(175°C). While it’s heating up, do a little happy dance. You’re about to create magic.
2. **Mix Up the Batter:** In a large bowl, combine the **red velvet cake mix**, **eggs**, **vegetable oil**, and **water**. Stir it up until it’s smooth. Am I the only one who gets a whiff of nostalgia when opening a box of cake mix? It’s like, “Yup, we’re going to have fun,” and maybe even “Avoid any scale today.”
3. **Bake That Cake:** Pour your deliciously red batter into a greased cake pan (about 9×13 inches works well). Bake it in your preheated oven for about 25-30 minutes, or until a toothpick inserted in the center comes out clean. Just a fair warning, do NOT forget about the cake like I did once. I set my timer, went to check Instagram, and 40 minutes later, I discovered the *slight* smell of burnt cake. But you know what? Even cake disasters can bring out one’s creativity.
4. **Let it Cool:** Once your cake is blissfully baked, take it out and let it cool completely. Seriously, if you skip this step, you’ll end up with a soupy mess when you try to form your cake pops. No one wants a cake volcano!
5. **Crumb Time:** Now for the fun part! Crumble the cooled cake into a large bowl. Heck, I get a little aggressive here—use your hands; the messier, the better! Just make sure you’re not turning it into cake dust. We want fine crumbs, not a powdery explosion.
6. **Frosting, Baby:** Add in the **cream cheese frosting**. The entire can, please! I know it seems like a lot, but it’s what keeps everything together and makes these pops *divine*. Mix thoroughly until you’ve got a moist, sticky mixture. You’re looking for a consistency that can easily hold a shape without being too wet.
7. **Form the Pops:** Use your hands (clean hands, please!) to form the mixture into small balls, about 1 inch in diameter. This is the Gordon Ramsay of cake-ball-making; it should be more precise than guessing how many ice creams you can eat before regretting it. Place them on a parchment-lined baking sheet. Pro tip: If you think it’s too sticky, pop them in the freezer for about 15 minutes before shaping. This will help you avoid sticky fingers and keep things manageable.
8. **Chill**: Once you’ve rolled them all out, refrigerate your cake balls for at least 30 minutes. This helps them firm up and will make coating them with chocolate so much easier! I wish someone could make my life easier like this.
9. **Melt the Candy:** While the cake balls chill, it’s time to prepare the **candy melts**. Place your candy melts in a microwave-safe bowl and heat them in 30-second intervals, stirring in between, until they’re smooth and glossy. The key here? Patience—do not throw it in for 2 minutes! It might sound like a good idea, but trust me, you’ll end up with a chunky mess—unless lumpy candy is your thing, then no judgment here.
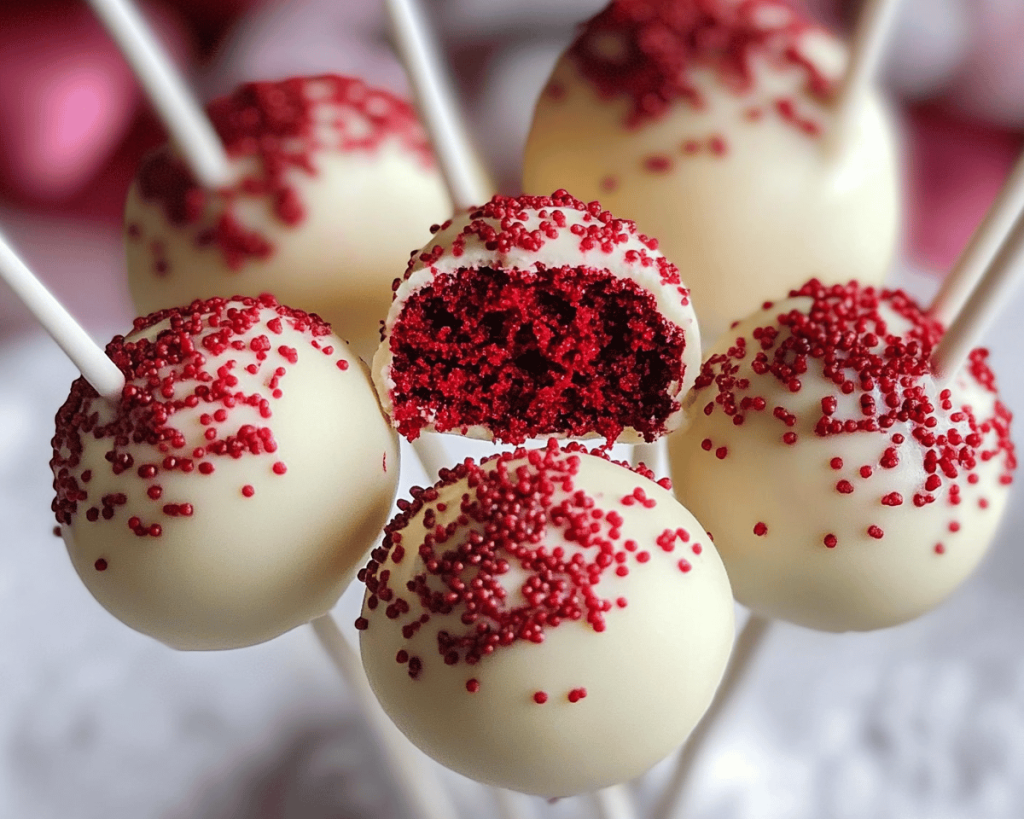
10. **Dip and Decorate:** Take your chilled cake balls out of the fridge. You can pop the end of a lollipop stick into the melted candy, then insert it into the cake ball about halfway. This keeps the stick from falling out when you dip. Finally, dip each cake ball into the melted candy. Make sure they’re fully coated and tap lightly to remove any excess. If you’re feeling fancy, sprinkle on some jimmies while the chocolate is still wet.
11. **Set**: Place your dipped cake pops back on the parchment-lined sheet until the chocolate hardens. You can pop them in the fridge to speed things along. Also, if they turn out adorable (which they will), I give you full permission to Instagram these beauties! Show the world your pop prowess!
12. **Enjoy**: Once they’re completely hardened, you can store them in an airtight container in the fridge. Or you can—as I often do—just set them out and provide my local friends with a delightful surprise. I’m telling you, once you start sharing these little gems, you might as well prepare yourself for a ring of doorbells and requests for more!
Side Notes & Sassy Hacks
Bonus Tips You Didn’t Ask For
– If you want to switch it up and avoid any red stains (hey, I get it), you could totally make a vanilla cake pop and just use food coloring to replicate that iconic hue!
– Want to up the flavor ante? Add a splash of vanilla extract or almond extract to the cake batter. Trust me; it adds a little something special. You can thank me later.
– Feel free to experiment with different types of sprinkles. Don’t be afraid to get wild with colors—think of them as edible confetti!
– If you’re feeling extra lazy (like I often am), microwave some chocolate chips instead of dealing with candy melts. I’m not here to judge; I’m just here to make your life easier.
– Remember, if it all goes sideways and your cake pops aren’t winning any beauty contests, just put them in a bowl and call it “Cake Pop Salad.” You’ll have saved yourself from an embarrassing mishap while still indulging.
Final Words of (Culinary) Wisdom
So, there you have it—the glory that is red velvet cake pops! On a chilly day or a sunny day, these sweet little bites can turn anyone’s frown upside down. Just remember, baking is about experimenting, and it’s totally okay to make a few missteps along the way—it shows you care! If you make these delightful morsels, snap a pic and tag me. Nothing fills me with joy like seeing your baking triumphs, or just the general chaos that ensues in the kitchen.
So go ahead, roll up those sleeves, and sprinkle a little magic into your day. And remember: cake pops are not just food; they are happiness served on a stick! Happy baking, friends!