## Let’s Get Real
So, let’s talk about the weather. Is it just me, or did Mother Nature decide to throw herself a month-long tantrum with all this rain? Seriously, I can’t remember the last time the sun decided to grace us with its presence. And you know what that means: indoor baking! Or, if you’re like me, procrastinating until the last minute and then throwing whatever you can find into a bowl, praying it turns into something edible. But I digress.
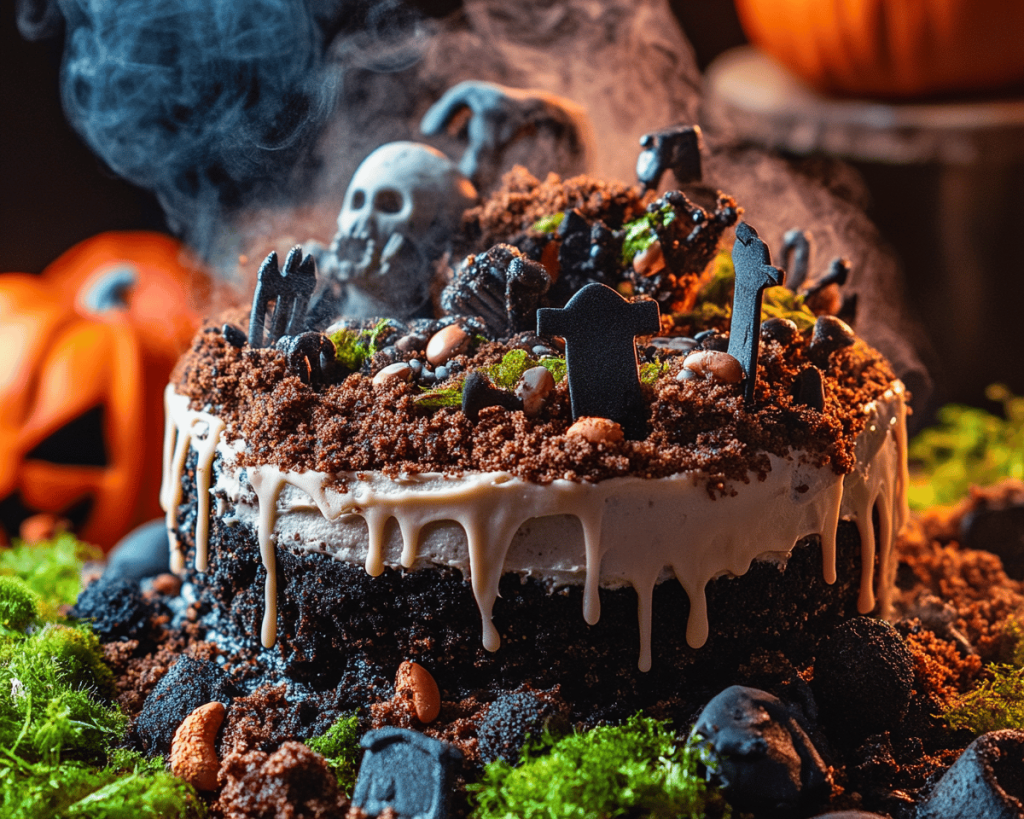
I’ve taken on something that’s perfect for this dreary weather, something so cheesy and fun that even the dreariest days can’t dampen your spirits. Enter the *Graveyard Dirt Cake*! Now, before you roll your eyes saying, “but I hated dirt cake as a kid,” let me tell you, I feel you. I was NOT a fan either. I mean, it was basically like getting served a bowl of crumbs and gummy worms, right? But now? Now I’m a grown-up who can appreciate the blend of creamy, chocolaty goodness mixed with a sprinkle of ghoulishness. Plus, it’s no-bake! Throw in some creepy-crawly decorations, and it’s Halloween party perfection.
So, grab that trowel of yours (okay, maybe just a spatula) because this dessert is about to get real messy in the best way possible!
## Ingredients, Unfiltered
Now, let’s break down what goes into this delightfully disgusting dessert. Warning: there might be a few strong opinions here, but we’re not holding back.
### Chocolate Sandwich Cookies:
You’ll need about a package and a half of those glorious little cookies that scream “I’m a childhood classic!” Every bite is going to turn our cake into a deliciously dark abyss of flavor. And honestly, I may or may not have snuck a few extra bites before crushing them — can you blame me?
### Unsalted Butter:
Helpful hint: **unsalted** is where it’s at, folks. You want to be in control of the salt here! Melt it down, and it’s like a magical potion. Also, it adds richness to the whole affair, so don’t skimp.
### Cream Cheese:
Now, don’t roll your eyes at me! Yes, it can be a little finicky and some may argue it’s unnecessary. But trust me, it makes the dessert richer and creamier. And let’s be honest, who doesn’t love a good cream cheese frosting situation?
### Powdered Sugar:
This is where the magic happens, my friends. It sweetens things up without turning your lovely creamy mix into gritty disaster. We all want a smooth, dreamy filling, right? So, stick with this sweet white dust.
### Cool Whip:
Here’s the thing: if you’re feeling adventurous, feel free to whip your own cream instead! But Cool Whip? That’s my go-to. It’s perfect for no-bake recipes and saves us from the struggles of whipping cream at a million miles an hour. Plus, it keeps everything light and fluffy.
### Chocolate Pudding Mix:
You could use homemade if you’re feeling fancy and want to impress someone. But then again, we’re going for cute and creepy, not Michelin Star, so box it is! Don’t forget to grab the one that’s instant – nobody has time for more waiting, am I right?
### Milk:
This one’s straightforward, friends. Just regular old milk. Balancing out the pudding mix is key here.
### Gummy Worms:
Because what’s a dirt cake without a few squirmy surprises? That’s right, nothing! Gummy worms are the final touch that turns this dessert from plain to Halloween fun. Bonus point if you can sneak a bit of real soil because that will definitely scare the pants off your guests… Kidding, obviously.
### Chocolate Sprinkles:
Optional, but honestly, who doesn’t love a little extra crunch on a dessert? You can throw those on to amp up the “dirt” factor, making it even more realistic.
## Is This Even Healthy? Let’s Discuss
Now, I won’t sit here and pretend this is a health food. Seriously, if you’re looking for greens, you’re going to need to scroll elsewhere. But here’s the deal: yes, there’s butter. Yes, there are cookies. And yes, there are gummy worms — there’s a decent chance your dentist will be keeping you in mind for an appointment soon! But listen, I’m not here to judge what makes you happy. If mounds of cookies, pudding, and a splash of childhood nostalgia do the trick, then dive in! I sleep just fine at night knowing I made this delightful mess — and let’s be real, so will you after one spoonful.
## Here’s What You’ll Need
– 1½ packages of Chocolate Sandwich Cookies (crushed totally depends on your cookie-snacking habits)
– ½ cup Unsalted Butter (melted)
– 8 oz Cream Cheese (softened)
– 1 cup Powdered Sugar
– 8 oz Cool Whip (thawed)
– 3.4 oz package of Chocolate Pudding Mix (instant)
– 2 cups Milk
– A generous handful of Gummy Worms (or more, because come on!)
– Chocolate Sprinkles (to garnish, if desired)
This makes enough to feed a small army, so I hope you’re ready to share! Or not — I wouldn’t blame you if you just wanted to hunker down and eat it all by yourself. No judgment here; we’re all friends!
## Okay, Let’s Make This
Before we dive in, let me just say: Don’t panic if this looks messy — it’s supposed to! So throw on that apron, rock out to Halloween jams, and let’s get this graveyard party rolling.
1. **Crush Those Cookies**
Grab your sandwich cookies and toss them into a ziplock bag, which means less mess and fewer cleanup difficulties. Then get creative with a rolling pin, or, if you’re feeling wild, smash them with your hands. It’s a bit therapeutic! Crush them until they resemble dirt. Then, do the inevitable: snag a few crumbs to taste because why not?
2. **Combine the Options**
In a large bowl, combine the crushed cookies with the melted butter. Mix until each crumb is coated and somewhat forms a lump of “soil.” Pour this mixture into the bottom of a 9×13 baking dish. This will be your lovely “dirt” base for everything that comes after.
3. **Make the Cream Cheese Mix**
In a different bowl, beat the softened cream cheese until it’s super smooth and creamy. Mix in the powdered sugar until fully blended. This is where the luscious dreaminess begins to manifest. Trust me, scraping down the sides and licking the bowl is required!
4. **Fold in the Cool Whip**
Now, for the fun part! Gently fold the Cool Whip into the cream cheese mixture until everything is combined. No beating this time! You want it fluffy and airy, like a delightful Halloween cloud.
5. **Pour that Creamy Goodness**
Spread your lovely cream cheese mixture over the cookie crust. Use a spatula to smooth it out, pretending you’re some kind of dessert artist. This is where the magic really happens.
6. **Prepare the Pudding**
Now, let’s whip up that pudding! In another bowl, combine the chocolate pudding mix with the milk. Whisk it until it’s thick and luscious — no one wants runny pudding here, okay? Once it’s done, pour it over that delicious cream cheese layer.
7. **Top it Off**
Sprinkle the remaining crushed cookies on top as a second layer of “dirt.” Seriously, the more layers, the better! Then, plop on a few chocolate sprinkles for that extra spooky touch. Scatter the gummy worms over the top like they’re popping out of the graveyard. Talk about presentation — the creepier, the better!
8. **Chill Time**
Now, here comes the hard part. Cover this bad boy with plastic wrap and pop it into the fridge for at least 4-6 hours or, if you’re feeling brave, overnight. This is what makes it set up beautifully and gives your taste buds time to anticipate that delightful chill.
9. **Serve It Up!**
When it comes time to serve, pull out your spooktacular dessert, slice into it, and watch your guests’ eyes go wide with delight. It’s messy, it’s creepy, and it’s absolutely delicious— just how Halloween desserts should be.
## Bonus Tips You Didn’t Ask For
– **Substitutions Galore:** Not a fan of Cool Whip? Swap it for homemade whipped cream! It adds an extra layer of love, but do let it chill longer for the perfect texture.
– **Vegan Version:** You can make it vegan by switching out the butter for a plant-based alternative, the cream cheese for dairy-free alternatives, and Cool Whip for a coconut whipped cream or homemade version.
– **Garnishing Ideas:** Want to step it up a notch? Add gummy spiders or edible glitter to really evoke that graveyard vibe when you’re ready to show off your masterpiece.
– **Storage:** Your dirt cake will last up to 4 days in the fridge, but honestly, it probably won’t last that long. I mean, it’s a graveyard of goodness, who can resist?
## Final Words of (Culinary) Wisdom
If you give this Graveyard Dirt Cake a whirl, let me know! Tag me on social, or just send me a mental high-five across the internet. I believe in you and your ability to create creepy-cool desserts that’ll impress your friends and family. As the Halloween ghosts say, “Eat, drink, and be scary!” Enjoy this graveyard delight, and let’s make some delicious, haunted memories together. Happy haunting!