**Meta Title:** Graveyard Dirt Cake | No-Bake Halloween Dessert Delight
**Meta Description:** Discover the perfect no-bake Graveyard Dirt Cake for your Halloween party! This fun, spooky dessert is creamy, chocolatey, and easy to make.
—
There’s something about Halloween that evokes a sense of nostalgia and excitement, doesn’t it? The moment the leaves start to turn, and pumpkin spice fills the air, my mind drifts to cozy gatherings, spooky decorations, and of course, undeniably delicious treats. One delectable dessert that never fails to elicit smiles and laughter is the Graveyard Dirt Cake. This no-bake masterpiece not only satisfies your sweet tooth but also doubles as a thrilling centerpiece for any Halloween party. Picture it: a luscious, chocolatey concoction layered in a pot that resembles a graveyard, complete with gummy worms and a cookie tombstone. Tempted yet? Let’s embark on this spooky but scrumptious journey together!
Whether you’re a seasoned baker or someone who prefers to keep the kitchen adventures simple, this Graveyard Dirt Cake is an easy yet show-stopping addition to your Halloween festivities. In just a few easy steps, you’ll create a hauntingly delightful dessert that will get your guests into the Halloween spirit. Are you ready to summon some deliciousness?
What is Graveyard Dirt Cake?
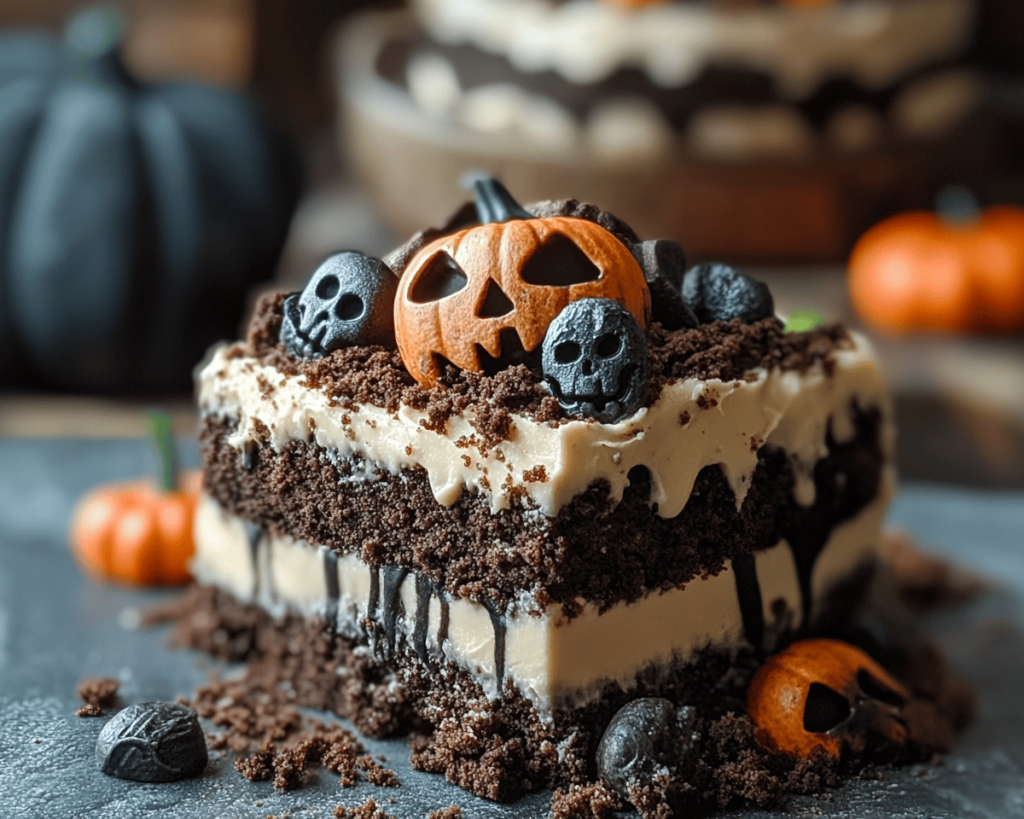
Graveyard Dirt Cake is a whimsical and playful dessert that resembles soil in which creepy crawlies might lurk—if only they were edible! Originating in the U.S. as a popular Halloween treat, this dessert combines layers of rich chocolate pudding, creamy vanilla whipped topping, and crushed chocolate cookies, all served in a pot or dish that resembles a graveyard. The use of gummy worms, candy bones, and even cookie tombstones allows for endless creativity and customization.
The combination of flavors is nothing short of indulgent. As you dig in, you’ll experience the velvety smoothness of the pudding mixed with the crunchiness of the crushed cookies—think of it as biting into a chocolate paradise. The chocolate elements marry perfectly with the sweetness of the whipped topping, creating a treat that everyone—kids and adults alike—will reach for second (and third) helpings of. What makes it even better? You can whip it together without ever turning on the oven!
Why You’ll Love This Graveyard Dirt Cake
There are plenty of reasons to be enchanted by this Graveyard Dirt Cake. Let me share just a few!
1. **No Baking Required**: This dessert allows anyone to channel their inner pastry chef without the stress of baking. That means it’s perfect for those last-minute party preparations or if you’re simply looking for a fuss-free way to contribute to a potluck.
2. **So Much Fun to Decorate**: One of the best parts of this dessert is that you can get as creative as you like! Let the kids (or the young at heart) join in on the fun by placing gummy worms in the dirt, crafting spooky tombstones, or arranging candy pumpkins throughout the cake.
3. **Perfect For All Ages**: This recipe is universally loved, making it ideal for Halloween parties of any size. The combination of flavors and fun presentation makes it irresistible, whether you’re serving it at a kid’s school celebration or an adult-themed Halloween bash.
4. **Budget-Friendly**: Unlike some elaborate desserts requiring fancy ingredients, Graveyard Dirt Cake relies on simple, accessible ingredients that won’t break the bank.
5. **Make Ahead**: This cake can be prepared a day or two in advance, allowing the flavors to meld beautifully while freeing your schedule for party-day preparations.
Ingredients You’ll Need
To create this delightfully spooky Graveyard Dirt Cake, gather the following ingredients:
1. **Chocolate Pudding Mix (2 packages, 3.9 oz each)**: This forms the decadent, rich base of our cake, providing that signature chocolate flavor. You can opt for instant pudding for a quick fix, or if you fancy cooking from scratch, homemade pudding will also work wonderfully.
2. **Milk (4 cups)**: Essential for achieving a smooth and creamy texture in the pudding. Whole milk brings richness, but feel free to substitute with 2% or a non-dairy alternative like almond or oat milk.
3. **Whipped Topping (12 oz)**: A light and airy addition that balances the richness of the chocolate pudding. If you prefer, you can also make your own whipped cream from heavy cream.
4. **Chocolate Sandwich Cookies (22 cookies)**: These will be crushed to create the “dirt” layer. Classic Oreos work best, but any chocolate cookies will suffice. Just ensure that they are of good quality to guarantee great flavor.
5. **Gummy Worms (1–2 bags)**: The signature “creepy returns” to our graveyard. Kids and adults love these, adding an element of playfulness to our dessert.
6. **Tombstone Cookies (optional)**: For an adorable Halloween touch, use store-bought cookies (like Milano) decorated with icing to resemble tombstones.
7. **Green Sprinkles (optional)**: Edible grass or green sprinkles can add a pop of color and enhance the graveyard effect.
8. **Optional Decorative Elements**: Get creative with your add-ons! Consider licorice, candy bones, or any spooky treats that spark your imagination.
How to Make Graveyard Dirt Cake
With your ingredients laid out, it’s time to conjure up this dessert! Follow these simple steps:
1. **Prepare the Pudding**: In a large bowl, whisk together the chocolate pudding mix and milk. For about 2 minutes, beat until smooth and thickened, following the package instructions. The rich chocolate aroma will fill your kitchen like a tempting potion!
2. **Fold in Whipped Topping**: Once the pudding thickens, gently fold in the whipped topping using a spatula. This step creates a light, fluffy texture that balances the denser pudding. Be gentle— you want to maintain its airiness!
3. **Crush the Cookies**: Place the chocolate sandwich cookies in a resealable plastic bag and crush them until they resemble fine dirt. You can also use a food processor for a quicker alternative. Make sure not to crush them too finely—it’s fun to have some texture!
4. **Layer the Dessert**: In a deep dish or individual cups, begin layering the dessert. Start by placing a layer of chocolate pudding mixture at the bottom, followed by a layer of crushed cookies. Repeat this layering process until you reach the top of your dish, ensuring the final layer is cookies. It should look like a dirt mound by the time you’re finished!
5. **Add Decorative Elements**: It’s time for the fun part! Insert your tombstone cookies into the “dirt” and sprinkle gummy worms over the top. If you’ve got them, scatter a few green sprinkles around for that extra creepy touch.
6. **Chill the Cake**: Cover the dish with plastic wrap and refrigerate for at least 2 hours, allowing the flavors to meld beautifully. If you can manage to wait overnight, even better—the pudding will become more flavorful and the textures will blend together even more harmoniously.
7. **Serve**: Bring this spooky delight to your Halloween party and watch as everyone digs in. As they take their first bite, the combination of rich chocolate, creamy whipped topping, and crunchy cookies will leave them craving more!
Tips, Tricks & Variations
Here are some expert insights to elevate your Graveyard Dirt Cake experience:
– **Use Homemade Pudding**: For a more decadent flavor, try making your **own chocolate pudding** from scratch. Just use cocoa powder, sugar, cornstarch, and milk, and follow a simple recipe.
– **Make it Vegan**: Swap out regular pudding mix for a vegan alternative and use coconut whipped cream. Use plant-based milk, and you’ll have a cruelty-free treat.
– **Add a Crunch**: For an extra layer of texture, consider adding chopped nuts or crushed candy bars in between the layers!
– **Experiment with Flavors**: While chocolate is classic, you can ignite your creativity by leaning into flavors like **mint chocolate** or even a layered vanilla and chocolate combination for a more intricate design.
– **Storing Leftovers**: Store any leftover dirt cake in an airtight container in the fridge. It will keep well for up to 3 days, but the cookies may lose their crunch.
– **Tiny Desserts**: Consider making individual servings in small cups or jars. This allows guests to stroll around the party with their own personal graveyard delight!
What to Serve With Graveyard Dirt Cake
If you’re looking to complement your Graveyard Dirt Cake, consider these delightful pairings:
1. **Creepy Cocktails**: Serve this dessert with spooky themed drinks such as black cherry cola cocktails or “witch’s brew” punch featuring lime sherbet and green soda.
2. **Savory Snacks**: Balance the sweetness with some savory delights! Think cheese platters with assorted crackers or pumpkin-flavored dips with pita chips.
3. **Fruity Flavors**: Add a side of fresh fruit salad for a refreshing palate cleanser. Seasonal fruits like apples or pears can be jazzed up with a sprinkle of cinnamon.
4. **Halloween Cookies**: Extend your dessert table by adding frosted sugar cookies shaped like bats, ghosts, or pumpkins. The contrasting flavors and textures will create an entertaining mix.
5. **Hot Beverages**: A warm cup of hot cocoa or spiced apple cider would enhance the comforting ambiance of your Halloween gathering, especially as evening sets in.
Nutrition & Health Benefits
While Graveyard Dirt Cake is a delightful indulgence, it’s important to enjoy it in moderation. Although it doesn’t boast the healthiest profile, it does offer certain nutrients thanks to its ingredients.
– **Calories**: Depending on your specific ingredients and portion size, a standard serving may contain around 300-400 calories. However, personal portions can vary significantly.
– **Calcium & Vitamin D**: Ingredients like milk and whipped topping serve as important sources of vitamin D and calcium, essential for bone health.
– **Antioxidants**: Dark chocolate in the pudding (if used) contains antioxidants that may provide health benefits. Just remember, the dessert should be treated as a special occasion treat, best enjoyed in moderation.
For a deeper dive into nutrition and dessert moderation tips, visit [Healthline’s nutrition section](https://www.healthline.com/nutrition).
Frequently Asked Questions
1. **Can I make this dessert in advance?**
Absolutely! In fact, it tastes even better the next day as the flavors meld together. Just cover it with plastic wrap and refrigerate until you’re ready to serve.
2. **What can I use instead of chocolate pudding?**
If you’re not a chocolate fan, try using vanilla pudding instead. You can layer it with crushed Oreos and add cocoa powder for a faux “dirt” effect.
3. **Can I freeze Graveyard Dirt Cake?**
While you can freeze the components separately, it’s best to enjoy this dessert fresh. Freezing can alter the texture of the whipped topping and pudding.
4. **How do I store leftovers?**
Keep leftover cake covered in the refrigerator and consume within 3-4 days. The crunchiness of the cookies will diminish over time, but it will still taste great!
5. **What can I use for decorations besides gummy worms?**
Get creative! You can use licorice for spikes, candy pumpkins, or even edible glitter for a spooky sheen. The possibilities are endless!
—
As Halloween approaches, it’s time to bring a whimsical touch to your celebrations. Delight your family and friends with this no-bake Graveyard Dirt Cake that is not only a tribute to the season but also a treat that will create lasting memories. With its layers of chocolatey goodness and playful décor, every bite brings you back to the enchanting joy of childhood Halloween nights.
I can guarantee it’ll be a crowd-pleaser, so don your apron and get ready for some fun in the kitchen! If you loved this recipe, I’d love to hear your thoughts. Tag me on Instagram with your creations, or leave a comment below with any variations you tried! Happy haunting!