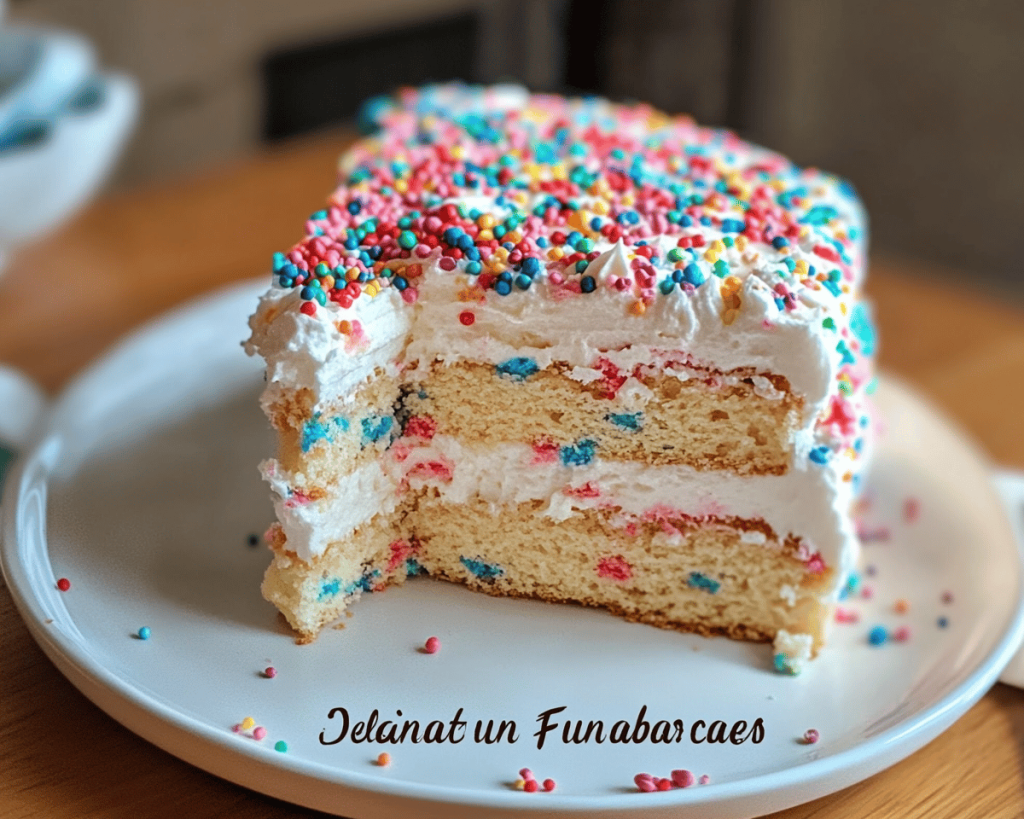
# Delight in Funfetti Icebox Cake
## Meta Title: Funfetti Icebox Cake Delight: Easy Recipe for Everyone
## Meta Description: Discover the joy of Funfetti Icebox Cake! This easy, no-bake dessert is perfect for any celebration with its colorful layers and creamy texture.
—
You know that feeling when a party is around the corner, or perhaps it’s just a casual Tuesday afternoon, and you crave something sweet, fun, and utterly delightful? That’s where my Funfetti Icebox Cake comes into play — a no-bake dessert that is as colorful and cheerful as it is creamy and delicious. This cake is perfect for celebrating birthdays, hosting get-togethers, or just treating yourself to something special. Trust me, once you serve this no-fuss, visually stunning, and absolutely scrumptious cake, you’ll be the star of the show.
In this article, we’ll dive into what makes a Funfetti Icebox Cake special, the step-by-step process of making it, and tips and tricks for the best results. So, grab your sprinkles, and let’s make a cake that’s sure to brighten any day!
## What is Funfetti Icebox Cake?
Funfetti Icebox Cake is a whimsical twist on the classic icebox cake, which typically features layers of cookies or graham crackers interspersed with rich whipped cream or pudding. Originating from the popular “Funfetti” cake mix trend, this icebox cake adopts the fun and colorful spirit of that iconic cake – you’ll see vibrant sprinkles layered within, bringing both joy and nostalgia to the dessert table.
The creamy layers meld beautifully with the tender, pillowy texture of the cookies, creating a delightful treat that melts in your mouth. Each bite is an explosion of sweet, creamy flavors with the crunchiness of sprinkles that dance on your tongue. It’s a cake that brings smiles, laughter, and a touch of childlike wonder.
## Why You’ll Love This Funfetti Icebox Cake
You might wonder why this Funfetti Icebox Cake deserves a spot in your recipe repertoire. Well, let me give you a few compelling reasons!
1. **No-Bake Ease**: This cake comes together without the need for ovens! Perfect for hot summer days or whenever you’re in the mood for a quick dessert.
2. **Quick & Simple**: With only a handful of ingredients and straightforward steps, you can whip this cake up in no time, making it an ideal choice for last-minute gatherings or celebrations.
3. **Versatile Ingredients**: You can easily adapt this recipe to accommodate dietary preferences — use gluten-free cookies or dairy alternatives, depending on your needs.
4. **Crowd-Pleaser**: Its colorful appearance and light flavor profile appeal to both kids and adults alike, making it a fabulous dessert for family gatherings or parties.
5. **Great for Meal Prep**: This cake can be made a day ahead, giving you time to prepare the rest of your menu worry-free. Just pull it from the fridge when you’re ready to serve!
This Funfetti Icebox Cake is a magical blend of simplicity and festive flair. Once you taste it, I promise you’ll understand why it’s a go-to recipe for any occasion!
## Ingredients You’ll Need
To create this scrumptiously delightful cake, gather the following ingredients:
– **2 cups heavy whipping cream**: This is the star ingredient for your fluffy, rich layers. Look for fresh cream without any additives for the best flavor and texture.
– **1 cup powdered sugar**: This provides sweetness while ensuring the whipped cream maintains its structure. For healthier alternatives, you can substitute with natural sweeteners.
– **1 teaspoon vanilla extract**: Pure vanilla extract brings warmth and aromatic flavor to the cake. It’s worth splurging on good-quality vanilla to enhance the overall taste!
– **1 package (16-ounce) store-bought Funfetti cookies**: You can choose between the classic or mini versions, or even make your own if you’re feeling adventurous!
– **1 cup rainbow sprinkles**: These vibrant little bites are the essence of Funfetti! Feel free to mix various shapes and sizes to amp up the visual appeal.
– **Optional: chocolate chips or any favorite candies**: For added indulgence, sprinkle a layer of chocolate chips or assorted candies between the layers, adding a surprise crunch!
### Tips for Choosing Ingredients
– **Heavy Cream**: Make sure it’s cold for better whipping results.
– **Sprinkles**: Check the ingredients to avoid any artificial dyes if that’s a concern for you.
## How to Make Funfetti Icebox Cake
Now, let’s get to the fun part — creating your Funfetti Icebox Cake! Grab your mixing bowl, and let’s get started.
### Step 1: Whip the Cream
1. In a chilled mixing bowl, pour in the **2 cups of heavy whipping cream**. Using an electric mixer, beat the cream on medium speed until it starts to thicken and become frothy, which usually takes about 1-2 minutes.
2. Once the cream begins to thicken, gradually add the **1 cup of powdered sugar** and **1 teaspoon of vanilla extract**. Increase the mixer speed to high and whip until soft peaks form, ensuring not to overbeat. You want it creamy and spreadable, but not turned into butter!
### Step 2: Prepare the Layers
3. Take a rectangular baking dish or an 8-inch round cake pan and spread a thin layer of the whipped cream mixture on the bottom. This acts as a glue, preventing your cookies from sliding around. It should be just enough to create a nice base.
4. Start layering the cookies — arrange them in a single layer over the whipped cream. Make sure they are slightly overlapping to create a solid foundation for the upcoming layers.
### Step 3: Layer with Cream and Sprinkles
5. Spoon another generous layer of the whipped cream over the cookies, spreading it evenly. Then, sprinkle a quarter of your **rainbow sprinkles** over the whipped cream, creating a joyous burst of color!
6. Repeat this process: layers of cookies, followed by cream, topped with sprinkles, until you’ve used all your cookies, leaving a final layer of whipped cream adorned with a flourish of sprinkles on top.
### Step 4: Chill and Firm Up
7. Cover the baking dish tightly with plastic wrap or a lid and put it in the refrigerator. Allow the cake to chill for at least **4 hours**, or ideally overnight. This chilling time allows the cookies to soften and the flavors to meld beautifully, resulting in a luscious texture.
### Step 5: Serve and Enjoy
8. When you’re ready to serve, simply remove the cake from the fridge. Slice into squares or wedges using a sharp knife. You can garnish with extra sprinkles or a drizzle of chocolate sauce for a finishing touch!
## Tips, Tricks & Variations
– **Storage**: Store leftovers in an airtight container in the fridge for up to 3 days. However, it’s best enjoyed fresh!
– **Reheating**: There’s no need to reheat; enjoy this cake cold for the best texture.
– **Flavor Variations**: Try adding a layer of fruit puree (like strawberry or raspberry) or a layer of pudding for a different flavor profile.
– **Vegan Option**: Substitute heavy cream with coconut cream and use vegan-friendly cookies for an equally delightful plant-based version.
– **Presentation**: Use a large spatula to lift slices out cleanly or serve directly from the baking dish for a buffet-style dessert!
## What to Serve With Funfetti Icebox Cake
This Funfetti Icebox Cake is mildly sweet and creamy, making it a great companion for a variety of flavors. Here are some fabulous ideas:
– **Fresh Berries**: Serve alongside tart raspberries, strawberries, or blueberries. Their natural acidity balances the creamy cake perfectly.
– **Coffee or Tea**: A cup of coffee or your favorite tea makes a delightful pair with the sweetness of the cake, creating an enjoyable dessert experience.
– **Ice Cream**: Vanilla or birthday cake-flavored ice cream will elevate the festive spirit and add extra creaminess.
## Nutrition & Health Benefits
While this Funfetti Icebox Cake is certainly a treat and packed with sugary bliss, it also contains some noteworthy components. Each slice provides a generous dose of calcium from the cream, along with some carbohydrates from the cookies. By incorporating fresh fruits as side accompaniments, you can increase the fiber content and nutritional value of your dessert.
For detailed nutritional information, you might want to check reputable sources like [Healthline](https://www.healthline.com) for accurate breakdowns.
## Frequently Asked Questions
**1. Can I freeze Funfetti Icebox Cake?**
Yes! Wrap the cake tightly in plastic wrap and store it in an airtight container. It can be frozen for up to 2 months. Thaw it in the fridge overnight when ready to enjoy.
**2. How do I make it ahead of time?**
This cake is a great make-ahead dessert. Assemble the cake as instructed and store it in the refrigerator for up to 24 hours before serving.
**3. Can I use homemade whipped cream?**
Absolutely! Homemade whipped cream can elevate the flavor even more. Just ensure it’s whipped to soft peaks before using.
**4. What can I substitute for heavy whipping cream?**
If you’re looking for a lighter option, consider using light whipped topping or a dairy-free alternative like coconut whipped cream for a different flavor.
**5. Is there a gluten-free version of this cake?**
Certainly! Use gluten-free cookies to ensure that you have an entirely gluten-free fun dessert fit for anyone with dietary restrictions!
—
The excitement of assembling a Funfetti Icebox Cake is just as delightful as enjoying it with loved ones. The vibrant colors and creamy layers create a symphony of flavors and textures that are sure to please. As you serve each slice, watch faces light up with joy as they take their first bites.
So why not treat yourself and your family to this beautiful, whimsical dessert tonight? When you do, please remember to share your creations with me — I’d love to see your beautiful Funfetti Icebox Cake! If you loved it, leave a comment or tag me on Instagram, and let’s spread the joy of this enchanting treat together!
Happy baking! 🌈🍰