Prep time: 20 minutes
Cook time: 25 minutes
Total time: 45 minutes
Servings: 12
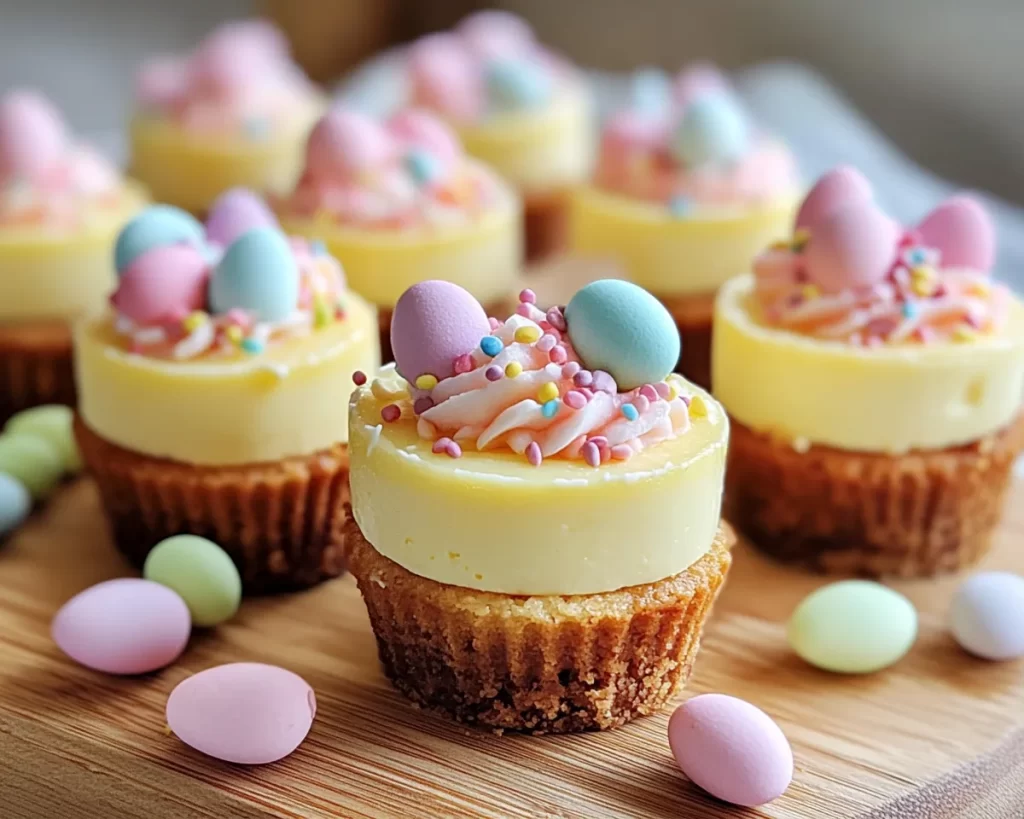
Have you ever found yourself captivated by a delicious dessert that seems to perfectly embody the spirit of a holiday? The sweet scent of spring wafting through your home, the joyful colors reminiscent of blooming flowers, and the anticipation of gathering with family and friends — all of these sensations can be rounded off with the delightful crunch of a mini cheesecake cup. This recipe for **Easter Mini Cheesecake Cups** is not just a feast for the taste buds; it brings a touch of elegance and whimsy to your Easter celebrations that everyone will appreciate.
This dessert is particularly special because it encapsulates the indulgent flavors of rich cheesecake while maintaining the charm of bite-sized treats. Each cup features a vibrant candy-colored topping, making them visually appealing to both children and adults alike. Plus, they are surprisingly easy to prepare! In this article, you will discover how to create these delightful mini cheesecakes, tips for achieving the perfect texture, variations to suit different tastes, and common mistakes to avoid.
What Is Easter Mini Cheesecake Cups?
Easter Mini Cheesecake Cups are an innovative twist on traditional cheesecake, taking classic flavors and packing them into individual servings. Originating from the classic cheesecake, this dish has evolved to provide bite-sized pleasures that are perfect for any gathering, especially festive occasions like Easter. The creamy filling contrasts beautifully with a buttery crust, usually made from crushed graham crackers or cookies.
These mini cheesecakes are baked in muffin tins, allowing for perfectly portioned servings that are both rich and satisfying. Each cup is light, fluffy, and has a delightful combination of sweetness and creaminess. The flavor is further enhanced by the toppings, which can range from fruit purees to chocolate drizzles. The diversity in toppings allows for creativity, allowing you to personalize each cheesecake cup and adapt them to various dietary needs or preferences. This dessert adds sophistication to any table while remaining simple enough for beginning bakers to tackle.
Why You’ll Love This
You will absolutely love **Easter Mini Cheesecake Cups** not only for their exquisite flavor but also for their convenience. They are quick to prepare, taking only around 20 minutes of hands-on time, making them a fantastic choice for busy parents or those who want to whip up something special without spending all day in the kitchen. Additionally, these mini cheesecakes are perfect for serving to a crowd, as you can easily make a large batch, and there are enough for everyone!
Not to mention, they are wonderfully versatile. Whether you’re looking for a gluten-free option by swapping in almond flour for the crust or offering a vegan version made with cashews, there are endless possibilities for customization. Common misconceptions about cheesecakes, such as needing extensive skill or time, can be left behind when you discover this easy recipe that yields stunning results.
When you serve these cute cups, expect compliments and satisfaction from your gathering. Their small size is perfect for satisfying a sweet tooth without the guilt of a full slice of cheesecake.
Ingredients You’ll Need
- Graham cracker crumbs: Approximately one cup is required for the crust. These crumbs provide a sweet and crumbly base. You can also substitute with digestive biscuits or even gluten-free crackers for a different flavor or dietary need.
- Butter: Melted butter is essential for binding the crumbs together. Use unsalted butter to maintain control over the salt content in your dish.
- Granulated sugar: A half-cup of sugar will sweeten both the crust and filling. Feel free to use alternatives like coconut sugar or stevia for a lower glycemic index.
- Cream cheese: Softened cream cheese is the star ingredient of the filling. Ensure it’s at room temperature for easy mixing, and feel free to swap it with a dairy-free cream cheese alternative for a vegan option.
- Sour cream: Adding a half-cup enriches the filling, giving it a creamy texture. If you prefer a tangy flavor, Greek yogurt can serve as a substitute.
- Vanilla extract: Use one teaspoon for that deep, aromatic flavor. Opt for pure vanilla extract rather than imitation for the best results.
- Eggs: Two large eggs will help set the filling while providing stability. For vegan versions, you can use flax eggs or aquafaba as substitutes.
- Candy or fruit toppings: These are optional but can be used to decorate and flavor your mini cheesecakes. Fresh fruits, chocolate shavings, or colorful candies can make your dessert pop visually and taste-wise.
How to Make
Creating your own **Easter Mini Cheesecake Cups** can be a fun and rewarding experience! Follow these detailed steps to ensure you achieve a delightful outcome:
- Preheat your oven to 325°F (162°C). This temperature is essential for evenly baking the cheesecakes. Make sure your oven is fully heated before you begin, as this can impact texture.
- In a medium bowl, combine your graham cracker crumbs and melted butter. Mix until the crumbs are fully moistened. The texture should resemble wet sand. If you’re opting for a cookie crust instead, crush them well and ensure they stick together when pressed.
- Now, press the crumb mixture firmly into the bottom of a lined muffin tin. You can use a small glass or measuring cup to help press the crumbs down evenly. This will create a sturdy foundation for your cheesecake filling.
- In a separate large mixing bowl, beat the softened cream cheese until smooth. This is a crucial step; ensure there are no lumps for the best creamy texture in your final product. An electric mixer can assist you here.
- Add in the granulated sugar and continue to beat until it’s well combined, scraping down the sides of the bowl as necessary. Sweetness is key, so taste and adjust as needed before moving on.
- Add the sour cream and vanilla extract to the mix and beat until fully incorporated. The sour cream adds tanginess that balances the sweetness of the cheesecake.
- Next, one by one, add in the eggs, beating well after each addition. This ensures that the batter is uniformly mixed. Make sure you don’t overmix at this point, as too much air can cause cracking during baking.
- Distribute the cheesecake filling evenly over the crust in each cup, filling almost to the top. An ice cream scoop can be handy in this step, ensuring even portions.
- Place the muffin tin in the preheated oven and bake for about 20-25 minutes. You will know they are done when the centers have set but still jiggle slightly. Avoid opening the oven door frequently, as sudden temperature changes can impact the cooking process.
- Allow the mini cheesecakes to cool completely in the tin before transferring them to the fridge. Let them chill for at least two hours, or preferably overnight, for the best flavor.
- Once chilled, top with your choice of candy or fruit before serving. Drizzle with chocolate sauce or a fruit puree for a vibrant finish. You’ll love how they look and how they taste!
Variations & Substitutions
Gluten-Free Variation: If you or someone in your family is gluten-sensitive, you can easily adapt this recipe. Swap the graham cracker crumbs for a gluten-free alternative, such as almond flour or gluten-free cookie crumbs. The crust will have a different taste but can be equally delicious. Just remember to check the labels of all ingredients to ensure they are certified gluten-free.
Vegan Variation: For a vegan version that still satisfies the cheesecake craving, replace the cream cheese with a dairy-free alternative made from cashews or tofu for a creamy texture. Use a plant-based sour cream and substitute eggs with flax eggs (1 tablespoon of ground flaxseed mixed with 2.5 tablespoons of water per egg rendition). The result will be a rich, creamy dessert that everyone can enjoy.
Fruit-Infused Variation: If you want to add a burst of flavor, consider incorporating fresh berries or pureed fruits directly into the cheesecake filling. Mixing in a half-cup of fresh strawberry or blueberry puree can create a delightful fruity twist on the original recipe. This variation offers a fresh taste perfect for springtime celebrations, enhancing both color and flavor.
Chocolate Variation: For chocolate lovers, adding cocoa powder or melted chocolate can transform the cheesecake filling into a chocolaty delight. Add a quarter cup of cocoa powder to the cream cheese mixture to create a chocolate cheesecake flavor. You can even top it off with chocolate ganache for maximum chocolate satisfaction.
Nut Butter Variation: If you’re a fan of nutty flavors, consider mixing in a couple of tablespoons of almond or peanut butter into the filling before baking. It creates a rich taste and a creamier texture that adds depth and interest to your mini cheesecakes. Drizzling some nut butter on top also makes for an eye-catching presentation.
Common Mistakes to Avoid
When making **Easter Mini Cheesecake Cups**, a few common mistakes can hinder your success. One critical issue is not ensuring that the cream cheese is at room temperature. If it’s cold, you’ll end up with a lumpy filling that’s difficult to blend.
Another mistake is overbaking your cheesecakes. Leaving them in the oven for too long can lead to dry, cracked cheesecakes. A perfect cheesecake should jiggle slightly in the center when you take them out. Ensure you keep an eye on the baking time and test them frequently towards the end.
Lastly, avoid skipping the chilling time. Although it might be tempting to dive into them right away, allowing the cheesecakes to rest in the fridge at least two hours (or overnight) gives them the chance to firm up and develop flavors. Remember, patience is key when it comes to perfect desserts!
Storage, Freezing & Reheating Tips
One of the best things about **Easter Mini Cheesecake Cups** is their excellent storage capabilities. You can keep any leftovers covered in an airtight container in the refrigerator for up to 5 days. If you want to enjoy them later, they freeze beautifully! Arrange them in a single layer on a baking sheet and freeze until solid. Once frozen, transfer them to a freezer-safe container or bag, where they can be stored for up to 3 months.
When you are ready to enjoy frozen cheesecakes, remove them from the freezer and let them thaw in the refrigerator overnight. This gentle thawing method preserves texture and flavor. Avoid reheating the cheesecakes in a microwave, as that could alter their creamy consistency. Instead, enjoy them cold for the best taste.
Food safety is also essential in managing your treats. Always make sure your ingredients are fresh, and after serving, return any uneaten morsels to the refrigerator promptly. Keeping track of chilling times can also prevent potential spoilage.
Frequently Asked Questions
Can I make these mini cheesecakes ahead of time? Yes! In fact, making these ahead of time is highly encouraged. These cheesecakes taste even better after sitting in the refrigerator for a few hours or overnight. This allows the flavors to meld and the texture to set perfectly.
Can I use low-fat cream cheese? Certainly! Low-fat or reduced-fat cream cheese can be an acceptable substitute if you’re looking for a lighter option. However, note that the texture and flavor may change slightly, and it may not be as creamy as the regular version.
What can I do if my cheesecake cups crack? Cracking can occur for several reasons, but the most common is overbaking. If you find cracks forming, take them out of the oven earlier next time, and remember to keep the oven temperature stable while baking.
Can I make these mini cheesecakes without sugar? Absolutely! You can substitute granulated sugar with natural sweeteners such as honey, maple syrup, or even sugar alternatives like stevia or erythritol. Just make sure to adjust the quantities based on the sweetness level of your chosen alternative.
How can I tell when the mini cheesecakes are done baking? The mini cheesecakes should be set on the edges and slightly jiggly in the center when done. While they will firm up as they cool, be cautious not to overbake, as this will lead to a dry texture.
Conclusion:
In summary, **Easter Mini Cheesecake Cups** provide a delightful and elegant dessert option that captures the joy of the season. With their creamy filling, crunchy crust, and many customizable variations, they offer something for everyone. Whether you are celebrating with family, planning a gathering with friends, or looking for a memorable treat for Easter, this recipe is perfect.
I encourage you to step into the kitchen, try your hand at this fun and indulgent recipe, and even customize it to suit your family’s tastes. Sharing these delightful mini cheesecakes offers not just a delicious treat but also a wonderful opportunity for creating memorable moments with those you love. So gather your ingredients, roll up your sleeves, and enjoy the sweet reward of your labor!