**Meta Title:** Baked Tennessee Onions | Southern Comfort Food Favorite
**Meta Description:** Discover the deliciousness of Baked Tennessee Onions! This comforting Southern recipe is a must-try for families seeking rich flavors and simple steps.
—
It’s a chill autumn evening; the leaves are crisply cracking underfoot as you walk to your front door. A whiff of something savory wafts through the air, instantly igniting those warm, nostalgic feelings of home cooking. That’s the power of Baked Tennessee Onions, a down-home Southern comfort food that wraps your soul in cozy deliciousness. They’re simple to make, yet the flavor is nothing short of spectacular—the kind of dish that fills your home with welcoming aromas and has everyone gathering around the table.
### What are Baked Tennessee Onions?
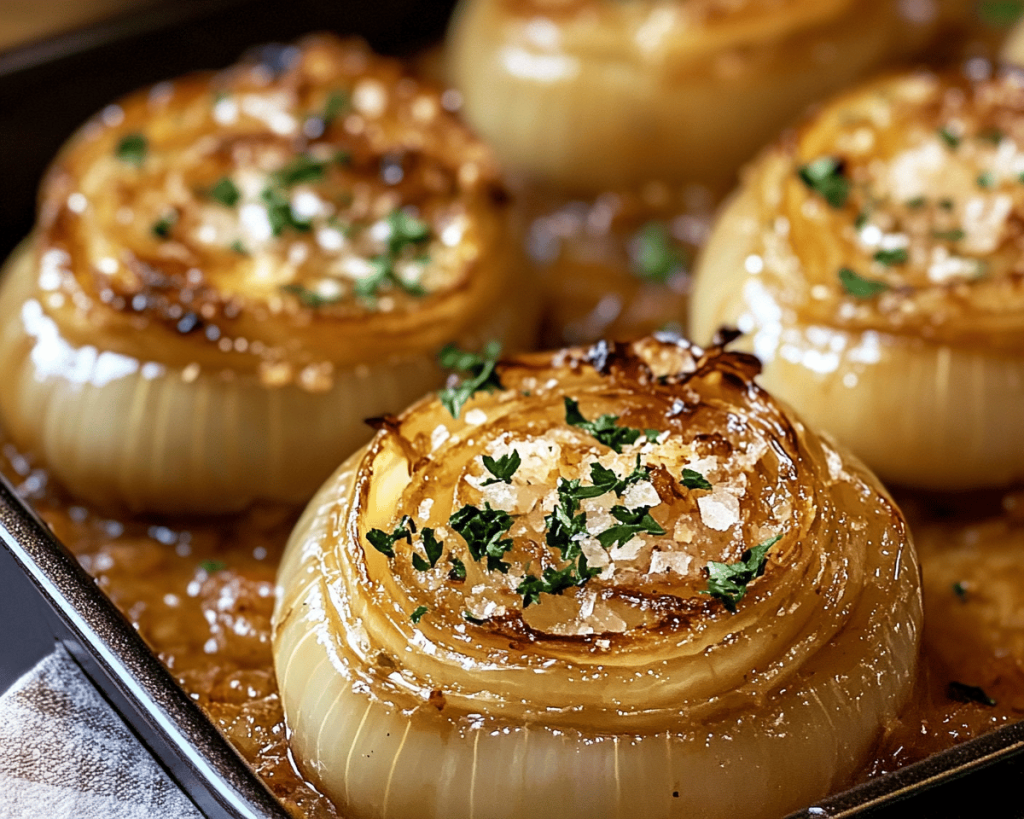
Picture this: large, sweet onions are hollowed out and filled with a rich mixture of butter, herbs, breadcrumbs, and cheese, then baked until perfectly tender. The result is a dish that’s both savory and slightly sweet, with a texture that’s wonderfully soft yet has a pleasant crunch thanks to the breadcrumbs. Baked Tennessee Onions offer a delightful blend of comfort and creativity, showcasing a quintessential Southern spirit.
Originating from the heart of the Tennessee mountains, this dish presents itself as a labor of love, having been passed down through generations. Made with simple ingredients, they shine a spotlight on the humble onion. The experience of biting into one of these beauties is memorable: the first taste reveals a warm, buttery richness, while the herbs and spices dance on your palate, inviting you to take another bite. Whether served as a side dish or a stand-alone treat, Baked Tennessee Onions have a unique way of bringing the family together, often evoking stories, laughter, and good old-fashioned Southern hospitality.
### Why You’ll Love This Recipe
– **Quick and Easy:** With just a handful of ingredients and straightforward steps, anyone can whip these up, making them ideal for those busy weeknights.
– **Comforting and Hearty:** There’s something undeniably comforting about warm, baked onions that envelop your senses, reminiscent of Grandma’s kitchen.
– **Family-Friendly:** Kids love the sweetness from the onions and the cheesy, crunchy topping. It’s an excellent way to introduce them to new flavors!
– **Customizable:** Feel free to experiment with your favorite herbs and cheeses, transforming this recipe into your go-to comfort food.
– **Perfect for Meal Prep:** These onions keep well in the fridge, making them a wonderful option for meal planning. Just reheat, and they’re ready to serve!
– **Great for Leftovers:** If you happen to have any left after dinner, they make a tasty addition to salads, sandwiches, or stand-alone snacks.
– **Can be Made Ahead:** Prepare the filling in advance, and you can assemble and bake them whenever you’re ready.
### Ingredients You’ll Need
Here’s a handy shopping list for your Baked Tennessee Onions:
– **4 large sweet onions** (e.g., Vidalia or Walla Walla) – for their sweetness and tenderness.
– **½ cup unsalted butter** – adds richness and flavor.
– **1 cup breadcrumbs** (preferably homemade or panko) – gives a nice crunch and holds the filling together.
– **1 cup shredded cheddar cheese** – delicious and gooey, adding depth to every bite.
– **1 tablespoon fresh thyme** (or 1 tsp dried) – for a fragrant herbal note that complements the onions beautifully.
– **1 tablespoon fresh parsley** (or 1 tsp dried) – freshens up the dish and adds a pop of color.
– **Salt and pepper** to taste – seasoning is key!
### How to Make Baked Tennessee Onions
Ready to fill your kitchen with irresistible aromas? Let’s get started with these simple steps!
1. **Preheat the Oven:** Start by setting your oven to 375°F (190°C) to prepare for that comforting bake ahead. The perfect temperature for creating irresistible, tender onions.
2. **Prep the Onions:** Peel the onions and carefully slice the tops off. Using a spoon or a small knife, hollow out the insides, leaving a good quarter-inch wall. Don’t toss the insides! They’ll be used in your filling.
3. **Make the Filling:** In a skillet, melt ¼ cup of butter over medium heat. Add in the hollows from the onions, chopped finely. Sauté for about 5 minutes until they are softened and fragrant. Next, stir in the breadcrumbs, thyme, parsley, salt, and pepper. Then, fold in the shredded cheese until it’s well combined. You should achieve a cohesive, gooey filling that looks inviting!
4. **Fill the Onions:** Generously spoon the filling back into the hollowed onions, packing them in tightly. They should look like little edible towers, all filled to the brim.
5. **Bake:** Place the stuffed onions in a baking dish and pour a little of the remaining melted butter over the top of each one. It helps to create that golden-brown crust we all love! Cover the dish loosely with foil and bake for 30 minutes. This allows the onions to soften and the flavors to meld beautifully.
6. **Uncover and Finish Baking:** After 30 minutes, remove the foil and bake for an additional 15 minutes, or until the tops are golden brown and crispy. You’ll know they’re ready when the kitchen is bursting with their mouthwatering aroma!
7. **Cool and Serve:** Once taken out of the oven, let them cool slightly before serving. This allows the flavors to settle and makes them easier to handle.
### Expert Tips, Tricks & Variations
– **Customize the Cheese:** Try using different types of cheeses like Monterey Jack for a milder flavor or Parmesan for a sharp kick. Mixing it up keeps the dish interesting.
– **Herbal Infusions:** Consider adding in some fresh basil or oregano for a twist on the classic filling. Experiment with whatever herbs you have on hand!
– **Get Creative with Add-Ins:** For added protein, mix in some cooked bacon bits or sausage into the filling. It’s a satisfying addition that only enhances the flavors.
– **Batch Cooking:** Make a double batch on weekends and freeze the extras. They store well in an airtight container for up to 3 months—just reheat and enjoy!
– **Grilling Option:** If you prefer grilling over baking, you can loosely wrap the onions in foil and grill them until tender. Just keep an eye on them to ensure they cook through.
### What to Serve With Baked Tennessee Onions
These stuffed onions shine as a side dish or even as a light meal. Here are a few delicious suggestions:
– **Grilled Chicken:** The savory flavors of chicken breast pair wonderfully with the sweet and cheesy onion dish.
– **Green Salad:** A fresh, crunchy salad with a zingy vinaigrette contrasts perfectly with the tender, rich texture of the onions.
– **Roasted Vegetables:** Think of colorful, caramelized veggies like zucchini, bell peppers, and carrots. They bring vibrance and health to your meal.
– **Cornbread:** A slice of this Southern classic alongside the onions is like a warm hug on a plate.
– **Light White Wine:** A chilled glass of Sauvignon Blanc complements the flavors beautifully, heightening the overall experience.
### Storage, Freezing & Meal Prep
**Storage:** Cooked Baked Tennessee Onions can be kept in an airtight container in the refrigerator for up to 4 days. They are just as delicious reheated!
**Freezing:** To freeze, ensure the onions are completely cooled, then wrap each onion in plastic wrap and place them in a freezer-safe bag. They can be stored in the freezer for up to 3 months. When you’re ready to enjoy them, simply thaw in the fridge overnight and reheat in the oven.
**Meal Prep:** You can prepare the filling ahead of time and store it separately in the fridge for up to 2 days. Stuff the onions just before baking—it’s a fantastic way to save time on a busy weeknight!
### Frequently Asked Questions
**Can I use yellow or red onions?**
Absolutely! While sweet onions offer a touch of sweetness, yellow and red onions will yield a different flavor profile—yellow will be more pungent and red will add a lovely color but keep in mind that the taste can vary.
**What can I substitute for breadcrumbs?**
If you’re aiming for a gluten-free option, almond flour or crushed gluten-free crackers work as excellent substitutes, providing the same crunch without gluten.
**Can I make these onions in advance?**
Yes! You can prepare the onions a day ahead, stuff them, and keep them covered in the fridge until you are ready to bake. Just remember to add a few extra minutes to the cooking time if they’re straight from the fridge!
**How do I know when they’re done?**
They are perfectly cooked when the tops are golden brown, and you can easily pierce the onion with a fork. The filling should be bubbling and oozy—just mouthwatering perfection!
**How do I reheat leftovers?**
Reheat your baked onions in a preheated oven at 350°F (175°C) for about 15-20 minutes or until heated through. You can also use a microwave for a quicker option, but the oven keeps them crispier!
—
Now it’s your turn—grab your ingredients and create this magic in your kitchen tonight! Trust me, once you experience the heavenly taste and soul-warming aroma of Baked Tennessee Onions, you’ll be adding them to your regular menu. Don’t forget to tag me when you try it, and share your thoughts! Happy cooking!