Prep time: 20 minutes
Cook time: 40 minutes
Total time: 1 hour
Servings: 12
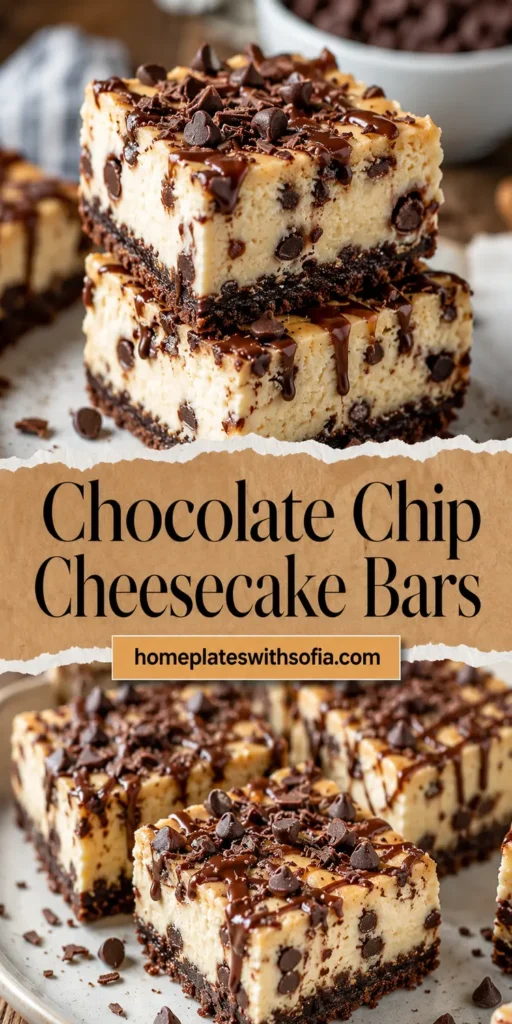
Indulging in a rich and creamy dessert is the perfect way to unwind or impress guests. These Chocolate Chip Cheesecake Bars are not just a delightful treat; they are easy to prepare and a guaranteed crowd-pleaser at any potluck. The combination of a buttery graham cracker crust, velvety cheesecake filling, and generous chocolate chip topping makes these bars irresistibly delicious. These bars are perfect for sharing with busy parents needing a quick dessert, or for novice cooks looking to impress their friends without much fuss.
What Is Chocolate Chip Cheesecake Bars for Potluck?
Chocolate Chip Cheesecake Bars are a delectable twist on traditional cheesecake. Unlike the towering slices you might find in a bakery, these bars are baked in a shallow pan, allowing for easy slicing and serving. The graham cracker base provides a fantastic crunch that complements the smooth, creamy filling. Topped with a generous sprinkle of chocolate chips, each bite is a perfect balance of flavors and textures. They are particularly great for potlucks, where convenience and shareability are key.
Why You’ll Love This
You’ll love these Chocolate Chip Cheesecake Bars for several reasons. First, they are **incredibly simple** to make. With just a handful of ingredients and straightforward instructions, even kitchen beginners can whip these up with ease. Second, they are a hit with both children and adults alike, making them versatile for any gathering. Finally, they can be prepared ahead of time and stored in the refrigerator, allowing you to free up time on the day of your event. The creamy filling matched with sweet chocolate chips will leave everyone asking for seconds.
Ingredients You’ll Need
- Graham cracker crumbs (1 ½ cups) – These provide the crunchy base that contrasts beautifully with the creamy filling.
- Granulated sugar (⅓ cup) – Sweetens the crust and the filling.
- Unsalted butter (½ cup, melted) – Binds the crumbs together to form the crust.
- Cream cheese (2 packages, softened) – The star ingredient that gives the filling its rich and creamy texture.
- Sour cream (1 cup) – Adds moisture and tanginess to the cheesecake mixture.
- Eggs (2 large) – These help set the cheesecake as it bakes, contributing to its structure.
- Vanilla extract (1 teaspoon) – Enhances the flavors of the cheesecake and adds depth.
- Chocolate chips (1 cup) – These add a delightful chocolatey sweetness that makes each bite special.
How to Make
- Preheat your oven to 325°F (163°C). Prepare a 9×13-inch baking pan by lining it with parchment paper, allowing some overhang for easy removal later.
- In a mixing bowl, combine the graham cracker crumbs, sugar, and melted butter. Stir until the mixture resembles wet sand. Press this mixture firmly into the bottom of the prepared baking pan to create an even crust.
- In a large mixing bowl, beat the softened cream cheese with an electric mixer until smooth and creamy. This will take about 2-3 minutes. Make sure there are no lumps, as this affects the texture of your cheesecake.
- Add the sour cream, sugar, and vanilla extract to the cream cheese. Mix until fully incorporated, scraping down the sides of the bowl as necessary.
- Add the eggs one at a time, mixing after each addition until just combined. Be careful not to overmix, as this can create a dense texture.
- Fold in the chocolate chips gently with a spatula, ensuring they are evenly distributed throughout the mixture.
- Pour the cheesecake filling over the prepared crust and smooth out the top with a spatula. Bake in the preheated oven for about 40 minutes, or until the edges are set and the center slightly jiggles.
- Once baked, turn off the oven and let the cheesecake bars cool inside with the door ajar for about 1 hour. This prevents cracking.
- After cooling, refrigerate for at least 4 hours before slicing into bars. This allows the flavors to meld and gives the cheesecake the ideal texture.
Variations & Substitutions
Nutty Crunch Variation: You can add chopped nuts like pecans or walnuts into the crust for an extra crunch. Simply add about ½ cup of finely chopped nuts to the graham cracker mixture. This addition will provide a delightful nutty flavor that complements the chocolate perfectly.
Fruit-Filled Variation: For a fruity twist, consider folding in fresh berries, like raspberries or blueberries, into the cheesecake mixture before baking. About 1 cup of fresh fruit can add a refreshing tartness that balances the sweetness of the chocolate chips.
Chocolate Mint Variation: If you love chocolate mint combinations, you can replace the regular chocolate chips with mint chocolate chips. Additionally, adding ½ teaspoon of peppermint extract to the cheesecake batter will enhance the minty flavor.
Vegan Version: To make a vegan version, substitute dairy ingredients with plant-based alternatives. Use almond or coconut cream instead of cream cheese and silken tofu instead of eggs. Ensure that your chocolate chips are dairy-free to complete this variation.
Gluten-Free Version: To make these bars gluten-free, simply use gluten-free graham crackers for the crust. The other ingredients remain the same, ensuring everyone can enjoy these delicious bars regardless of dietary restrictions.
Common Mistakes to Avoid
One common mistake is overmixing the batter, which can lead to a dense texture. Be careful to mix until just combined. Another issue is baking the cheesecake for too long, which results in a dry product. Remember, the center should have a slight jiggle when you remove it from the oven. Also, not cooling the cheesecake gradually in the oven can cause cracks. Always allow it to cool slowly with the oven door slightly open. Finally, skipping the refrigeration step can result in a soft, messy bar. Patience pays off for the best texture.
Storage, Freezing & Reheating Tips
These Chocolate Chip Cheesecake Bars can be stored in an airtight container in the refrigerator for up to 5 days. For longer storage, you can freeze them. To freeze, wrap each bar tightly in plastic wrap and then in aluminum foil. They can be stored in the freezer for up to 3 months. When you’re ready to enjoy them, simply thaw in the refrigerator overnight. To **reheat**, you can place a bar in the microwave for about 10-15 seconds for a warm treat.
Frequently Asked Questions
Can I make these bars ahead of time?
Absolutely! These bars are perfect for making ahead of time. In fact, they taste even better after being chilled in the refrigerator for several hours or overnight. This gives the flavors time to meld beautifully.
What’s the best way to slice cheesecake bars?
To slice your cheesecake bars neatly, use a sharp knife that has been warmed under hot water. Wipe it clean between cuts to ensure clean edges. This will help maintain the beautiful texture of the bars.
Can I substitute ingredients for allergies?
Yes, you can make substitutions based on allergies. Use dairy-free alternatives for cream cheese and sour cream, and ensure your chocolate chips are allergen-free. Additionally, gluten-free graham crackers can replace regular ones for those with gluten sensitivities.
Why is my cheesecake cracking?
Cracking can occur if the cheesecake is baked at too high a temperature or if it cools too quickly. This is why it’s essential to bake it at a moderate temperature and allow it to cool gradually in the oven.
How do I know when these bars are done baking?
Your cheesecake bars are done when the edges are set, but the center still has a slight jiggle. They will continue to firm up as they cool, so avoid overbaking to prevent a dry texture.
Conclusion: These Chocolate Chip Cheesecake Bars are sure to become a staple in your dessert repertoire. They layer on flavors in a way that satisfies the sweet tooth while still being wholesome enough for everyday enjoyment. Don’t miss out on this delicious recipe the next time you need a sweet treat for a gathering or simply want to indulge yourself. Happy baking!