Let’s Get Real
So, I’ve been on this wild ride called life, and let me tell you, sometimes it feels like I’m navigating a stormy sea without a life vest. From work stress to the endless barrage of errands, there are days when chocolate is literally the only thing keeping me on this side of sanity. I mean, who hasn’t had a “Chocolate Therapy” session, right? But hear me out — I’m not talking about just any chocolate. I’m talking about the glorious, soul-soothing, melt-in-your-mouth decadence that is Chocolate Depression Cake.
Yes, you read that right. I feel like I need to flash a neon sign that says “Happiness Ahead!” because this cake is a solid reminder that even when life is throwing curveballs faster than a major league pitcher, we can distract ourselves with a slice of cake so divine, you’ll forget what was bothering you in the first place. I’ve had my ups and downs with baking in general—do you remember that time I tried to bake bread and nearly started a kitchen fire because I forgot I left the dough sitting way too close to the heater? Let’s just say, my ambitious dreams of being the next bread-making queen came to a grinding halt. But this cake? This bad boy is about as forgiving as that friend who always vows to move your couch but never shows. You can’t mess it up. Spoiler: I’ve tried.
Let’s dive into the world of this chocolaty wonder, which is not just a cake; it’s practically therapy for those of us who find solace at the bottom of a cake pan. And to all the cake purists out there, don’t worry, I’m not about to dump a bunch of kale into this mix. That’s not how I do things!
Ingredients, Unfiltered
What’s Really in Chocolate Depression Cake
Let’s break down the ingredients. I promise it will be more enlightening than reading the back of your favorite comic book. Seriously — I’ll even throw in the fun comments!
All-Purpose Flour: The unsung hero of any cake. Look, this flour does the heavy lifting here while we’re busy stress eating our way through Netflix binges. I usually buy the unbranded stuff because, frankly, I think all-purpose flour is a total scam. It’s like the generic equivalent of cake flour – they’re all good at serving their purpose.
Sugar: Obviously, we’re using granulated sugar because having sugar in a cake without “sweetness” would just create a pasty vegetable mess. In my opinion, sugar is the magic dust of life. If my cake isn’t making me feel like I’m having an out-of-body experience, then something’s gone wrong. Sorry, not sorry!
Cocoa Powder: Ah, cocoa powder. This is where the magic intensifies. But let me get real with you. If you use the cheap stuff, which I’ve done in a moment of penny-pinching desperation, your cake might resemble more of a sludge than a brownie. Trust me, splurge just a little. Go for the good cocoa, like Dutch-processed if you’re feeling fancy.
Baking Soda & Baking Powder: These little fellows are what make your cake rise and come to life! It’s like they’re on a secret mission from the cake gods to give your cake the height of a diva on a reality show. Use ‘em because nobody wants a flat cake. What’s next? A pancake?
Salt: Yes, even in dessert! Salt brings out the flavor like a humble friend who reminds you to stop brooding and start living. I always think of it as a hug for all the sweet elements.
Vegetable Oil: I prefer oil to butter in this recipe because it keeps the cake nice and moist. Who wants a dry cake? No one, right? Ever tried to drown it in icing just to take a drink of water afterward? Let’s not be those people.
Vanilla Extract: Because, duh, vanilla is life! It’s like the cool friend in high school who got along with everyone — it just adds that je ne sais quoi. Don’t be stingy; let it flow!
Vinegar: Yup, you read that right! Vinegar is like the wild card in this cake that surprises you but in a totally good way. It reacts with the baking soda to create the lift your cake needs. It’s basically the secret agent in cake-making. Isn’t it fascinating how a bit of sour can lead to something so sweet?
Water: And last but not least, we have water. You might think, “What’s with the liquid?” but butter, oil, and water are like the three musketeers. Without them, you’re just a sad bowl of dry ingredients waiting to happen. So let’s hydrate, folks!
Let’s Talk Health (or Not)
Is This Even Healthy? Let’s Discuss
Sure, there’s sugar and oil, and let’s be honest, this isn’t winning any health awards anytime soon. But let’s not kid ourselves: cake is not meant to be healthy. I mean, are we really going to nitpick here while we’re devouring chocolate goodness like it’s our 9-to-5? No, thank you. Sometimes I like to have my cake and eat it too — while wondering how I’ve juggled both my personal and professional life without completely spiraling.
Here’s the deal: Life is too short to count calories when eating cake. I mean, who even made that a thing? I prefer to be blissfully ignorant as I capture that perfect Instagram shot while hiding my leftover slice from the night before. If you’re worried about being health-conscious, allow me to present to you the notion of moderation. Yes, if you scarf down five slices in one sitting, you may be requiring someone to scrape you off the floor later. But if you enjoy a small slice and bask in the chocolatey delight? Now that’s what I call balance!
Your Grocery List
Here’s What You’ll Need
Here’s a straightforward list for you, sans the emojis because we’re adults here (well, most of us):
– 1 ½ cups all-purpose flour
– 1 cup granulated sugar
– ⅓ cup unsweetened cocoa powder
– 1 tsp baking soda
– ½ tsp baking powder
– ½ tsp salt
– ⅓ cup vegetable oil
– 1 tsp vanilla extract
– 1 tsp white vinegar
– 1 cup water
This recipe yields about 12 slices of pure euphoria.
The Actual Cooking Part
Okay, Let’s Make This
Now that we’ve got our shopping sorted out, let’s kick things into high gear and bake this baby! Don’t worry; no kitchen fires are on our radar today.
1. Preheat Your Oven: Take a moment and preheat that oven to a cozy 350°F (175°C). Your cake is going to need that warm hug of heat, and the science of cake baking just wouldn’t be the same without it.
2. Mix the Dry Ingredients: Grab a mixing bowl that’s big enough for all this deliciousness. Add the all-purpose flour, granulated sugar, unsweetened cocoa powder, baking soda, baking powder, and salt. Whisk it like you mean it! We are talking serious incorporation here. You want these ingredients to be best friends before they get to mingle with the wet ones.
3. Combine the Wet Ingredients: Now, in another bowl, mix together the vegetable oil, vanilla extract, vinegar, and water. Just like a good marriage, it’s all about blending well!
4. Unite the Mixes: Make a well in the dry ingredients and pour the wet mix in. Now, here’s where I usually get overzealous. I pull out the whisk like I’m some superhero on a mission. This part can get a little messy, but who cares? Embrace the chaos! Stir until everything is combined, but don’t overdo it. A few lumps are totally alright. They’ll be your funky little buddies in the cake!
5. Pour into the Pan: Grab your pan. I usually go for a 9×13 inch, but if you’ve got a round one, go ahead and use that! Pour the heavenly batter in and feel empowered that you’re channeling your inner pastry chef.
6. Bake: Pop that pan into the oven and set a timer for 30 minutes. Here’s my little secret — do not walk away from the oven! I learned that the hard way when I got into an intense TikTok scrolling session and nearly burned my last chocolate cake to ashes. Stay vigilant; your cake is counting on you!
7. Check for Doneness: Once the timer goes off, poke a toothpick or cake tester into the **center** of the cake. If it comes out clean, you’re golden! If it’s still got some oozy bits clinging to it, maybe give it another 5-10 minutes.
8. Cooling Off: Once baked to perfection, remove it from the oven and let this beauty cool in the pan for a solid 10-15 minutes. Then transfer it onto a wire rack. Bake-feels are real, people.
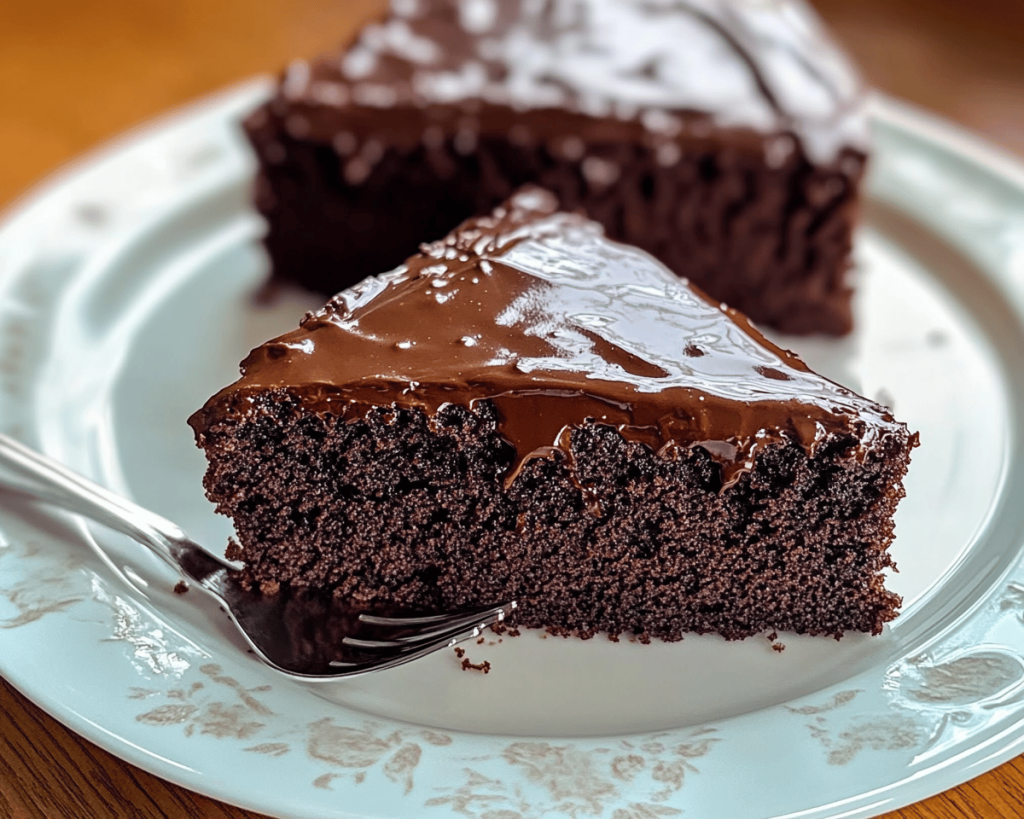
9. Slice and Serve: Now comes the best part: you slice this cake like a pro, serve it up, and watch the expressions of pure joy on everyone’s face. You might need to remind them that no, they can’t have another slice—well, not before you get your first, anyway!
Side Notes & Sassy Hacks
Bonus Tips You Didn’t Ask For
– Allergic to gluten? You can totally swap out the all-purpose flour for a gluten-free blend. Just make sure it has the xanthan gum in it, or you’ll end up with a chewy brick instead of a light, fluffy cake.
– Don’t want to use oil? Believe it or not, you can substitute with applesauce — just make sure it’s unsweetened, or you’ll end up doubling down on the sugar rush.
– Not a vinegar fan? You can use lemon juice instead, which acts in the same way. It’s like swapping out a soft drink for something slightly more sophisticated – very ‘adulting’ of you.
– For a little extra fancy, add some chocolate chips into the batter before baking. I mean, why not? Who could say no to a little extra chocolate bliss?
– And if you’re feeling extra wild, throw in a dash of espresso powder into your batter — it will brighten the chocolate flavor in a way that’ll make you wonder why you never tried it before. Plus, a little caffeine never hurt anyone, right?
Final Words of (Culinary) Wisdom
So there you have it: my melodramatic, chaotic, sugar-fueled affair with Chocolate Depression Cake! They say that baking is healing, and I couldn’t agree more. Every slice is a reminder that there’s joy to be found, even in the messiest of moments. If you try this recipe, tag me on social media or even just shoot me a mental high-five! I want to see your creations, maybe cry a little happy tear over how beautiful they are, and then possibly steal a slice from your kitchen while no one’s watching. Embrace the messy, the delicious, and the pure, gooey joy of baked goods! Now let’s get baking, shall we?