Prep time: 15 minutes
Cook time: 10 minutes
Total time: 25 minutes
Servings: 12 clusters
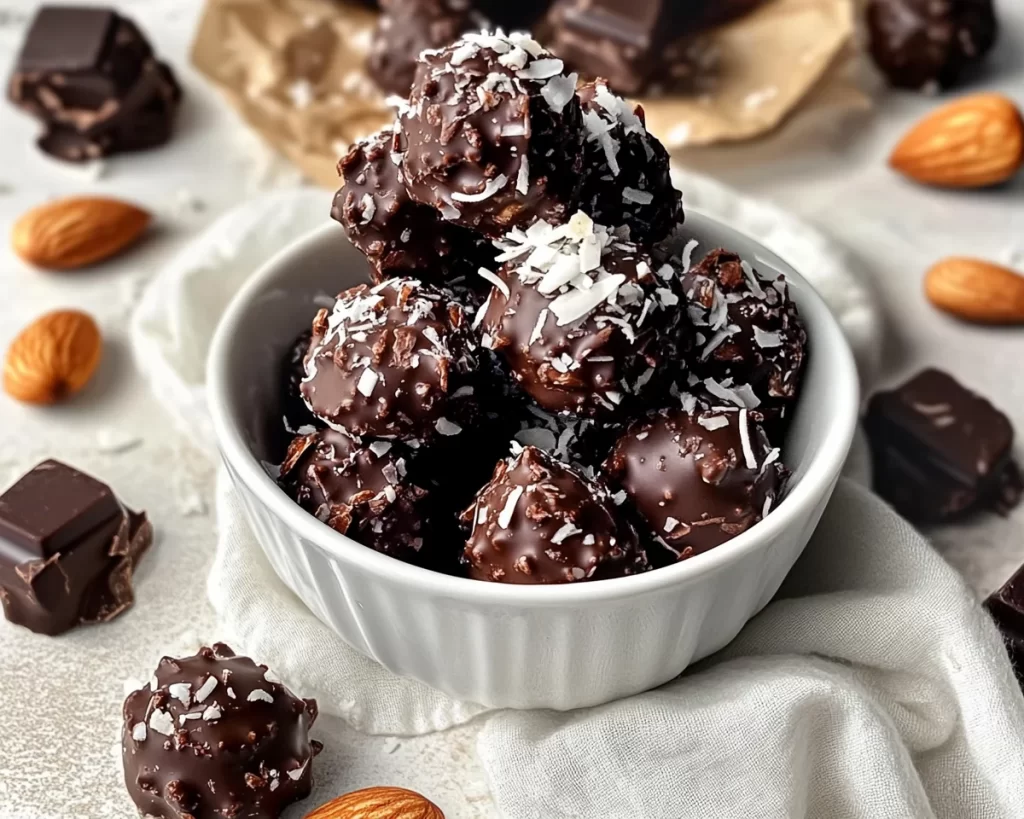
Imagine the moment you unwrap a piece of creamy dark chocolate, only to find a delightful crunch of toasted coconut and almond waiting inside. This is the experience you get with Classic Dark Chocolate Coconut Almond Clusters. Not only are these treats a delight for your taste buds, but they also provide a satisfying texture that mirrors indulgent chocolates without the guilt. As you prepare to make these clusters, you’ll learn how easy it is to create something that looks gourmet yet requires minimal effort in your kitchen. This recipe is perfect for busy parents, novice cooks, or anyone looking to treat themselves without spending much time.
The essence of these clusters lies in their combination of flavors and textures. The bitterness of rich dark chocolate expertly balances the sweetness of shredded coconut, while the almonds introduce an enticing crunch. Together, they beam with **nutritional benefits**, including healthy fats and antioxidants. What’s more, you’ll discover that making these at home not only saves you money compared to store-bought chocolates, but it also allows for customization according to your dietary needs and preferences. This recipe elevates your snacking game and gives you a delightful treat to enjoy!
What Is Classic Dark Chocolate Coconut Almond Clusters?
Classic Dark Chocolate Coconut Almond Clusters are a delightful combination of flavors originating from a variety of dessert traditions that celebrate indulgence while keeping health in mind. These clusters consist of luscious dark chocolate that lovingly envelops toasted coconut flakes and crunchy almonds. Each bite offers a complex flavor profile—the bittersweet chocolate, the rich, nutty taste of almonds, and the tropical sweetness of coconut. This trio creates a snack that is not only satisfying but also provides a small nutritional punch.
The texture is equally appealing; imagine biting into a glossy chocolate shell to unveil a combination of chewy coconut and crisp almonds. Each element plays a role in the overall experience, making these clusters a popular choice for both adults and kids. Whether enjoyed during a cozy evening at home or shared at a gathering, these clusters are sure to be a crowd-pleaser. And the best part? They’re easy to make right in the comfort of your kitchen!
Why You’ll Love This
You will fall in love with Classic Dark Chocolate Coconut Almond Clusters for several compelling reasons. First, the incredible taste speaks for itself—rich dark chocolate mingles beautifully with the sweetness of coconut and the crunchiness of almonds, creating a symphony of flavors that will surely please anyone’s palate. Moreover, this recipe is incredibly easy to follow, making it perfect for beginners or those with busy lifestyles who want a delicious snack without extensive preparation.
Another notable benefit is the financial aspect; homemade snacks are generally less expensive than commercial options, which often have hidden ingredients and preservatives. By making these clusters at home, you know exactly what is going into them. This recipe is also versatile. You can swap out ingredients to cater to different dietary needs—whether you’re gluten-free, vegan, or simply looking for something different, the options are plentiful. So, put aside any misconceptions about chocolate being synonymous with guilt and prepare yourself for a joyous eating experience!
Ingredients You’ll Need
- Dark chocolate (at least 70% cacao) – This is the star of the show. It provides a rich, complex flavor and has numerous health benefits, such as antioxidants. If you prefer a vegan option, look for dairy-free dark chocolate.
- Unsweetened shredded coconut – Adds a chewy texture and a naturally sweet flavor. Avoid sweetened coconut to maintain better control over the overall sweetness of your clusters.
- Almonds – Offers a satisfying crunch and healthy fats. You can use sliced, slivered, or whole almonds, depending on your personal preference.
- Salt – A pinch enhances the flavor of the chocolate and balances the sweetness of the coconut.
- Coconut oil (optional) – If you’re looking for a little added creaminess, melted coconut oil can be mixed with the chocolate to improve its flow and give more depth to the flavor.
These ingredients work together harmoniously, but feel free to customize your clusters based on what you have available. For instance, if you are not a fan of almonds, you might replace them with walnuts or pecans. The use of dark chocolate in this recipe elevates it beyond typical chocolate bark by incorporating nutritious ingredients.
How to Make
- Prep your ingredients: Begin by gathering all your ingredients together. Measure out about 1 cup of dark chocolate, 1 cup of unsweetened shredded coconut, and ½ cup of almonds. Chop the almonds if you desire a finer texture. Make sure you have everything ready for a smooth cooking process.
- Melt the dark chocolate: Take a heatproof bowl and place it over a pot of simmering water—this is known as the double boiler method. Add the measured dark chocolate and stir it continuously until it’s completely melted. Be careful not to let any water or steam mix with the chocolate, as this can cause it to seize. This step should take about 5 minutes.
- Add coconut oil (optional): If you’re using coconut oil for its creaminess, now’s the time to add about 1 tablespoon to the melted chocolate. Stir until both elements are fully combined, creating a smooth and luxurious chocolate mixture.
- Incorporate the dry ingredients: Remove the bowl from the heat and add the shredded coconut and almonds to the melted chocolate. Mix until all the ingredients are evenly coated; you want every coconut flake and almond to be enveloped in chocolate.
- Prepare trays for clustering: Line a baking sheet or tray with parchment paper. This ensures that your clusters do not stick, making them easy to remove once they are set. Using a spoon, scoop out small amounts of the chocolate mixture and drop them onto the prepared parchment paper. This is when you can decide the size of your clusters—small bites or larger treats!
- Sprinkle with salt: Before the clusters set, take a tiny pinch of salt and sprinkle it over the top of each one. This tiny step enhances the flavor and makes the chocolate even more delicious.
- Chill to set: Place the baking sheet in the refrigerator for about 10-15 minutes or until the chocolate has hardened. Once you notice they are firm to the touch, you can take them out.
- Serve and enjoy: Once set, carefully lift the clusters off the parchment paper and transfer them to an airtight container. They are ready to be enjoyed! These clusters can be kept for snacking throughout the week or served as a delightful dessert.
The process is as rewarding as it is straightforward, even if you’re just starting in the kitchen. You’ll enjoy the enticing aroma of melted chocolate and the satisfying sound crunch as you bite into the clusters.
Variations & Substitutions
Nut-Free Variation: If you are preparing snacks for someone with nut allergies, simply omit the almonds and replace them with pumpkin seeds or sunflower seeds for a delightful crunch. These alternatives will still give your clusters that satisfying bite, while ensuring that they remain allergen-friendly.
Vegan Option: To make this recipe completely vegan, ensure that the dark chocolate is dairy-free. Brands like Enjoy Life offer great options that still have the robust flavor you expect from dark chocolate. Also, you might consider replacing honey (if you add any for sweetness) with agave syrup or maple syrup for a purely plant-based option.
Flavor Boost: For those looking to elevate the flavors, consider adding spices like cinnamon or cayenne pepper to the chocolate before mixing in the coconut and almonds. A dash of cinnamon can provide a warming note, while a hint of cayenne will add an unexpected kick that balances the sweetness.
Fruit Add-ins: You can create a tropical twist by folding in some dried fruit like pineapple or mango pieces before spooning the mixtures onto the baking sheet. The addition of these fruits introduces more natural sweetness and tantalizes your taste buds with every bite, offering a chewy contrast to the crunchy nuts and coconut.
Common Mistakes to Avoid
When making Classic Dark Chocolate Coconut Almond Clusters, you may encounter a few pitfalls that can affect your results. One common mistake is overheating the chocolate. If chocolate is heated too quickly or at too high a temperature, it can become grainy and unusable. To avoid this, always use the double boiler method or melt it in the microwave in short intervals, stirring between each burst of heat.
Another misstep is not preparing your work surface properly. If you skip lining the trays with parchment paper, your clusters may stick, making cleanup tedious and damaging your beautiful creations. Always take the time to prepare your surface, ensuring each piece can lift away easily once set. Lastly, using sweetened shredded coconut may result in overly sweet clusters. Opt for unsweetened coconut flakes for a balanced flavor that allows the rich dark chocolate to shine.
Storage, Freezing & Reheating Tips
Proper storage will ensure that your Classic Dark Chocolate Coconut Almond Clusters remain fresh and flavorful. Store them in an airtight container at room temperature for up to a week; however, for a longer shelf-life, keep them in the refrigerator for up to two weeks. If you choose to store them in the fridge, it’s wise to place parchment paper between layers to avoid them sticking together.
If you want to enjoy these indulgent treats later, freezing is also an option. Place the clusters in a single layer on a baking tray and freeze them until solid. Once they are frozen, transfer them to a freezer-safe container or zip-lock bag. They can remain in the freezer for up to three months. When you’re ready to enjoy, let them thaw in the refrigerator for about an hour or enjoy them directly from the freezer for a cooling snack.
Remember, while reheating these clusters is not necessary, if you want to enjoy them warm, gently place them in the microwave for no more than 5-10 seconds to slightly melt the chocolate again. Just be cautious to avoid overshooting the time—overheating can lead to separation and spoilage.
Frequently Asked Questions
Can I use milk chocolate instead of dark chocolate?
Certainly! While dark chocolate is preferred for its rich flavor and health benefits, you can use milk chocolate if that’s what you enjoy. Just remember that it will be sweeter and may not have the same depth of taste as dark chocolate.
What can I use instead of coconut?
If coconut is not your favorite, try using finely chopped oats or puffed rice for added texture without the coconut flavor. You can also skip the coconut entirely and opt solely for nuts—experimenting can yield delicious results!
How do I know when the chocolate is melted properly?
Chocolate is ready when it is completely smooth and glossy without any lumps remaining. Always stir it continuously while melting, and avoid letting any steam or water mix with it, as this could cause it to seize.
Can I make a double batch at once?
Yes! Just ensure that your mixing bowl and baking pan can accommodate the larger quantity. More chocolate may take slightly longer to melt, so be patient and keep stirring.
Can I sell these homemade clusters?
As long as you adhere to local regulations regarding food sales—the rules regarding packaging and labeling, for instance—you should be able to sell them. An additional tip is to offer samples to entice potential buyers—you’ll find that the delicious taste speaks for itself!
Conclusion:
Classic Dark Chocolate Coconut Almond Clusters are a delightful treat that combine rich flavors with simple preparation. With the versatility to adapt to dietary needs and preference, these clusters can become a staple in your dessert lineup. I encourage you to try your hand at making them, customizing flavors or ingredients to your liking. Don’t forget to share your delicious creations, whether it be through social media or with friends and family. Happy cooking!