Prep time: 20 minutes
Cook time: 30 minutes
Total time: 50 minutes
Servings: 16 bars
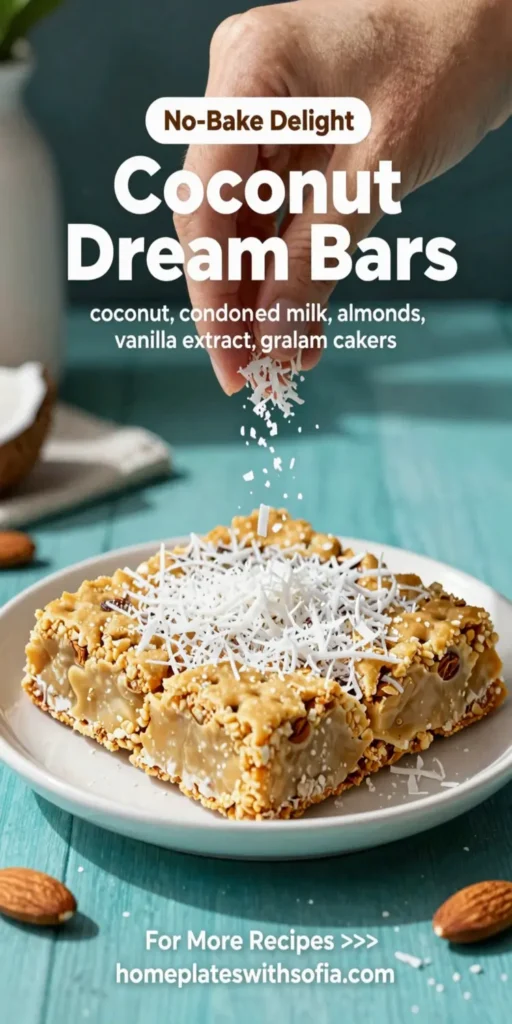
Coconut Dream Bars are a delightful treat that brings the tropical flavors of coconut into a luscious dessert. With layers of buttery crust and creamy coconut filling, these bars are sure to be a hit at parties or as a sweet snack for busy parents on the go. When you’re looking for a dessert that feels special without requiring advanced baking skills, Coconut Dream Bars fit the bill perfectly.
What Is Coconut Dream Bars?
Coconut Dream Bars are a rich and creamy confection made with coconut, sweetened condensed milk, and a buttery crust. They are a versatile dessert, perfect for any occasion. The buttery base pairs wonderfully with the soft and chewy coconut layer, offering a delightful contrast in texture. Many people enjoy these bars during holiday gatherings or summer picnics, making them a popular choice among dessert lovers.
Why You’ll Love This
There are countless reasons to fall in love with Coconut Dream Bars. For one, they are incredibly easy to make, requiring minimal ingredients and effort. This makes them ideal for kitchen beginners or busy parents looking for quick baking solutions. The sweet and tropical flavor of coconut brings a taste of the tropics right to your home. Additionally, they are perfect for meal prep; you can make a batch at the beginning of the week and enjoy them as a sweet treat throughout the days. Finally, their flavor and creamy texture will leave your family and friends asking for seconds.
Ingredients You’ll Need
- 1 cup unsalted butter: Provides richness and helps create a flaky crust.
- 1 cup granulated sugar: Sweetens the bars and balances the coconut flavor.
- 2 cups all-purpose flour: Serves as the base for the crust.
- 1 teaspoon vanilla extract: Adds depth of flavor to the crust.
- 1 can (14 oz) sweetened condensed milk: Creates a creamy and sweet coconut layer.
- 3 cups shredded coconut: This is the star of the recipe, providing that tropical flavor and chewy texture.
- 1/2 teaspoon salt: Enhances the sweetness of the bars and balances the flavors.

How to Make
- Preheat your oven to 350°F (175°C). Grease a 9×13-inch baking pan and set it aside. This ensures that your bars will bake evenly and won’t stick.
- In a mixing bowl, cream together the unsalted butter and granulated sugar until light and fluffy. This should take about 3-4 minutes. Be sure to scrape down the sides of the bowl to incorporate all ingredients well.
- Add in the vanilla extract and gradually mix in the flour and salt. Continue to mix until the dough comes together. You should have a smooth texture without lumps.
- Press the dough evenly into the bottom of the prepared baking pan to create the crust. Ensure it’s pushed firmly into the corners of the pan. This forms the base that will hold the creamy filling.
- Bake the crust in the preheated oven for about 15 minutes, or until it turns lightly golden. Keep an eye on it to avoid over-baking.
- While the crust is baking, combine the sweetened condensed milk and shredded coconut in a bowl. Mix until thoroughly combined. This will be your filling that creates the rich texture of the bars.
- Once the crust is done, remove it from the oven and pour the coconut mixture over the hot crust, spreading it out evenly. This helps the filling cling to the crust.
- Bake the entire pan for an additional 20-25 minutes or until the top is golden brown. You want the coconut filling to set nicely, giving a beautiful texture.
- Remove the pan from the oven and let it cool completely in the pan before slicing into bars. This allows the layers to adhere properly.
Variations & Substitutions
Chocolate Chip Coconut Dream Bars: Add about 1 cup of chocolate chips to the coconut filling for a richer dessert. The combination of chocolate and coconut is always a crowd-pleaser. Just fold them in gently before baking.
Nutty Coconut Dream Bars: For a crunchier texture, mix in 1 cup of chopped nuts, such as almonds or walnuts, into the coconut filling. This adds a nutty flavor and extra crunch.
Gluten-Free Coconut Dream Bars: Substitute the all-purpose flour with a gluten-free flour blend. Ensure the blend you use is suitable for baking, and adjust the quantity according to the brand’s instructions.
Lemon Coconut Dream Bars: Add the zest of one lemon and a tablespoon of lemon juice to the coconut mixture for a zesty twist. The freshness of lemon enhances the tropical vibe and creates a refreshing dessert.
Common Mistakes to Avoid
Overmixing the Dough: Be careful not to overmix your dough when preparing the crust. Overmixing can result in a tough texture instead of a tender, flaky crust.
Not Cooling the Bars: Allow your bars to cool completely before slicing. If you cut them while warm, they may crumble and not hold their shape.
Forgetting to Grease the Pan: Always grease your baking pan well, or line it with parchment paper. This prevents sticking and makes it easier to lift out the bars once they are baked.
Storage, Freezing & Reheating Tips
Coconut Dream Bars can be stored in an airtight container at room temperature for up to 5 days. If you’d like to keep them fresh even longer, you can freeze them. To freeze, wrap individual bars in plastic wrap and place them in a freezer-safe container or bag. They can be stored in the freezer for up to three months. When you’re ready to enjoy, simply thaw them in the fridge overnight or at room temperature for a couple of hours.
For reheating, place a bar in the microwave for about 10-15 seconds to warm it up. This will bring back the soft texture and enhance the flavors. Just be careful not to overheat!
Frequently Asked Questions
Can I make Coconut Dream Bars ahead of time?
Absolutely! These bars are perfect for making ahead. In fact, they taste even better after resting for a day as the flavors meld together. Once prepared, allow them to cool completely and then store in an airtight container in the refrigerator. You can also freeze them for longer storage.
Can I use fresh coconut instead of shredded coconut?
While fresh coconut can be used, it’s important to know that it has a different moisture content than packaged shredded coconut. If you choose to go with fresh, make sure to dry it out a bit in the oven or a dehydrator to avoid a soggy filling.
Is there a vegan option for this recipe?
Yes, you can substitute the butter with a plant-based butter or coconut oil, and use coconut cream in place of sweetened condensed milk. These adjustments will give you a vegan-friendly version of Coconut Dream Bars without sacrificing taste.
How do I know when my bars are done baking?
The bars are done when the top has a golden brown color and a slight firmness when pressed in the center. A toothpick inserted should come out mostly clean, with just a few moist crumbs attached.
Conclusion:
Coconut Dream Bars are a perfect mix of simplicity and indulgence, making them a fantastic choice for anyone looking to satisfy their sweet cravings with minimal fuss. Their delightful coconut flavor and chewy texture appeal to all ages, especially busy families who can whip up these bars in no time. Whether you’re serving them at a gathering, sharing with friends, or enjoying them as a weekend treat, these bars will definitely become a favorite. So get baking, and enjoy a taste of the tropics with every delectable bite!