Prep time: 20 minutes
Cook time: 25 minutes
Total time: 45 minutes
Servings: 12
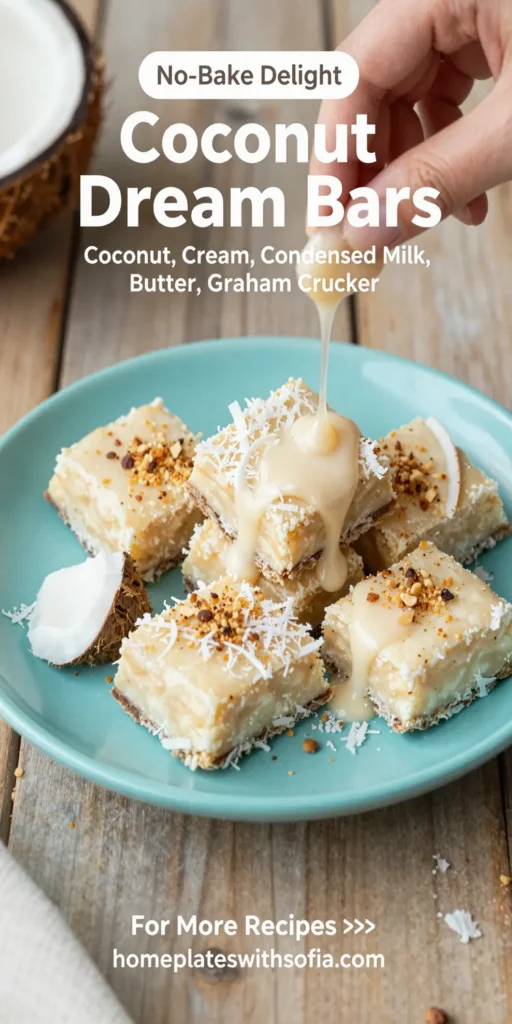
Coconut Dream Bars are a delightful treat, perfect for any occasion. Combining the rich, tropical flavors of coconut with a creamy texture and a hint of sweetness, this dessert will transport you to paradise with every bite. The layers of buttery crust, luscious coconut filling, and a sweet glaze create a perfect harmony of flavors that are sure to impress your family and friends. Whether you’re planning a special gathering, wanting a simple weeknight dessert, or just indulging yourself, these bars are a must-try.
What Is Coconut Dream Bars?
Coconut Dream Bars are a layered dessert, characterized by a buttery crust that serves as the base, followed by a smooth and creamy coconut filling made with shredded coconut and sweetened condensed milk. Topped with a light glaze or a sprinkle of powdered sugar, these bars are then cut into squares for easy serving. They blend the textures of a cookie bar and a decadent coconut custard, making them an irresistible option for coconut lovers. The simplicity of this recipe allows you to whip it up in less than an hour, and the outcome is utterly satisfying.
Why You’ll Love This
There are countless reasons to adore Coconut Dream Bars. First, they encapsulate the essence of summer with their **refreshing coconut taste**. Even in the colder months, these bars evoke a sense of warmth and sunshine. Secondly, they are incredibly easy to prepare, making them ideal for busy **parents** or anyone new to baking. Lastly, these bars are not overly sweet, striking a perfect balance that allows the coconut to shine. Plus, their beautiful, inviting appearance makes them a wonderful addition to any dessert table. You’ll find yourself making these bars again and again!
Ingredients You’ll Need
- 1 cup unsalted butter: Softened to room temperature, butter serves as the base for the crust. It provides rich flavor and helps create a tender texture.
- 1 cup granulated sugar: This sweetener is blended into the crust for added sweetness and helps achieve a crispy texture.
- 2 cups all-purpose flour: The primary ingredient for the crust, giving it structure and a delightful chewiness when baked.
- 1 teaspoon vanilla extract: This enhances the flavor of the crust and ties all the ingredients together.
- 1 can (14 oz) sweetened condensed milk: Key to the coconut filling, it adds sweetness and creaminess that makes the bars rich.
- 2 cups shredded coconut: The star of the show, providing texture and authenticity to the bars.
- 1/4 teaspoon salt: A pinch of salt heightens the sweetness and balances the flavors in both the crust and filling.
- Powdered sugar (optional): For dusting on top, adding a nice finishing touch for presentation.
How to Make
- Preheat your oven to 350°F (175°C). This step is essential as it ensures a properly cooked crust. Grease a 9×13 inch baking pan with cooking spray or line it with parchment paper for easy removal of the bars later.
- In a large mixing bowl, cream together the softened butter and granulated sugar until the mixture is light and fluffy. This should take about 3-5 minutes using an electric mixer. The right texture will make for a tender crust.
- Add the flour and salt to the creamed mixture. Mix on low speed just until the flour is incorporated. Avoid over-mixing to keep the crust tender. The dough will be soft; evenly press it into the bottom of the prepared baking pan.
- Bake the crust in the preheated oven for 15 minutes, or until slightly golden. Keep an eye on it, as over-baking can lead to a hard crust.
- While the crust is baking, prepare the filling. In a separate bowl, combine sweetened condensed milk, shredded coconut, and vanilla extract. Stir until everything is well combined.
- Once the crust has baked, remove it from the oven and pour the coconut mixture evenly over the top. Spread it out with a spatula, ensuring each corner is filled. Return it to the oven and bake for an additional 20-25 minutes, or until the top is set and lightly browned.
- Allow the bars to cool completely in the pan on a wire rack. This vital step allows the filling to firm up for easier cutting. Once cooled, dust with powdered sugar if desired, and cut into squares to serve.
Variations & Substitutions
Chocolate Coconut Dream Bars: For a delightful twist, add 1 cup of semi-sweet chocolate chips to the coconut filling before baking. The combination of chocolate and coconut is a classical pairing cherished by many!
Nutty Addition: Mix in 1/2 cup of chopped nuts like almonds or macadamia nuts into the coconut filling for added texture and flavor. This creates a delightful crunch that elevates the bars.
Gluten-Free Option: Substitute the all-purpose flour with a gluten-free flour blend to cater to gluten-sensitive individuals. This version allows everyone to enjoy the delicious flavors of Coconut Dream Bars without worry.
Dairy-Free Version: Replace the butter with coconut oil and use a dairy-free condensed milk alternative. This variation keeps the coconut flavor while making it suitable for those avoiding dairy.
Common Mistakes to Avoid
One common mistake is **using cold butter** for the crust. Cold butter will not cream nicely with sugar, resulting in a dense crust rather than a light and tender one. Always ensure that your butter is at room temperature.
Another issue is **overmixing** the dough, which can lead to a tough texture. Mix just until the ingredients are combined. For the filling, be cautious not to overbake; the center should be set but soft. **Keep an eye on the bars during the final baking time**, as ovens can vary in temperature.
Storage, Freezing & Reheating Tips
Coconut Dream Bars can be stored in an airtight container in the refrigerator for up to a week. Ensure they are completely cooled before storing to avoid condensation. If you prefer to enjoy these bars later, you can freeze them; wrap each square in plastic wrap and place them in a freezer-safe container for up to 3 months.
When ready to enjoy, remove the bars from the freezer and let them thaw in the refrigerator overnight. For a quick treat, you can microwave them for a few seconds to regain their delightful softness.
Frequently Asked Questions
Can I use fresh coconut instead of shredded coconut?
Certainly! Fresh coconut can be used; however, you will need to ensure it’s finely grated and squeezed dry. This prevents excess moisture from altering the filling’s consistency.
How can I enhance the flavor of the coconut filling?
To intensify the coconut flavor, consider adding a tablespoon of coconut extract along with the vanilla extract. This additional flavoring will amplify the tropical taste, making it even more enjoyable.
Are these bars suitable for baking at high altitude?
Yes! If you are at high altitude, you may want to adjust the baking time and potentially reduce the sugar slightly. You can also add an extra tablespoon of flour to prevent the bars from becoming too puffy.
What can I serve these Coconut Dream Bars with?
These bars pair well with whipped cream or a scoop of vanilla ice cream for a delightful dessert experience. The creaminess complements the coconut flavor beautifully.
Can I make these bars ahead of time?
Absolutely! Coconut Dream Bars can be made a day in advance, making them perfect for gatherings. Just be sure to keep them in the refrigerator until you’re ready to serve.
Conclusion: Coconut Dream Bars are an easy and delightful dessert that captures the essence of tropical flavors. Their layered texture and simplicity make them a fantastic choice for any occasion. With variations and options for customization, everyone can enjoy a taste of paradise right from their kitchen. Try making these bars today, and you’ll be sure to please friends, family, and yourself with each decadent bite!