Prep time: 20 minutes
Cook time: 15 minutes
Total time: 35 minutes
Servings: 24 cookies
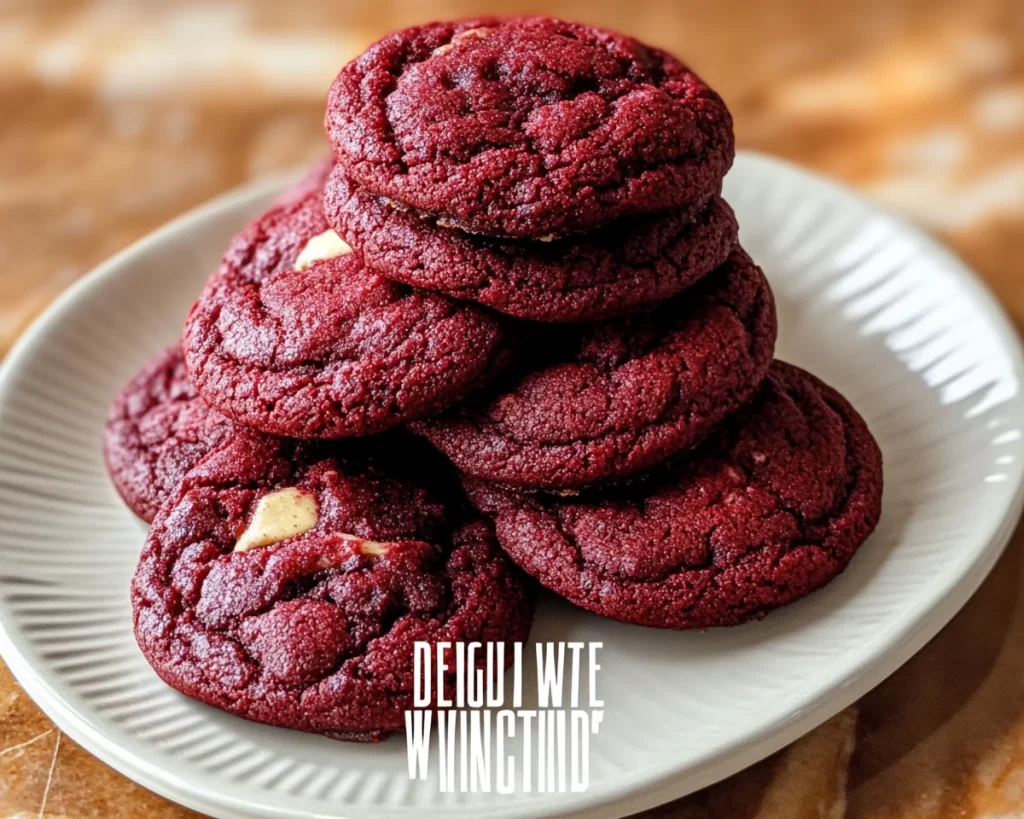
Imagine walking into your kitchen on a chilly afternoon, the enticing aroma of freshly baked cookies wafting through the air, beckoning you to take a bite. Now, picture transforming that tantalizing notion into reality with a twist—using nutritious and vibrant beets to create **Delicious Red Velvet Cookies With Beets**. Not only do these cookies boast a stunning color that will dazzle your guests, but they also offer a delightful taste and texture that will enchant the whole family.
These cookies are not just your average dessert; they are a way to indulge without the guilt. In this recipe, you will discover how to perfectly blend the earthy sweetness of beets with the classic flavors of red velvet, creating a cookie that is both moist and chewy. You will also learn helpful tips for making these cookies, a few fun variations, and insights into ingredient choices that enhance both flavor and nutrition.
What Is Delicious Red Velvet Cookies With Beets?
Delicious Red Velvet Cookies With Beets are a delightful and unexpected twist on traditional red velvet cookies. The luscious red color, traditionally derived from cocoa powder and red food coloring, is powered here by **cooked beets**. Not only does this give the cookies their rich, striking hue, but it also enriches them with vitamins, fiber, and natural sweetness. The texture is chewy with slightly crisp edges, making them perfect for dunking in milk or enjoying on their own.
Originating from the Southern United States, red velvet cake is known for its soft, moist texture and subtle flavor that combines cocoa and vanilla. When you adapt this classic dessert into cookie form, the flavors take on a new dimension. The addition of beets provides an earthy undertone that enriches the cookie experience and makes them more wholesome. These cookies are perfect for holiday gatherings, birthday parties, or just a cozy day at home with family.
Why You’ll Love This
There are countless reasons why you will fall in love with these Delicious Red Velvet Cookies With Beets! First and foremost, they are a joy to eat, offering a unique flavor that balances rich cocoa notes with the natural sweetness of beets. These cookies are not just a treat; they’re a hidden source of nutrients you can feel good about serving to your loved ones. The vibrant color also adds a special touch to any dessert table, making these cookies stand out as an impressive and gourmet option.
Moreover, the preparation is simple and forgiving, making it an ideal recipe for both beginners and seasoned bakers. If you have kids around, they will love helping mix the dough and rolling the cookies into balls. For the health-conscious cookie lover, this recipe provides a lower sugar alternative without sacrificing taste.
You may find that some people have preconceived notions about beets, thinking they have an overpowering flavor. However, in this cookie recipe, the sweetness and earthiness of the **beets** enhance rather than overpower the classic red velvet taste. If you cautiously choose your ingredients and stick to the recipe, you’ll be amazed at how remarkable these cookies can be!
Ingredients You’ll Need
- All-purpose flour (2 cups): This forms the base of your cookies. You can substitute gluten-free flour if desired.
- Cocoa powder (1/4 cup): Adds a rich, chocolaty flavor. Use unsweetened cocoa for the best results.
- Granulated sugar (1 cup): Sweetens the cookies. You can substitute with coconut sugar or a sugar substitute if desired.
- Brown sugar (1/2 cup): This adds moisture and depth of flavor. You can use light or dark brown sugar.
- Baking soda (1 tsp): The leavening agent helps the cookies rise.
- Salt (1/2 tsp): Enhances the flavors in the cookie.
- Vegetable oil (1/2 cup): Replaces butter for a softer texture. You can use coconut oil for a healthier option.
- Vanilla extract (1 tsp): Adds depth of flavor.
- Eggs (2 large): Binds ingredients together while adding moisture.
- Pureed beets (1 cup): The star ingredient! It should be cooked, cooled, and pureed until smooth.
- Chocolate chips (1 cup): Optional, but they add an extra layer of sweetness and decadence.
When choosing ingredients, consider options that cater to dietary needs. For example, if you need a vegan alternative, you can use flax eggs in place of regular eggs. Using pure maple syrup instead of granulated sugar can add a delightful flavor while keeping the recipe natural and nutritious.
How to Make
- Preheat your oven and prepare the baking sheets. Start by preheating your oven to 350°F (175°C). Line two baking sheets with parchment paper. This will prevent the cookies from sticking and make cleanup easier.
- Mix the dry ingredients. In a large mixing bowl, whisk together the all-purpose flour, cocoa powder, baking soda, and salt until well combined. Ensure that there are no lumps of cocoa powder; sifting the cocoa powder is recommended for a smoother texture.
- Combine the wet ingredients. In another bowl, whisk together the granulated sugar, brown sugar, vegetable oil, and vanilla extract until the mixture is smoothly blended. Add the eggs one at a time, making sure each egg is fully incorporated before adding the next. The mixture should be thick and glossy.
- Add the beet puree. Gently fold in the pureed beets until evenly mixed. This step adds moisture and a beautiful color to the mix. The earthy aroma of the beets will start to fill your kitchen as you combine everything.
- Combine wet and dry ingredients. Gradually add the dry ingredient mixture to the wet ingredients, stirring until just combined. Avoid over-mixing to keep your cookies light and fluffy. If you’re adding chocolate chips, fold them in gently at this stage.
- Shape the cookies. Using a tablespoon or cookie scoop, drop rounded portions of dough onto the prepared baking sheets, spacing them about 2 inches apart. You can roll the dough into balls for a more uniform shape.
- Bake the cookies. Place the baking sheets in the preheated oven and bake for 12-15 minutes, or until the edges are set but the centers are still soft. Don’t worry if they look slightly undercooked; they will firm up as they cool!
- Cool and enjoy! Once baked, remove the cookies from the oven and let them cool on the baking sheets for 5 minutes before transferring them to a wire rack to cool completely. This cooling period is essential for achieving the perfect chewy texture.
There you have it! A straightforward process that anyone can master. As you work through the steps, enjoy the sensory experience of mixing, measuring, and baking. The radiant color of the dough, coupled with its alluring smell, creates an atmosphere filled with anticipation.
Variations & Substitutions
Cocoa-Free Red Velvet Cookies: If you want to avoid cocoa altogether, you can replace the cocoa powder with an additional cup of all-purpose flour. While these cookies may not have the classic chocolate flavor, they will still retain their gorgeous red hue and soft texture. You can also elevate the flavor by adding 1/2 teaspoon of almond extract.
Vegan Red Velvet Cookies: To make these cookies vegan-friendly, substitute the eggs with flax eggs (1 tablespoon of ground flaxseed mixed with 2.5 tablespoons of water per egg). Use non-dairy milk instead of regular milk, and choose dairy-free chocolate chips. This allows everyone to enjoy these delightful cookies without compromising on taste!
Gluten-Free Red Velvet Cookies: If you or someone you know is gluten intolerant, swapping out the all-purpose flour for a gluten-free flour blend can be a game-changer. Make sure the blend includes a binding agent, as this will help achieve the desired texture. You might also want to add a tablespoon of cornstarch for added chewiness.
Beet Chocolate Chip Cookies: For a double treat, you can turn these red velvet cookies into beet chocolate chip cookies. Simply fold a cup of semi-sweet chocolate chips into the dough before baking. The rich, melty chocolate pairs perfectly with the slight earthiness of the beets, creating an indulgent dessert that’s sure to please anyone sweet-toothed.
Nutty Red Velvet Cookies: If you enjoy a crunch in your cookies, consider adding chopped nuts such as walnuts or pecans. They introduce a delightful texture contrast and added flavor. Opt for roasted nuts to enhance their nuttiness. Just make sure to chop them roughly so they don’t overpower the cookie dough.
Common Mistakes to Avoid
One of the most common mistakes in baking cookies, especially ones like **Delicious Red Velvet Cookies With Beets**, is overmixing the dough. Overmixing can lead to tough cookies, ruining your hoped-for chewy texture. To avoid this, mix until the ingredients are just combined, creating a harmonious blend without over-activation of gluten.
Another critical cooking warning is not measuring ingredients accurately. Baking is a science, and even small discrepancies can affect the final product. Always use proper measuring cups and spoons, especially when it comes to flour and sugar.
Lastly, letting the cookies cool too long on the baking sheets can lead to overcooking. You want them to hold their shape but still be slightly soft in the middle. The best practice is to remove them from the oven just when the edges are set. If you wait until the middle looks fully baked, they will become dry and lose that delightful chewy texture you crave.
Storage, Freezing & Reheating Tips
To keep your cookies fresh, store them in an airtight container at room temperature. They will last for up to a week, maintaining their chewy texture. If your kitchen tends to be warm, consider placing parchment paper between layers of cookies to prevent them from sticking together.
If you make a large batch and want to enjoy them later, freezing is a great option. Place baked cookies in a single layer on a baking sheet and freeze for a couple of hours. Once frozen, transfer them to a resealable plastic bag or airtight container. They can be stored in the freezer for up to three months! When you’re ready to enjoy, simply pop them in the microwave for a few seconds to warm them up or let them thaw at room temperature.
For the dough itself, you can also freeze unbaked cookie dough balls. This way, you can bake fresh cookies at any moment! Just shape the dough into balls, freeze them on a baking sheet, then transfer to a freezer bag. When you want to bake them, simply take them out and bake straight from the freezer, adding an additional minute or two to the baking time.
Frequently Asked Questions
Can I use canned beets instead of fresh beets?
Yes, canned beets can be used as a convenient substitute; however, ensure they are rinsed and dried well to avoid excess moisture in your cookies. Fresh beets often have a richer, more vibrant flavor, but canned ones will still work in a pinch.
Are these cookies suitable for children?
Absolutely! These cookies are family-friendly, and the addition of beets makes them a more nutritious option than traditional cookies. The sweetness of the cookies can also make it easier for kids to enjoy their veggies without realizing it!
How can I tell when the cookies are done baking?
The edges of the cookies should be set, and the centers might look slightly underbaked. They will firm up as they cool, so it’s best to take them out of the oven while they’re still soft in the middle to ensure a chewy texture.
Can I use natural sweeteners instead of sugar?
Yes, you can substitute granulated sugar with natural sweeteners like honey or agave syrup. However, these alternatives will change the moisture content of the cookies, so you may need to adjust the flour ratio accordingly.
What should I do if my cookies spread too much during baking?
If your cookies spread too much, it could be due to warm dough or not enough flour. To remedy this, chill your dough for about 30 minutes before baking and ensure your oven temperature is accurate by using an oven thermometer.
Conclusion:
Making **Delicious Red Velvet Cookies With Beets** is an adventure worth embarking on. Not only do these cookies cater to your sweet tooth, but they also offer a healthier alternative that is bright, flavorful, and fun to make. The joy of baking them transcends mere culinary skills; it’s about creating beautiful, shareable treats that bring people together. So, gather your ingredients, channel your inner baker, and indulge warmly in these whimsical cookies. Don’t forget to share your creation with friends and family; after all, every cookie tastes better when shared! [Read also: Easy Dessert Recipes for Beginners]