### Delightful Nun’s Puffs for Sweet Lovers
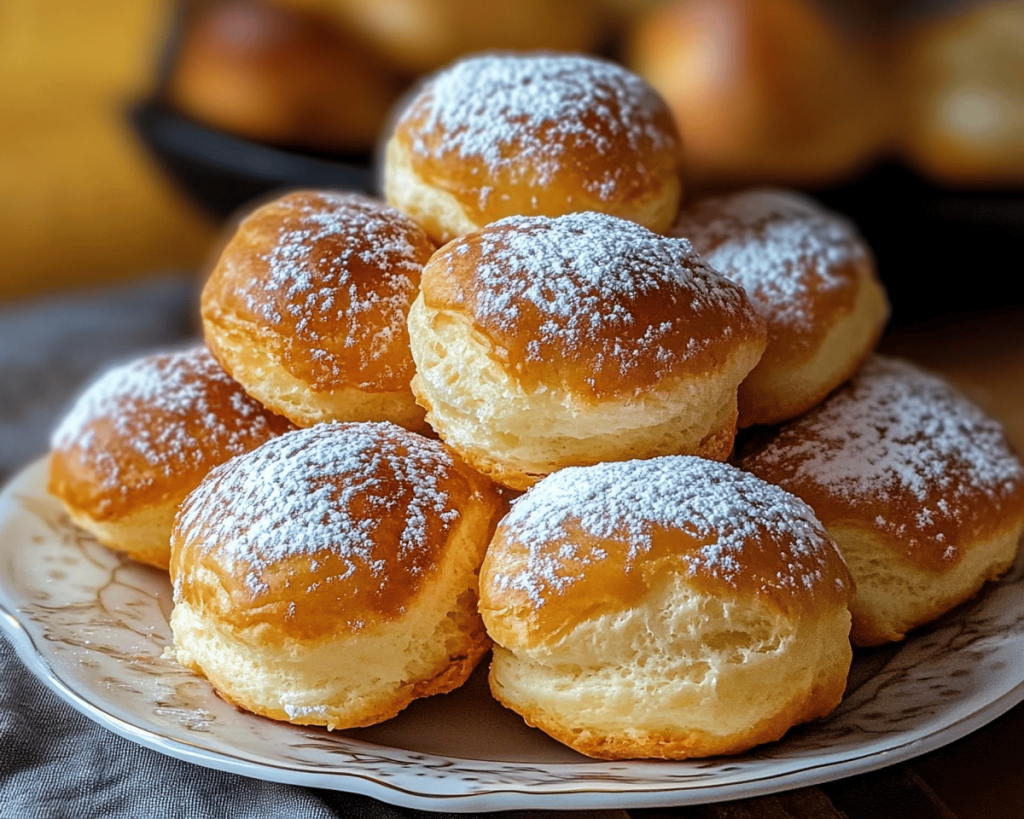
You know that feeling when you crave something sweet, fluffy, and utterly delightful? The kind of treat that fills your kitchen with the warm embrace of vanilla and caramel notes, inviting you to indulge? That’s exactly what Nun’s Puffs offer! These luscious pastries are a cross between a cream puff and a donut, perfectly golden on the outside, airy in the middle, and simply delightful. Not only are they delicious, but they hold a tender story of simplicity, tradition, and a delightful surprise of sweetness.
Today, I’m excited to share my recipe for Nun’s Puffs! These little bites of joy are perfect for a cozy family brunch, an afternoon pick-me-up, or any time you want to treat yourself to something special. By the end of this article, you’ll know how to whip up these delightful treats that will have your loved ones raving about your baking skills.
—
## What are Nun’s Puffs?
Nun’s Puffs, also known as **choux pastry puffs**, hail from a tradition that intertwines culinary art with a sprinkle of lore. It is said that the name comes from the nuns who created these pastries in France, as they were often light and airy – characteristics that the nuns hoped would make them pleasing to their congregation.
The flavor profile is a whimsical blend of buttery richness and sweetness, with a soft, creamy inside that melts in your mouth. These puffs have a unique texture: crispy on the outside with a doughy, almost cake-like interior. What truly makes them enchanting is how versatile they are. Whether dusted with powdered sugar, drizzled with chocolate, or filled with a luscious vanilla custard, Nun’s Puffs beckon with their charm.
—
## Why You’ll Love This Nun’s Puffs Recipe
There’s something truly special about Nun’s Puffs that makes them a must-try. First off, they are incredibly simple to make, requiring only a handful of ingredients that you likely already have in your pantry. If you’re looking for an impressive dessert that can be whipped up in under an hour, this recipe will become your go-to!
Moreover, Nun’s Puffs are perfect for **meal prep** or serving at family gatherings. You can create a batch ahead of time and freeze them. Simply warm them up in the oven when you’re ready to serve, and they’ll taste as fresh as if they just came out of the oven!
Let’s not forget the biggest motivator: the flavor! Each bite of these pastries beckons you to have another, creating a gentle cycle of indulgence that’s hard to resist. Whether you’re a novice in the kitchen or a seasoned baker, this recipe is straightforward and thrilling—perfect for sharing with friends or enjoying as a sweet reward after a long day.
—
## Ingredients You’ll Need
Before we get started, let’s check the ingredient list. This humble recipe only needs a few essentials:
1. **Butter** – 1/2 cup (unsalted): For a rich flavor and a tender puff. Stick with unsalted to control the seasoning.
2. **Water** – 1 cup: Acts as the vaporizer that creates the puff and steam inside.
3. **Flour** – 1 cup (all-purpose): The central ingredient that binds and gives structure to the puffs.
4. **Eggs** – 4 large: Essential for leavening, contributing to the puffs’ light texture.
5. **Sugar** – 2 tablespoons: Just enough to add sweetness; you can adjust it to your liking.
6. **Vanilla extract** – 1 teaspoon: It elevates the incredible sweet fragrance throughout the puffs.
7. **Salt** – 1/4 teaspoon: Balances the sweetness and enhances all the flavors.
Feel free to experiment with flavors! A dash of almond extract or lemon zest can brighten these delightful puffs even further.
—
## How to Make Nun’s Puffs
Getting your hands busy in the kitchen can be a fun adventure! Let’s plunge into the step-by-step guide to crafting these delightful Nun’s Puffs:
### Step 1: Preheat the Oven
Begin by preheating your oven to 400°F (200°C). While you’re at it, line a baking sheet with parchment paper to ensure your puffs don’t stick, making for easy cleanup.
### Step 2: Create the Dough
In a medium saucepan over medium heat, melt the **butter** with **water** and **salt**. As soon as it starts boiling, quickly stir in the **flour** with a wooden spoon. Don’t be timid! Stir vigorously until it pulls away from the sides of the pan and forms a ball, about 1-2 minutes. The dough should become smooth, and you might hear a slight sizzle as the moisture escapes.
### Step 3: Cool Down the Dough
Remove the saucepan from heat and allow the dough to cool slightly for about 5-10 minutes. This step is crucial because adding eggs while the dough is too hot will cook them, leading to an undesirable texture.
### Step 4: Combine the Eggs
Once the dough is cool enough, add the **eggs** one at a time. Mix well after each addition until each egg is fully incorporated; your dough should be glossy and smooth. It may feel slightly sticky, but that’s perfect. Add in the **sugar** and **vanilla extract**, mixing until everything is well-blended.
### Step 5: Shape the Puffs
Using a spoon or a piping bag, drop generous amounts of dough onto the prepared baking sheet, leaving sufficient space between each puff, as they will expand while baking. Aim for two tablespoons of dough per puff for the best results. The semi-spherical shapes will add character as they bake!
### Step 6: Bake to Perfection
Place the baking sheet in your preheated oven and bake for about 20-25 minutes, or until your puffs are golden brown and puffed up! Avoid opening the oven door while they bake — we don’t want to collapse those airy dreams.
### Step 7: Cool and Enjoy
Once out of the oven, allow the Nun’s Puffs to cool on a wire rack. Dust with powdered sugar or drizzle with chocolate, if you’re feeling extra indulgent. Serve them warm or at room temperature, and savor the heavenly aroma that fills the kitchen!
—
## Tips, Tricks & Variations
– **Storage**: Keep your Nun’s Puffs in an airtight container at room temperature for up to two days. If you prefer to freeze them, place them in a zip-top freezer bag—just thaw and reheat before serving.
– **Reheating**: To bring back the crispiness, reheat puffs in the oven at 350°F (175°C) for 5–10 minutes.
– **Serving Options**: Consider filling these puffs with whipped cream, custard, or chocolate mousse for a richer experience. Simply cut a small slit in the bottom and pipe in your filling.
– **Spices**: Add a touch of cinnamon or nutmeg to the dough for added flavor. It can take your Nun’s Puffs to a new height of comfort food goodness.
– **Vegan Version**: Swap the eggs for flaxseed meal or an aquafaba alternative. The texture may vary, but you’re still left with a delicious treat.
—
## What to Serve With Nun’s Puffs
These delectable pastries are wonderful on their own, but consider pairing them with a few accompaniments to elevate the experience. A drizzle of **chocolate sauce** adds indulgence, while a side of **fresh berries** gives a tart contrast and a pop of color. For a delightful drink pairing, serve them with a warm cup of coffee or a soothing chai tea. The fragrant spices in the chai can complement the sweetness of the puffs beautifully, making for a fantastic brunch or afternoon tea pairing.
—
## Nutrition & Health Benefits
While Nun’s Puffs are undoubtedly a treat, they do provide a few benefits. Each puff contains moderate amounts of protein from the eggs, essential for muscle repair and overall health. Additionally, the ingredients are predominantly whole-food sources, offering some level of nourishment.
Each Nun’s Puff contains approximately 150-200 calories, depending on your additions. As with any dessert, moderation is key; indulge in these sweet pastries occasionally, enjoying the delight they bring without straying too far from a balanced diet.
—
## Frequently Asked Questions
### Can I make Nun’s Puffs ahead of time?
Yes! You can prepare the dough and freeze it for later use. Just make sure you thaw it before baking. Alternatively, fully baked puffs can be frozen and reheated in the oven.
### What can I do if my puffs don’t rise?
If your puffs don’t puff, it’s likely due to not enough steam. Ensure that you let the dough come to a full boil before adding the flour. Also, avoid opening the oven door during baking as this can cause them to collapse.
### How long can I store Nun’s Puffs?
Nun’s Puffs are best enjoyed fresh but can be stored in an airtight container at room temperature for up to two days. For longer storage, freeze them in a zip-top bag.
### Can I fill Nun’s Puffs with whipped cream?
Absolutely! Fill them with whipped cream, custard, or anything your heart desires! Just wait until they’re cool to avoid melting or breaking apart any creamy fillings.
### What is the best way to serve Nun’s Puffs?
Nun’s Puffs are delightful on their own, but to enhance the experience, serve them dusted with powdered sugar or drizzled with chocolate sauce. Pair them with fresh fruit or a comforting beverage!
—
Recap the highlights: Nun’s Puffs are airy, sweet, and oh-so-delightful. They offer unparalleled versatility for fillings and serving options. They’re sure to bring smiles to your kitchen and sweeten your gatherings. So, why not treat yourself and your loved ones to this charming recipe tonight? If you love these Nun’s Puffs as much as I do, leave a comment below or tag me on Instagram to share your creations! Happy baking!