Prep time: 10 minutes
Cook time: 10 minutes
Total time: 20 minutes
Servings: 4
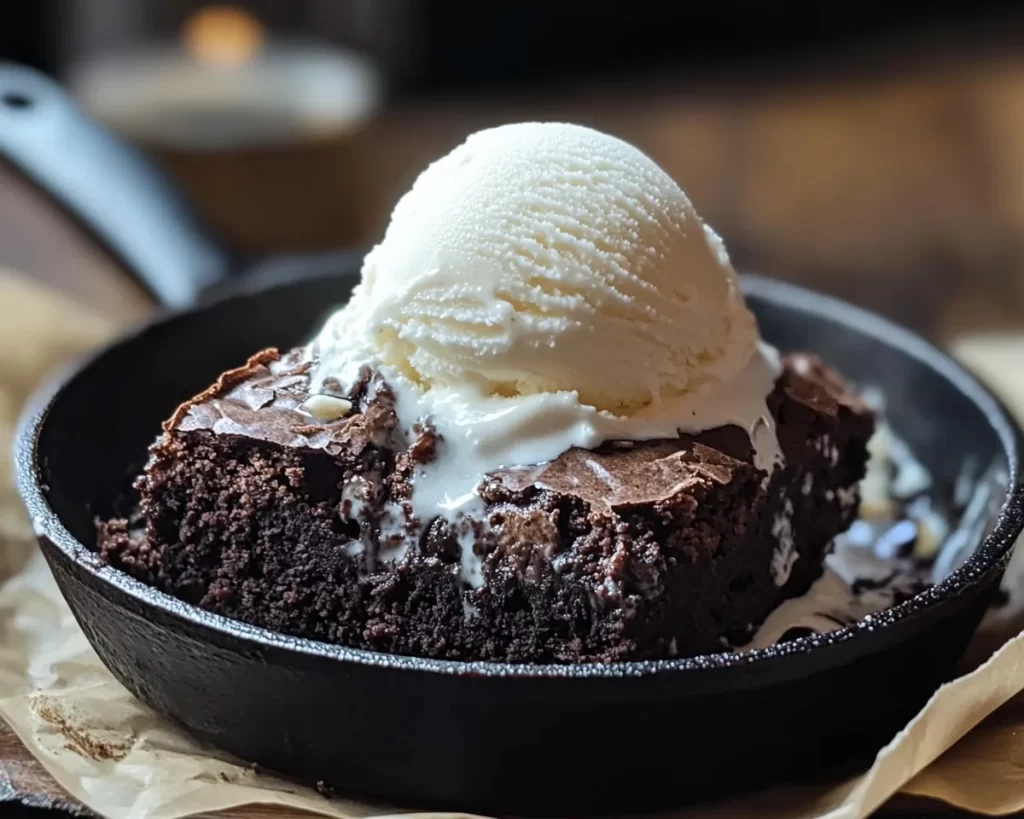
Indulging in a rich and gooey brownie topped with a scoop of creamy vanilla ice cream is a classic dessert that sparks joy. This easy Skillet Brownie with Vanilla Ice Cream is perfect for those spontaneous cravings or when you have unexpected guests. It requires only 20 minutes from start to finish, making it a go-to treat for busy parents, kitchen beginners, or anyone looking for a quick yet impressive dessert.
What Is Dessert Recipes: Skillet Brownie With Vanilla Ice Cream in 20 Minutes?
This delightful recipe combines the decadence of homemade brownies with the transformative power of being baked in a skillet. As it cooks, the edges become slightly crisp while the center remains fudgy, giving a delicious contrast in texture. The addition of vanilla ice cream makes this dessert even more luxurious, creating a melty, satisfying experience with every bite. You can easily whip this up any day of the week, and it’s simple enough for children to help with, making it a fantastic family activity.
Why You’ll Love This
There are countless reasons why this Skillet Brownie with Vanilla Ice Cream will quickly become a staple dessert in your kitchen. First and foremost, it’s so quick to prepare! You don’t have to spend hours measuring and mixing; it all comes together in a matter of minutes, which is perfect for those busy nights. Additionally, the use of a skillet allows for even cooking and an easy cleanup, making it an attractive option for both the seasoned cook and the novice.
Moreover, this dessert is incredibly versatile. You can customize the flavors or toppings according to your liking. From adding nuts for texture to drizzling chocolate sauce on top, it’s all possible! Not to mention, the combination of warm brownies and cold ice cream creates a mouth-watering contrast you simply can’t resist.
Ingredients You’ll Need
For the Skillet Brownie:
- 1/2 cup butter (melted) – Adds richness and moisture to the brownies.
- 1 cup granulated sugar – Sweetens the brownies, balancing out the rich chocolate.
- 2 large eggs – Provides structure and helps bind the mixture.
- 1 teaspoon vanilla extract – Gives the brownies a delightful aroma.
- 1/3 cup unsweetened cocoa powder – The star ingredient that makes these brownies chocolaty.
- 1/2 cup all-purpose flour – The base that adds body to the dessert.
- 1/4 teaspoon salt – Enhances the flavors and balances sweetness.
- 1/4 teaspoon baking powder – Adds a slight lift to the brownies.
- Optional: 1/2 cup chocolate chips – For an extra chocolaty experience.
For Serving:
- Vanilla ice cream – Creamy, delicious, and the perfect accompaniment to warm brownies.
- Chocolate sauce – For drizzling on top for chocolate lovers!

How to Make
- Preheat your oven to 350°F (175°C). For optimal baking, ensure your oven is fully preheated before placing your skillet inside.
- In a mixing bowl, combine the melted butter, granulated sugar, eggs, and vanilla extract. Use a whisk to blend until the mixture is smooth and creamy. The mixture should become pale and slightly thickened.
- In another bowl, whisk together the cocoa powder, flour, salt, and baking powder. Gradually add this dry mixture into the wet ingredients. Stir gently until just combined; a few lumps are okay as overmixing will result in dense brownies.
- If you are using chocolate chips, fold them into the brownie batter. This addition will provide melted pockets of chocolate in every bite. Pour the batter into a well-greased oven-safe skillet.
- Bake the brownie for about 10 minutes, or until a toothpick inserted into the center comes out with a few moist crumbs. The texture should be fudgy, not dry!
- Remove the skillet from the oven and let the brownie cool for a few minutes. Serve warm with a scoop of vanilla ice cream on top and a drizzle of chocolate sauce if desired. Enjoy the warmth of the brownie with the cold ice cream for an irresistible treat!
Variations & Substitutions
Nutty Chocolate Brownie: Consider adding 1/2 cup of chopped nuts, such as walnuts or pecans, to the brownie batter for an added crunch. Not only do they provide texture, but they also bring a rich flavor that complements the chocolate beautifully.
Peanut Butter Swirl: For a delicious twist, you can swirl in 1/2 cup of peanut butter into the brownie batter before baking. The peanut butter will create a creamy richness and a delightful flavor contrast.
Chocolate Mint Brownies: For those who love a minty flavor, add 1/2 to 1 teaspoon of peppermint extract into the mixture. This variation will provide a refreshing touch that pairs wonderfully with vanilla ice cream.
Vegan Brownies: If you want a plant-based option, substitute the eggs with 1/2 cup of unsweetened applesauce or a mashed banana, and use a vegan butter alternative. The result will still be deliciously fudgy!
Common Mistakes to Avoid
One common mistake is overbaking the brownies. Overbaking can result in dry and crumbly brownies, losing that fudgy texture you desire. Keep an eye on them, and remember that the brownies will continue to cook slightly in the skillet even after you take them out.
Another mistake is not using a well-greased skillet. If the skillet is not properly greased, the brownie may stick, making it difficult to serve. Make sure to use a generous amount of butter or non-stick spray to ensure easy removal.
Lastly, don’t forget to measure your ingredients accurately. Baking is a science, and even a slight deviation can lead to undesired results. Use a scale for the best precision, particularly with the flour and sugar.
Storage, Freezing & Reheating Tips
To store any leftover brownies, allow them to cool completely before transferring them to an airtight container. They can be stored in the refrigerator for up to a week. If you wish to freeze them, wrap the brownies tightly in plastic wrap and then in aluminum foil. They will last in the freezer for up to three months.
When you’re ready to enjoy them again, thaw them in the refrigerator overnight. For a warm treat, pop them in the oven at 350°F (175°C) for about 5–10 minutes. Add a scoop of vanilla ice cream on top after reheating to recreate that fresh-out-of-the-oven experience.
Frequently Asked Questions
Can I make this brownie recipe gluten-free?
Absolutely! To make gluten-free brownies, simply substitute all-purpose flour with a high-quality gluten-free flour blend. You can also use almond flour for a delightful nutty flavor. Just ensure that your other ingredients, like baking powder, are also gluten-free to avoid cross-contamination.
How do I know when the brownies are done baking?
The best way to check for doneness is to insert a toothpick into the center of the brownies. If it comes out with a few moist crumbs, your brownies are perfectly baked. Remember, if you see wet batter on the toothpick, they need a little more time.
Can I use a different size skillet for this recipe?
While a cast-iron skillet works best for even heat distribution, you can use any oven-safe skillet. Just be mindful of the cooking time, as a smaller skillet may require a shorter baking time and a larger one may take a bit longer.
Is it necessary to use chocolate chips?
No, using chocolate chips is entirely optional. The brownie batter itself is rich and chocolaty enough on its own. However, chocolate chips do create pockets of melted chocolate, enhancing the overall flavor and texture of the finished brownie.
What toppings can I use on the brownies?
You have a plethora of options for toppings! You can serve them plain, dust with powdered sugar, drizzle with chocolate or caramel sauce, or even top with fresh fruit like raspberries or strawberries for a tart contrast. The options are endless for how to elevate this delightful dessert!
Conclusion:
This Skillet Brownie with Vanilla Ice Cream is a swift, crowd-pleasing dessert that can become a favorite for both your family and friends. With its rich flavors and delightful textures, you can create a memorable experience in just 20 minutes. Whether you’re indulging after a long day or celebrating a special occasion, this recipe is sure to impress. Enjoy the convenience and taste without compromising quality!