Prep time: 20 minutes
Cook time: 10 minutes
Total time: 30 minutes
Servings: 24 cookies
Making cookies can often feel like a daunting task, but when you throw in the festivity of Easter, the process can transform into a delightful experience. Easter Egg Sugar Cookies are not just another batch of ordinary cookies; they are a canvas for creativity and a vehicle for deliciousness. Imagine the scent of vanilla wafting through your kitchen as these vibrant cookies come together, bringing joy to your family and friends. Whether you’re a seasoned baker or a beginner, this recipe will guide you through each step to create beautiful, colorful cookies that will satisfy your sweet tooth and bring smiles to everyone around.
These cookies are so special because they are incredibly versatile. The base recipe can easily be adapted with different flavors or decorations, making every batch unique. You will learn how to create a soft and chewy cookie, how to decorate them with royal icing for that perfect finish, and some wonderful variations that can make your Easter celebration even more exciting. Let’s dive into this fun and festive baking adventure together!
What Is Easter Egg Sugar Cookies?
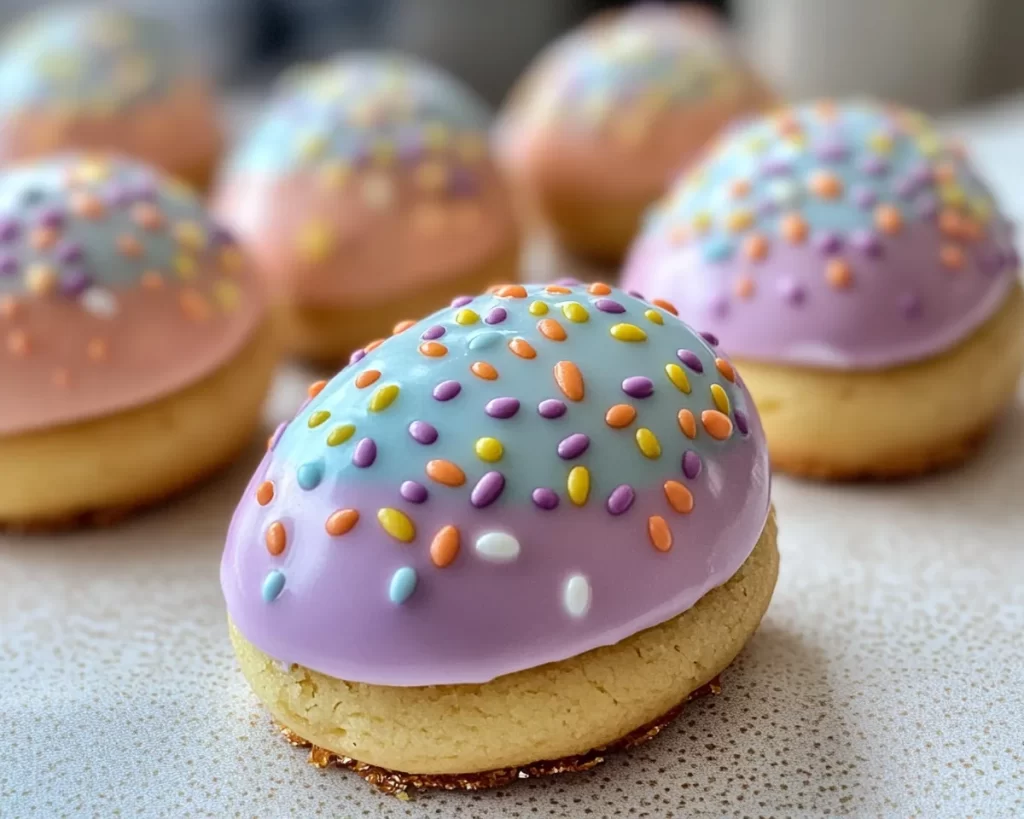
Easter Egg Sugar Cookies are a delightful treat that combines the sweetness of a classic sugar cookie with the playful imagery of Easter eggs. Originating from traditional baking practices during the Easter season, these cookies often feature vibrant colors and intricate decorations that resemble decorated eggs—an iconic symbol of Easter. The texture of these cookies strikes a perfect balance between being soft in the middle and slightly crisp on the edges, making them incredibly satisfying to bite into.
The flavor profile is distinctly sweet, with hints of vanilla and butter that create a comforting taste. What makes these cookies particularly appealing is their adaptability. You can customize them with different colors, designs, and even flavors like lemon or almond to match your personal taste preferences. The joy of customizing each cookie to your heart’s content is a big part of why they have become a beloved staple during the Easter festivities.
One of the appealing aspects of these cookies is the visual feast they offer. With a little creativity, you can transform these simple dough circles into an array of colorful eggs, each adorned with adorable patterns. Not only are these cookies a treat for your taste buds, but they are also a beautiful addition to any Easter dessert table, creating a festive atmosphere that everyone can enjoy.
Why You’ll Love This
You’re going to love this Easter Egg Sugar Cookies recipe for several reasons. First and foremost, the taste is simply divine. Each cookie is perfectly sweet with just the right amount of buttery richness. When you sink your teeth into one, the soft but slightly crisp texture offers a delightful mouthfeel that pairs perfectly with a glass of milk or a cup of tea.
Another significant advantage is the ease of preparation. This recipe is designed to be straightforward, even for those who may not have extensive baking experience. You will find that with just a few key ingredients and some simple steps, you can create a batch of stunning cookies that look and feel professionally made. Additionally, this recipe is cost-effective, allowing you to celebrate Easter without breaking the bank.
Health is often a concern when it comes to desserts, but you can enjoy these cookies in moderation as part of a balanced diet. You can also experiment with healthier alternatives if you want, ensuring that everyone can indulge without guilt. The versatility of this recipes allows for plenty of room for creativity, enabling you to customize flavors and add-ins like chocolate chips or nuts based on your liking or dietary restrictions.
Ingredients You’ll Need
- All-purpose flour: The base of the cookie, providing structure and texture. You can substitute with gluten-free flour if needed.
- Baking powder: This ingredient helps the cookies rise and gives them a light texture.
- Salt: A crucial component that enhances the sweetness of the sugar.
- Unsalted butter: The primary fat that adds creaminess and a rich flavor. For a dairy-free option, use coconut oil or margarine.
- Sugar: Granulated sugar is used to sweeten the dough. You can try using a sugar substitute for a lower-calorie option.
- Egg: Acts as a binding agent, helping to hold the dough together. Flaxseed meal can be used as an egg substitute for a vegan version.
- Vanilla extract: Adds a rich and aromatic flavor, enhancing the overall taste of the cookies.
- Royal icing: This optional but recommended ingredient is used for decorating and giving the cookies their beautiful Easter egg appearance.
- Food coloring: Perfect for dyeing your royal icing to create colorful patterns and designs on the cookies.
Each ingredient plays a crucial role in achieving the perfect Easter Egg Sugar Cookie. Understanding these roles can not only improve your cooking skills but also allow you to confidently adjust the recipe based on your dietary needs or preferences.
How to Make
To create these delightful Easter Egg Sugar Cookies, follow these step-by-step instructions:
- Gather your ingredients: Start by assembling all your ingredients. Measure out the all-purpose flour, baking powder, salt, unsalted butter, sugar, egg, and vanilla extract. Having everything ready will streamline the process and make baking less chaotic, especially if you’re involving kids in the fun.
- Prepare your dry ingredients: In a large bowl, whisk together the all-purpose flour, baking powder, and salt. This step ensures that the baking powder is evenly distributed and helps in achieving a consistent rise in your cookies. Set this mixture aside to focus on the wet ingredients.
- Cream the butter and sugar: In another mixing bowl, beat the room-temperature unsalted butter and sugar together. Use an electric mixer or a wooden spoon to cream the mixture until it is light and fluffy, which should take about 3-5 minutes. This step is crucial because it incorporates air, making your cookies tender and light.
- Add the egg and vanilla: Follow up by adding the egg and vanilla extract to the creamed butter and sugar. Beat the mixture until everything is well combined, creating a smooth consistency. The eggs provide a binding agent that holds the cookie together while adding richness to the flavor.
- Combine wet and dry ingredients: Gradually add the flour mixture to the wet ingredients, mixing until the dough just comes together. Be careful not to overmix; this can lead to tougher cookies. Once combined, you can use your hands to knead the dough slightly, forming it into a ball.
- Chill the dough: Wrap the dough in plastic wrap and refrigerate for at least 30 minutes. Chilling the dough is essential for developing flavor and preventing the cookies from spreading too much while baking.
- Preheat the oven: About 10 minutes before you take the dough out of the fridge, preheat your oven to 350°F (175°C). This timing ensures your cookies will go into a hot oven, allowing them to bake evenly and achieve that golden color.
- Roll out the dough: After chilling, take the dough out and roll it out on a lightly floured surface to about 1/4 inch thickness. Use cookie cutters shaped like eggs, flowers, or other fun designs to cut out your cookies.
- Bake the cookies: Place the cut-out cookies onto a baking sheet lined with parchment paper. Bake them in the preheated oven for about 8-10 minutes or until the edges are lightly golden. Keep a close eye on them, as baking times may vary based on your oven.
- Cool the cookies: Once baked, remove the cookies from the oven and let them cool on the baking sheet for about 5 minutes before transferring them to a wire rack. Allow them to cool completely before decorating to ensure that the icing doesn’t melt.
- Decorate the cookies: While the cookies cool, prepare your royal icing or other decorations. Once cool, use piping bags or spatulas to decorate them in beautiful colors and patterns, transforming the plain cookies into stunning Easter-themed treats!
This method gives you not just delightful cookies, but the process itself can become a joyful family occasion. Enjoy the scents that fill your kitchen, the laughter shared among loved ones, and the satisfaction of creating something beautiful and delicious all at once!
Variations & Substitutions
Chocolate Easter Egg Cookies: If you’re a chocolate lover, consider using cocoa powder in your dough. Replace about one-third of the flour with unsweetened cocoa powder, which will add a rich chocolate flavor to your cookies. This variation is perfect for those who crave deeper flavors and chocolatey treats. The cookies will have a slightly different texture, so keep an eye on the baking time to ensure they remain chewy and delicious.
Gluten-Free Easter Egg Cookies: For those with gluten sensitivities, you can easily adapt this recipe using gluten-free all-purpose flour. Be sure to check that your flour blend contains xanthan gum, as this will help replicate the texture typically provided by wheat flour. The cookies will still be flavorful and just as delightful as the traditional version, allowing everyone to enjoy them without worry.
Citrus Zest Cookies: Adding a splash of citrus zest, such as lemon or orange, to your dough can brighten the flavors significantly. Simply grate the zest of one lemon or orange into your dough during the mixing phase. This variation lends a refreshing taste that complements the sweetness of the sugar cookies wonderfully, making them particularly enjoyable during spring.
Almond Sugar Cookies: If you want to switch up the flavor profile, replace the vanilla extract with almond extract. Almond extract provides a unique nutty flavor that pairs perfectly with the sugar base. Feel free to add slivered almonds on top of the icing for a crunchy texture. This variation appeals to those who enjoy a slightly different twist on the classic sugar cookie.
Common Mistakes to Avoid
One common mistake when making Easter Egg Sugar Cookies is **overmixing the dough**. While it can be tempting to mix until perfectly smooth, overmixing can develop the gluten too much, resulting in tough cookies. Always mix just until the ingredients are combined for a softer, chewier texture.
Another issue to watch out for is **skipping the chilling step**. Chilling the dough is essential for preventing your cookies from spreading too much during baking. If you rush this step, your cookies may come out flat instead of beautifully puffed with a nice shape. Therefore, it is important to allow enough chilling time for optimum results.
Additionally, be cautious of **baking at the wrong temperature**. Ensure that your oven is fully preheated before placing the cookies inside. An oven that is not hot enough will yield cookies that are excessively soft and lack the right structure. Conversely, too hot an oven can cause burnt edges while leaving the centers raw. Always double-check the temperature for the best outcome.
Lastly, don’t overlook the **cooling process**. It might be tempting to decorate your cookies straight out of the oven, but doing so can lead to melted icing and a cluttered appearance. Allow your cookies to cool completely on a wire rack first, ensuring that your decorated cookies look just as good as they taste.
Storage, Freezing & Reheating Tips
Proper storage of your Easter Egg Sugar Cookies is vital to maintain their deliciousness. Place cooled cookies in an airtight container lined with parchment paper to prevent them from sticking together. They can typically remain fresh at room temperature for about one week.
If you want to store cookies for a longer period, consider freezing them. To freeze, place the cookies in a single layer on a baking sheet and freeze until solid. Once frozen, transfer them to a freezer-safe bag or container, where they can last for up to 3 months. When you are ready to enjoy them, simply thaw at room temperature for a few hours, and they will be just as delightful as when they were freshly baked.
When it comes to reheating, gently warm cookies in the microwave for about 10-15 seconds. Be cautious not to overheat them, as this can lead to a chewy texture instead of the desired softness. For those who prefer a little crispness, a few minutes in a preheated oven at 350°F (175°C) can rejuvenate their freshness, making them taste newly baked.
Remember that food safety is crucial when it comes to storing your creations. Make sure to consume any decorated cookies within one week to avoid any spoilage from the icing or perishables used in decoration.
Frequently Asked Questions
Can I use a different type of flour?
Yes, you can substitute all-purpose flour with gluten-free flour blends, almond flour, or even whole wheat flour. However, the texture might slightly differ, so adjustments may be necessary in the mixing and baking times to ensure the cookies maintain their delightful softness.
What kind of icing should I use for decorating?
Royal icing is recommended for decorating Easter Egg Sugar Cookies since it dries hard and provides a perfect canvas for detailed designs. You can also use buttercream frosting if you prefer a softer texture, though it won’t harden as well.
Can I prepare the dough in advance?
Absolutely! The sugar cookie dough can be made in advance and stored in the refrigerator for up to three days. You can also freeze the dough for up to three months. When you’re ready to use it, thaw it overnight in the refrigerator and then roll, cut, and bake as directed.
How should I decorate my cookies?
Get creative! Use royal icing, colored sugar, sprinkles, or edible markers. You may also consider drizzling melted chocolate over your cooled cookies for a different touch. There are countless ways to make your cookies festive and unique.
What’s the best way to get even shaping for the cookies?
Using cookie cutters can help, but for the best result, use a rolling pin and a straight edge to roll the dough evenly. You can also place wooden dowels or thickness guides on either side of the dough while rolling to achieve uniform thickness. This ensures that all cookies bake evenly.
Conclusion:
Creating Easter Egg Sugar Cookies not only satisfies your sweet cravings but also brings heaps of joy to the Easter holiday. The combination of beautifully decorated cookies and their delicious taste offers a delightful experience for all who partake. Whether you’re baking for family or hosting a spring gathering, this recipe allows for creativity, sharing, and festive decoration. I encourage you to embrace the joy of cookie-making, customize your creations, and share them with those you love. Don’t forget to let your personal flair shine through! Give this recipe a try, and it may just become a cherished tradition in your home.