Prep time: 20 minutes
Cook time: 10 minutes
Total time: 30 minutes
Servings: 24 cookies
Making Easter Funfetti Cookies is a delightful way to celebrate the season. These colorful cookies are perfect for any festive occasion, bringing joy and sweetness to your gatherings. With their vibrant sprinkles and soft, chewy texture, they’ll be a big hit with kids and adults alike. Let’s dive into the world of funfetti cookies and create something memorable!
What Is Easter Funfetti Cookies?
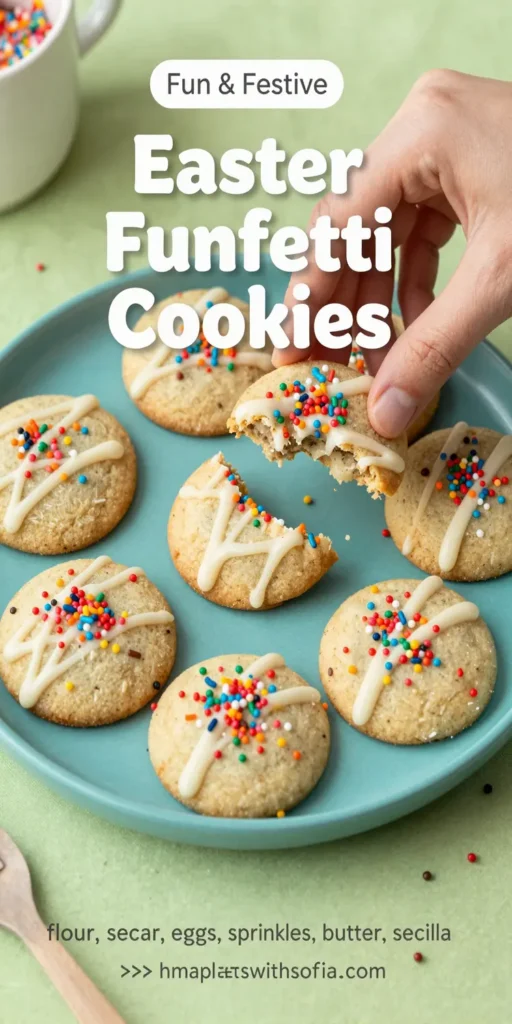
Easter Funfetti Cookies are a colorful twist on the classic sugar cookie, featuring vibrant sprinkles scattered throughout the dough. The term “funfetti” describes the colorful bits of sprinkles that add a joyful appearance to baked goods. These cookies not only taste delightful but also look cheerful, making them ideal for spring celebrations and egg hunts. Crafted with a buttery dough, these cookies promise a soft and chewy texture, which complements the sweetness of the sprinkles beautifully. The combination feels festive and inviting, making each cookie a mini celebration in itself.
Why You’ll Love This
There are numerous reasons to love Easter Funfetti Cookies. First and foremost, they are visually stunning, adding a splash of color to your dessert table. The vibrant sprinkles create a joyous atmosphere that’s perfect for any gathering, especially during the Easter festivities. Furthermore, they are incredibly easy to make, which is a boon for busy parents or beginner bakers looking to impress. The dough comes together quickly, and the delightful aroma wafting through your kitchen is an experience in itself. Finally, these cookies are versatile; you can mix and match various sprinkles to create a personalized look unique to your celebration!
Ingredients You’ll Need
- 2 ¾ cups all-purpose flour: This serves as the base of the cookie, providing structure and texture.
- 1 teaspoon baking soda: This ingredient helps the cookies rise, ensuring a soft and chewy consistency.
- ½ teaspoon salt: Salt enhances the flavors of the dough, balancing out the sweetness of the sugar and sprinkles.
- 1 cup unsalted butter, softened: Butter creates a rich flavor and contributes to the chewy texture of your cookies.
- 1 cup granulated sugar: This sweetener gives the cookies their signature sweetness and a slight crispness.
- 1 cup brown sugar, packed: Brown sugar adds moisture and a hint of caramel flavor, making the cookies even more irresistible.
- 2 large eggs: Eggs bind the ingredients together and provide moisture for a tender cookie.
- 2 teaspoons vanilla extract: Vanilla adds depth and unmistakable flavor that enhances the cookie dough.
- 1 cup colorful sprinkles: These vibrant bits add fun and festivity, making the cookies visually appealing.
How to Make
- Preheat your oven to 350°F (175°C). Start by lining two baking sheets with parchment paper. This will prevent your cookies from sticking and ensure an even bake.
- In a medium bowl, combine the all-purpose flour, baking soda, and salt. Whisk these together until well mixed, ensuring that the baking soda is evenly distributed throughout the flour. Set aside to prepare for the wet ingredients.
- In a large mixing bowl, beat the softened unsalted butter, granulated sugar, and brown sugar together until the mixture is light and fluffy. This process should take about 2-3 minutes. The fluffiness indicates that you’ve incorporated enough air into the mix, which helps create a light texture.
- Add the eggs, one at a time, mixing well after each addition. Next, pour in the vanilla extract. Continue to beat the mixture until everything is seamlessly blended together, creating a creamy dough.
- Gradually add the flour mixture to the wet ingredients, mixing on low speed until just combined. Avoid overmixing; this can lead to tough cookies. Finally, gently fold in your colorful sprinkles with a spatula, ensuring an even distribution without crushing the sprinkles.
- Scoop tablespoon-sized portions of the cookie dough onto the prepared baking sheets, spacing them about 2 inches apart. This allows room for spreading during baking, ensuring individual cookies do not stick together.
- Bake the cookies in the preheated oven for 8-10 minutes or until the edges are lightly golden. The centers will look soft – this is perfectly fine as they will continue to cook as they cool.
- Once baked, remove the cookies from the oven and allow them to cool on the baking sheets for about five minutes before transferring them to a wire rack to cool completely. This step is essential for achieving the perfect chewy texture.
Variations & Substitutions
Chocolate Chip Funfetti Cookies: For those who adore chocolate, consider adding 1 cup of semi-sweet chocolate chips to the dough. This adds a rich chocolate flavor that pairs beautifully with the sweet vanilla notes of the cookies.
Gluten-Free Funfetti Cookies: Substitute the all-purpose flour with a 1:1 gluten-free flour blend. Most of these blends contain xanthan gum, which acts as a binder and ensures that your cookies hold together well, providing that same enjoyable chewy texture.
Vegan Funfetti Cookies: Replace the butter with coconut oil or a vegan butter substitute. Utilize flax eggs (1 tablespoon ground flaxseed mixed with 2.5 tablespoons of water per egg) in place of regular eggs. This keeps the cookie delightful without using animal products.
Seasonal Sprinkles: Change up the flavor and appearance by using themed sprinkles. Consider red, white, and blue sprinkles for the 4th of July or orange and black for Halloween cookies.
Common Mistakes to Avoid
Overmixing the Dough: One of the biggest pitfalls when making cookies is overmixing the dough. This can result in cookies that are tough and lacking that desired chewiness. Mix the wet and dry ingredients just until combined.
Not Measuring Ingredients Accurately: Baking is a science, and precise measurements are crucial for the success of your cookies. Scoop flour lightly into your measuring cup and level it off with a knife for accuracy. A food scale can also be beneficial for precise measurements.
Underbaking Cookies: It can be tempting to pull cookies from the oven as soon as they look done. However, underbaking can lead to raw centers. For the perfect chewy texture, look for golden edges while still having soft centers.
Using Cold Ingredients: Cold butter or eggs can lead to a dough that doesn’t mix well. Be sure to let your butter come to room temperature and ideally use eggs that are at room temperature to ensure a smooth blend.
Storage, Freezing & Reheating Tips
To properly store your Easter Funfetti Cookies, place them in an airtight container at room temperature. They will remain fresh for about one week. If you wish to store them longer, you can freeze the baked cookies. To do this, allow them to cool completely and then stack them between layers of parchment paper in a freezer-safe container. They can last up to three months in the freezer.
To reheat, simply take out the desired number of cookies, and place them on a baking sheet in an oven preheated to 300°F (150°C) for about 5-7 minutes. This method helps restore their soft and chewy texture while keeping the sprinkles vibrant.
Frequently Asked Questions
Can I use milk instead of butter in this recipe?
Using milk instead of butter is not advisable since butter provides not only fat for moisture but also flavor. If you’re looking to reduce dairy, consider using vegan butter substitutes or coconut oil for similar results.
What should I do if my dough is too sticky?
If you find that your dough is too sticky to handle, it may be due to the humidity in your environment or if it wasn’t chilled long enough. You can add a tablespoon of flour at a time until the dough reaches an appropriate consistency. For best results, consider chilling the dough for at least 30 minutes before baking. This firms up the dough, making it easier to work with.
Can I make the cookie dough ahead of time?
Absolutely! You can prepare the dough ahead of time and store it in the refrigerator for up to 24 hours. Alternatively, roll the dough into balls and freeze them. When you’re ready to bake, just take out the frozen dough and bake them straight from the freezer, adding an extra minute or two to the baking time.
How can I make these cookies more festive for Easter?
To enhance the festive flair, consider adding pastel-colored sprinkles or incorporating chopped candy eggs into the dough for an extra surprise. Decorating the cooled cookies with icing or additional sprinkles also adds a lovely touch.
Conclusion:
Easter Funfetti Cookies are not just a treat; they are an experience bursting with flavor and color. They are perfect for any occasion, especially during festive celebrations. Whether you’re an experienced baker or a busy parent looking for a fun project, these cookies provide both joy and deliciousness. Remember to embrace the variations and get creative while baking! The delightful combination of flavor, fun, and festivity makes these cookies a must-try this Easter.