Let’s Get Real
Alright, let’s talk about lemon bars. If you’ve ever experienced the joy of biting into a perfectly tangy, buttery lemon bar, you’re probably nodding your head in agreement right now. If you haven’t? Well, I’m genuinely concerned for your taste buds. But seriously, there’s a magical quality about lemon bars — they’re like a sunshine-infused treat that can brighten even the dreariest of days. And let’s be real, with the weather fluctuating between “I need a hoodie” and “is that fire from the sun?” I think I deserve all the citrus comfort food I can get.
Now, here’s my confession: I was a lemon bar hater as a kid. Yep, you read that right! I recoiled at the thought of the tartness, cringing at every slice offered to me at a family gathering. But one fateful day, my adult palate (which I swear is a thing) finally caught up with my sweet tooth, and I went from “no, thank you” to “where are all the lemon bars and can I have seconds, thirds, and maybe a whole pan?”
So, how did I come up with this Easy 2-Ingredient Lemon Bars recipe? Well, during one of my recent “let’s clean out the kitchen” phases, I discovered two sad little ingredients: a can of sweetened condensed milk lingering in the back of my pantry and a few lemons on the verge of Google Maps–level rampage into the trash bin. C’mon, I’m not one to waste food; that would be a culinary crime! In a moment of inspiration (or perhaps desperation), I thought, “What if I just whip these together?” Spoiler alert: it’s a game changer.
Ingredients, Unfiltered
What’s Really in Easy 2-Ingredient Lemon Bars
Let’s break this down so we can embrace the lusciousness of these babies, shall we?
Sweetened Condensed Milk: Oh boy, this sweet nectar of the gods is the secret weapon here. It’s thick, creamy, and adds a sweetness that’s just insane. I swear, if I could take a bath in this stuff, I would. No shame in my game. You can use the regular kind, but I like to toss a can of low-fat in there because balance, right? Make your body think you’re being healthy while secretly devouring a treat.
Lemons: The true stars of the show! What’s life without a little zest and tang? Lemons not only brighten these bars in flavor but also in color. And I’m convinced that the aroma of fresh lemons can turn a frown upside down faster than a charming cat video. Pro tip: roll your lemons on the counter before juicing them; it’ll release more juice and make you feel like a kitchen pro.
That’s it! Two ingredients! You seriously don’t even need flour or eggs. And no, this isn’t a cooking cheat; it’s a culinary miracle.
Let’s Talk Health (or Not)
Is This Even Healthy? Let’s Discuss
Alright, let’s pause here for a hot minute and address the health aspect because we all know that nagging voice in the back of our head whispers, “But is it good for you?” So let’s break that down.
Sure, there’s sweetened condensed milk, which has sugar squared (or multiplied by infinity), and calories galore. And yes, lemons are technically healthy but they won’t make up for the sugar tsunami happening in this recipe. But here’s the deal: I sleep just fine at night. Sometimes you’ve got to let your inner 5-year-old out and indulge, especially when it’s as simple as these lemon bars. Life is a series of choices, and I choose joy — and lemon bars — every time.
So if someone gets all “health police” on you, just remind them that, hey, everything in moderation, folks! And you can always eat a salad afterward! Okay, maybe I’ll stick to my spiritual guidance instead.
Your Grocery List
Here’s What You’ll Need
– 1 can (14 ounces) sweetened condensed milk
– 2 large lemons
This quantity makes about 12 bars. Just enough to share… or not. I don’t judge.
The Actual Cooking Part
Okay, Let’s Make This
Now we get to the fun part, where all the magic happens. And by magic, I mean the part where you try not to accidentally squirt lemon juice in your eye. Let’s roll, kitchen warriors!
1. **Preheat Your Oven:** First, crack the oven open and set it to 350°F (175°C). Trust me when I say this is essential; your bars need a warm hug from the oven to set properly.
2. **Prep Your Lemon Juice:** Grab those lemons and roll them around like they’re prepping for the red carpet. Cut them in half, and juice them into a bowl. You’ll need about half a cup of fresh lemon juice, which equates to about 2 lemons, but you may want to squeeze an extra one just to be sure. Lemon juice is what gives these bars their zing, so be generous! (Do you sense my enthusiasm for these zesty wonders yet?)
3. **Mix It Up:** In a mixing bowl, pour in the sweetened condensed milk. Just let that creamy goodness slide in there like it’s at a birthday party with free cake. Then, add your freshly squeezed lemon juice. Stir until smooth. And I mean, stir like you’re channeling your inner chef. You want those two ingredients to become best friends, preferably over a glass of Rosé — but that might just be my daydream talking.
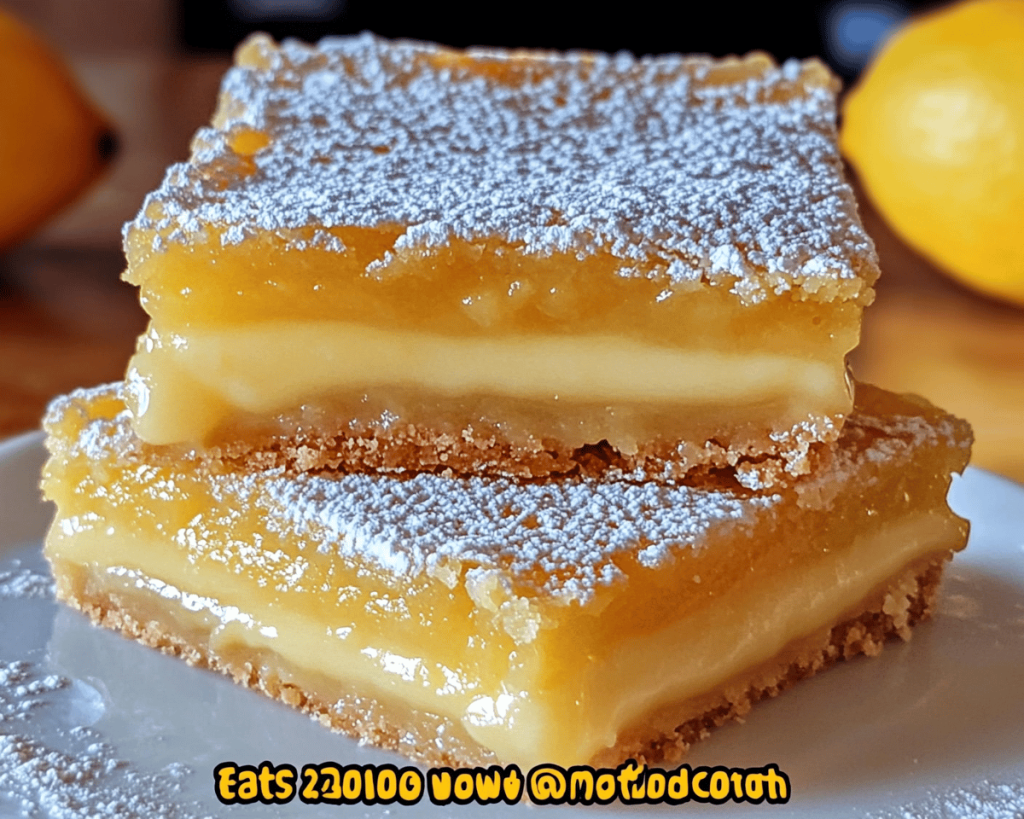
4. **Pour and Bake:** Now that your heavenly mixture has come together, pour it into an 8×8 baking dish. I like to line mine with parchment paper; it makes the bars super easy to lift out later even if I end up acting like a toddler and topple them everywhere. No judgment. Place the baking dish in your preheated oven and let those lovely bars bake for about 20-25 minutes. The edges should turn slightly golden, and the center might look a bit set but still slightly jiggly — don’t panic if it looks messy; it’s a sign of deliciousness!
5. **Cool Down:** Remove from the oven and let it cool — the hardest part, really. Once it’s at room temperature, pop those bars in the fridge for at least 2 hours. The cooling is key; you want these bars to firm up like they’re heading to a powerlifting competition.
6. **Slice and Serve:** Once chilled, take them out of the fridge and cut them into squares. I like to dust mine with powdered sugar because, let’s be real, it makes everything look fancy. Plus, they’ll look like they came straight out of a trendy bakery instead of my off-kilter kitchen.
Side Notes & Sassy Hacks
Bonus Tips You Didn’t Ask For
– **Use Organic Lemons:** If you can, go for organic lemons. They tend to have a brighter flavor and zest that elevates the whole dish. Farmers’ market, anyone?
– **Leftover Egg Whites:** This is a real-life hack! If you ever find yourself with leftover egg whites (from, say, a failed vegan meringue recipe), you can whip those bad boys up into meringue clouds to top your lemon bars. Pro move for the extra show-off points!
– **Play with Flavor:** Feeling adventurous? Add a splash of vanilla extract for a depth of flavor or infuse some lemon zest for that extra citrus kick. Your lemon bars will appreciate the effort.
– **Store Properly:** These bars keep well in the fridge for about 5 days. They can also be frozen; just wrap them tightly to avoid freezer burn. When you’re ready to indulge (like at 3 am), thaw them out in the fridge overnight.
– **Make it a Party:** Throw in a little crushed graham cracker crust if you’re feeling frisky. Just mix crushed graham crackers with melted butter, press it into the bottom of your dish as a base, and then pour the lemon mixture on top. It’s like a beach vacation in dessert form.
Final Words of (Culinary) Wisdom
And there you have it! Two ingredients, a few simple steps, and a culinary masterpiece that would make even your grandma jealous. If you try it — and I sincerely hope you do — tag me. I want to see the lemon bar magic you whip up! Or just send me a mental high-five because at the end of the day, we’re all just trying to navigate this wacky food journey together. May your lemon bars be tangy, sweet, and utterly delightful. Enjoy, my culinary comrades! 🍋