Let’s get Real
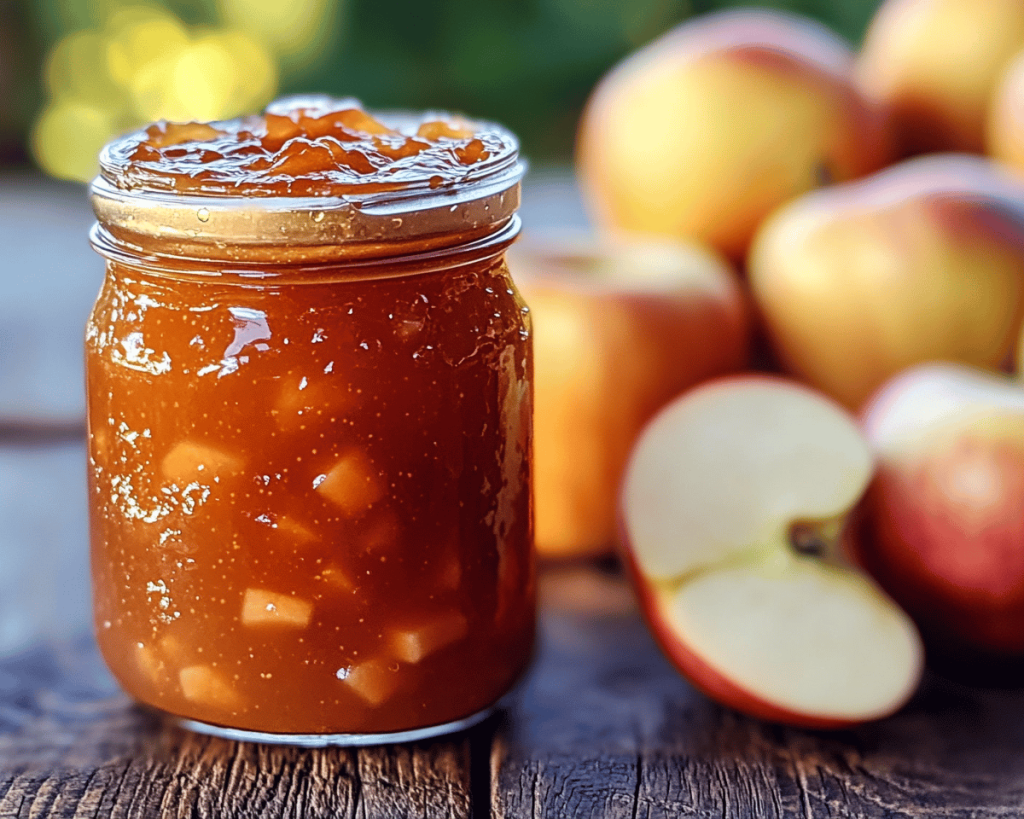
Oh, fall. That whimsical season where the air becomes crisp, sweaters come out of hibernation, and the world gets obsessed with crunchy leaves and pumpkin spice. Am I right? However, what truly lights my autumn bonfire of joy is the caramel apple. Those delicious, sticky, gooey delights that take me right back to childhood fairs, where I would beg my parents for quarters to buy one that was way too big for my tiny hands. I mean, who can forget the struggle of taking a glorious bite and it feeling like a crime scene of caramel and apple bits everywhere? Good times, my friends. But why should that nostalgic sweetness be confined to street fairs? Enter my latest obsession: Easy Fall Caramel Apple Jam.
Imagine this: it’s a rainy Saturday afternoon, the kind that begs you to stay indoors, put on fuzzy socks, and whip up something ridiculously delicious. That’s all it takes for the creative juices to start flowing. And once I thought of making a jam out of that fall classic caramel apple, I knew I’d found my project for the day. Spoiler alert: it was a game changer. Trust me; you’ll want to keep this jam stocked in your pantry to pair with everything from toast to ice cream. Don’t worry; I’ll spill all the secrets so you can recreate this sugary symphony of flavors at home. Grab your apron, we’re diving in!
Ingredients, Unfiltered
What’s Really in Easy Fall Caramel Apple Jam
Now, let’s talk about what you’ll need to make this magical jar of autumnal joy. The good news? Most of these ingredients are probably hanging out in your kitchen right now, just waiting for a purpose. Let’s get into the gritty details of what each one does, shall we?
Apples: The main star of the show! I prefer using apples that are sweet and a little tart, like Honeycrisp or Granny Smith. They add a refreshing zing to the sweet jam. Plus, their crispiness holds very well during cooking—you want that perfect apple texture!
Brown Sugar: This is what brings the “caramel” right into the apple jam. It gives that rich, molasses flavor that pairs so perfectly with the sweetness of the apples. Let’s face it—if you’re not a fan of brown sugar, we can’t be friends. Just kidding! But really, you need this for that deep sweetness.
Butter: Because, let’s be honest, I’m a firm believer that butter makes everything better. It adds a richness that takes this jam from “meh” to “heck yes!” Plus, the aroma of melting butter with apples and sugar is what my dreams are made of.
Vanilla Extract: A splash of this divine nectar just to round everything off. Honestly, you could put vanilla extract in water and it would still taste like a gift from the culinary gods.
Cinnamon: This spice is fall in a jar. Do you even fall if you don’t sprinkle cinnamon on everything? It adds warmth and coziness to the jam, making you want to snuggle up with a blanket. Seriously, mentioning cinnamon should come with a cozy blanket disclaimer!
Lemon Juice: A splash will do! It brings some acidity to the jam, balancing out all that sweetness and helping to preserve it. Also, who doesn’t love zesty magic in their life?
Let’s Talk Health (or Not)
Is This Even Healthy? Let’s Discuss
So, you might be wondering if this jam is healthy. Well, let’s get real for a second. Sure, we’ve got butter and sugar galore. But you know what? Sometimes you just need to live a little. Sure, there’s brown sugar, which gives it that sinful sweetness, and yes, there’s plenty of butter—because hello, flavor!
But being healthy doesn’t always mean eating rabbit food, right? You’re allowed to treat yourself, especially when it comes to delicious homemade spreads that scream “fall” at the top of their lungs. And if you’re feeling extra cheeky, you can always spread it on whole grain toast. That’s basically a health food, right? So grab that bread, slather on your caramel apple jam (with unapologetic abandon), and enjoy life while it’s still sweet!
Your Grocery List
Here’s What You’ll Need
– 4 cups chopped apples (about 6 medium apples)
– 1 cup brown sugar
– 1/4 cup unsalted butter
– 2 teaspoons vanilla extract
– 1 teaspoon ground cinnamon
– 2 tablespoons lemon juice
This will yield about 3-4 half-pint jars of goodness, depending on how much you sneak while you cook. And let’s be honest, it’s usually a lot. I mean, can you really resist those tasty apple bits as they simmer away? You’ll want to keep this jam around to spread on toast, pancakes, or mix into yogurt. It’s an autumnal multitasker!
The Actual Cooking Part
Okay, Let’s Make This
Now for the fun part! Get your hands ready because we are about to dive headfirst into caramel apple jam 101.
1. First, get those apples ready. Wash them well and chop them into small cubes. Please, don’t forget to remove the cores! I don’t want you to call me crying because you bit into a core and chipped a tooth. That’s no fun for anyone. I usually leave the peels on for added fiber and, let’s be real, less work. Who has time for peeling apples? Not me!
2. In a large pot over medium heat, melt your butter. Trust me, taking a moment to let this butter melt is like waiting for Christmas morning: it’s entirely worth it.
3. Once it’s beautifully melted, add those chopped apples to the pot. Their natural juices will start to mingle with that melted butter, making your kitchen smell like a crisp autumn day. Swoon—if only I could bottle that scent!
4. Next up, sprinkle in the brown sugar and cinnamon. Stir it all around like you’re mixing a potion in a cauldron. Only this potion results in sweet jam instead of trouble! Keep stirring until the sugar is completely dissolved.
5. Now it’s time to add the vanilla extract (because life is better when vanilla is involved) and that bright, zesty lemon juice. This is where the magic happens!
6. Allow the mixture to simmer on medium-low heat for about 20-30 minutes. Keep stirring occasionally to prevent it from sticking. You want it to cook down while also getting cozy together. That’s the key to achieving that luscious jam consistency we’re after!
7. The texture should be thick and syrupy. If you want to check for perfect spreadability, you can drop a spoonful onto a cold plate (chill one in the freezer for a few minutes before cooking). If it holds its shape, you’re ready to go! If it’s still too runny, let it simmer away for a bit longer.
8. Once it’s reached its desired consistency, remove it from heat and let it cool slightly. It’s hard to resist tasting it right away; I won’t judge if you do!
9. Now, you can pour it into sterilized jars while it’s still warm. Secure the lids tightly and, if you’re into canning, you can go ahead and process them in a water bath to extend their shelf life. If not, just keep them in the fridge.
10. Allow the jars to cool completely before opening them. Let’s be real here: a hot jar that gets opened too soon can lead to a sticky mess that will involve way too many paper towels to clean up.
Side Notes & Sassy Hacks
Bonus Tips You Didn’t Ask For
– **Substitutions:** Feel free to swap in different fruits! Pears can be an excellent partner to apples if you’re feeling extra fancy. If you’re looking to switch things up, you can also add in cranberries for a slight tartness to complement the sweet.
– **No Canning?** No problem! You can easily make a small batch of jam and refrigerate it instead. It’s really just as delicious, and who wants to deal with sterilizing jars anyway?
– **Texture preference:** If you’re a bit of a chunky jam person, you can leave the apple pieces larger. If you’re digging the smooth vibe, go ahead and blend it up once it cools a little. I mean, who are we to judge your jam texture style?!
– **Serving Ideas:** Besides slathering it on toast, consider putting a scoop of this caramel apple jam right on top of vanilla ice cream. Hello, dessert of dreams! Pour it over pancakes or even use it in your baking – like as a filling for pastries! Sky’s the limit, really!
– **Crazy Cooking Memories:** Remember that time I stirred my jam a bit too vigorously and knocked a chunk of brown sugar onto the floor? Yeah, that was an adventure! Spoiler alert: my dog never complained about the sweet surprise.
Final Words of (Culinary) Wisdom
Look at that, you’ve officially made Easy Fall Caramel Apple Jam! I knew you had it in you! I can’t tell you how satisfying it is to create your own spread—there’s something so special about knowing exactly what went into each jar. This jam is not just for you, but also makes the most adorable gifts for those friends who are always swooning over your culinary skills. Not that we’re bragging, but let’s just say this jam will make you look like the hero of autumn!
So go ahead, pop a jar open and taste the flavors of fall on your toast tomorrow morning. If you try this jam and love it (and I know you will!), tag me in your photos or send me a mental high-five! I can’t wait to hear how you make this beautiful, sticky, sweet concoction your own. Happy cooking!