### Fruity Pebbles Bread – Fun, Colorful & Bursting with Sweet Cereal Crunch!
You know that feeling when you walk into a kitchen and are greeted by the comforting aroma of freshly baked bread? Now, imagine infusing that warm, delightful experience with a joyful splash of color and sweetness. Enter **Fruity Pebbles Bread**—a whimsical creation that brings a childhood favorite right into a slice of soft, airy dough. This isn’t just any bread; it’s a vibrant, nostalgic treat that bridges the gap between breakfast and dessert, perfect for those moments when you crave something a bit more fun and colorful.
In this article, I’ll guide you through making this deliciously cheerful bread. You’ll learn about the interesting backstory of Fruity Pebbles, gather all the ingredients needed, and follow step-by-step instructions to achieve that tantalizingly sweet crunch in every slice. So, bring out your mixing bowls and preheat that oven; we are about to embark on a delightful baking adventure!
What is Fruity Pebbles Bread?
Fruity Pebbles Bread is a delightful product of culinary creativity, inspired by the iconic Fruity Pebbles cereal, which has tickled taste buds since its debut in the 1970s. Those rainbow-hued rice crisps, infused with fruity flavors, have captured the hearts of both kids and adults alike. This bread marries the nostalgic taste of the cereal with the warmth and comforting texture of homemade bread.
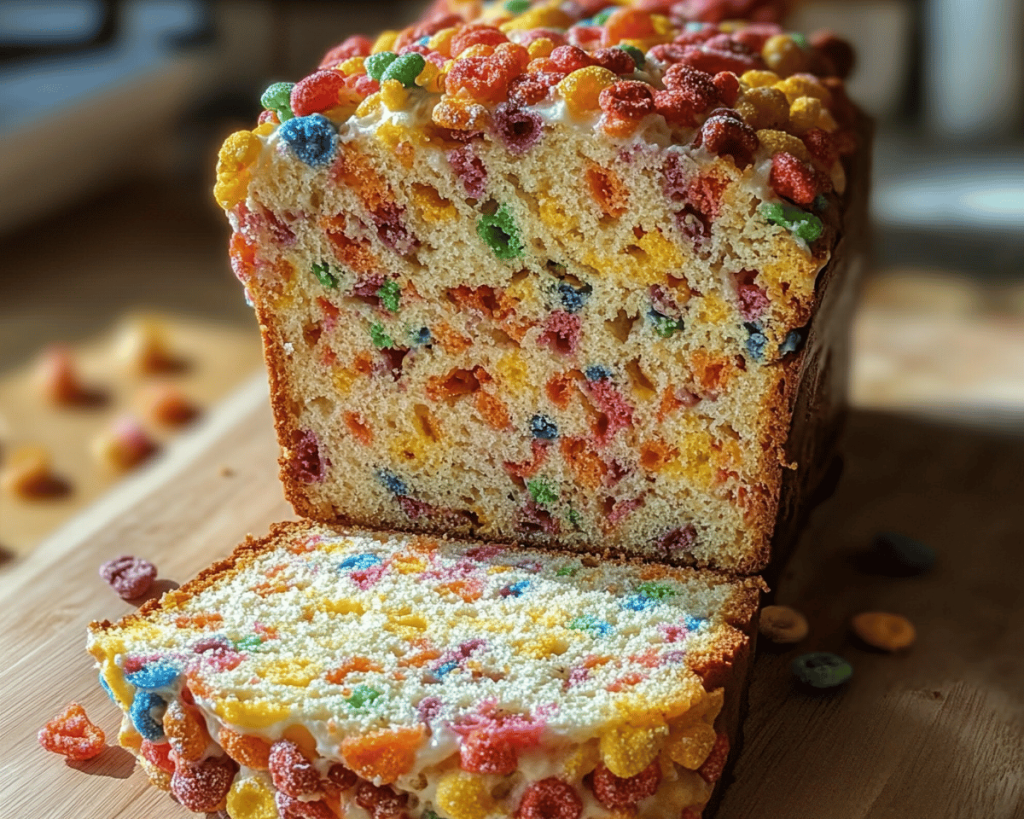
Imagine a loaf that’s light and fluffy with a golden-brown crust—each slice filled with bursts of vibrant color and the sweet, familiar flavor you remember from breakfast. The bread is slightly sweet, with hints of vanilla and a delightful crunch from the Fruity Pebbles, creating a perfect balance of softness and texture. You would serve this bread at brunch, indulge in a snack, or even enjoy it toasted with a pat of butter or a drizzle of honey.
Why You’ll Love This Fruity Pebbles Bread
This Fruity Pebbles Bread stands out for so many reasons. First, it’s incredibly simple to make. With just a few basic ingredients and a dash of creativity, you can whip up a loaf that’s bursting with sweetness and character. It’s a fantastic way to get kids involved in baking—watching and munching on the colorful cereal while they help you mix the dough can be a joy-filled experience all around.
Additionally, this recipe is perfect for meal prep! You can bake it on the weekend, allowing for easy breakfasts or snacks through the week. It’s also a humble crowd-pleaser during family gatherings—a colorful loaf that will undoubtedly spark smiles and conversation. Let’s not forget how budget-friendly it is, especially if you have leftover cereal waiting to be transformed into something spectacular!
Ingredients You’ll Need
To create this spectacular Fruity Pebbles Bread, gather the following ingredients:
– **3 cups all-purpose flour**: This forms the base of our bread. For the lightest texture, use a scoop and level method to measure flour accurately.
– **1 cup warm milk**: Using warm milk allows the yeast to activate properly, leading to a fluffier loaf. Almond or oat milk can be substituted for a dairy-free option.
– **2 teaspoons active dry yeast**: Essential for leavening our bread, giving it that delightful rise. Make sure your yeast is fresh for the best results.
– **1/4 cup granulated sugar**: It not only adds sweetness but also feeds the yeast, promoting fermentation.
– **1/4 cup unsalted butter (melted)**: For that rich, buttery flavor and tender texture. Coconut oil or margarine can serve as replacements.
– **1 large egg**: This adds moisture and richness to the bread. Use a flaxseed egg (1 tablespoon ground flaxseed + 2.5 tablespoons water) for a vegan option.
– **1 teaspoon vanilla extract**: Pure vanilla extract amplifies the flavor profile of the bread.
– **1/2 teaspoon salt**: Essential for enhancing all the flavors and balancing the sweetness.
– **1 cup Fruity Pebbles cereal**: The star of the show! This will provide color, crunch, and fruity flavor in every slice.
How to Make Fruity Pebbles Bread
1. **Activate the Yeast**: Begin by pouring your warm milk into a large mixing bowl. Make sure the milk is warm to touch but not too hot (about 110°F). Sprinkle the active dry yeast on top of the milk. Add a teaspoon of sugar and let it sit for 5-10 minutes, or until it’s frothy. This indicates that your yeast is active and ready to work its magic in the dough.
2. **Mix the Wet Ingredients**: Once your yeast is frothy, add in the melted butter, egg, vanilla extract, and the remaining sugar. Whisk these ingredients together until they are fully incorporated and smooth.
3. **Combine the Dry Ingredients**: In a separate bowl, whisk together the all-purpose flour and salt. Gradually add this to the wet mixture, stirring with a wooden spoon or spatula until a shaggy dough forms. Remember, the dough may be a bit sticky at first; that’s totally fine!
4. **Knead the Dough**: Turn the dough out onto a lightly floured surface. Knead it for about 6-8 minutes until smooth and elastic. If the dough is too sticky, sprinkle a little more flour as needed. Your goal here is to develop the gluten, which helps the bread rise and stay fluffy.
5. **Let it Rise**: Place the kneaded dough in a greased bowl, cover it with a clean kitchen towel, and allow it to rise in a warm area for about 1 hour, or until it has doubled in size. The warmth helps in fermenting the yeast, which creates those beautiful bubbles in the dough.
6. **Incorporate the Fruity Pebbles**: After the dough has risen, gently punch it down to release the air. Now, fold in the Fruity Pebbles, ensuring they are evenly distributed throughout the dough. This task is so much fun as the colorful pebbles bring a festive spirit to your loaf!
7. **Shape and Second Rise**: Transfer the dough to a greased 9×5 inch loaf pan. Press it gently into the pan and cover it again with the kitchen towel. Let it rise for another 30-45 minutes until it puffs up just above the edge of the pan.
8. **Bake**: Preheat your oven to 350°F (175°C). Bake the bread for 30-35 minutes or until it’s golden brown on top and sounds hollow when tapped. A digital thermometer inserted into the center should read around 190°F when fully baked.
9. **Cool and Serve**: Once baked, remove the bread from the oven and let it cool in the pan for 10 minutes before transferring it to a wire rack to cool completely. This cooling period is essential to ensure that your bread maintains its perfect structure.
Tips, Tricks & Variations
– **Make it Vegan**: Substitute traditional dairy with plant-based alternatives like almond milk, coconut oil instead of butter, and a flaxseed egg for a delightful vegan version.
– **Add More Flavor**: Consider mixing in 1 teaspoon of almond extract or orange zest for a unique twist. A hint of citrus adds freshness that pairs beautifully with the Fruity Pebbles.
– **Storage**: Keep any leftover bread wrapped tightly in plastic wrap at room temperature for up to three days. For longer storage, slice and freeze your bread in an airtight container.
– **Toasting**: This bread is exquisite when toasted—just imagine that golden-brown crispness and the sweet nutty aroma wafting through your kitchen!
– **Experiment with Different Cereals**: While Fruity Pebbles are fun, feel free to experiment with other colorful cereals. Lucky Charms, Cap’n Crunch, or even Cocoa Pebbles offer delightful and unique flavor profiles!
What to Serve With Fruity Pebbles Bread
This colorful loaf is versatile enough to serve in various delightful ways. Enjoy it **plain** for a simple snack or breakfast. For an elevated experience, spread some cream cheese or a lightly sweetened mascarpone cheese on top; a sprinkle of extra Fruity Pebbles adds a fun crunch.
It can also be wonderful when made into a **French toast**! Just slice the bread and dip it into a mixture of eggs, milk, and cinnamon before frying it in butter until golden brown. Drizzle it with maple syrup or a fruit compote for an unforgettable brunch experience.
Pair the bread with a refreshing **fruit salad**, or enjoy it alongside a chilled glass of milk or a fruity smoothie to balance the sweet flavors beautifully.
Nutrition & Health Benefits
Fruity Pebbles Bread may be considered a treat, but it also offers some delightful nutrition. The main ingredient, whole-wheat flour (if you choose that as your variation), provides fiber and essential nutrients. Each slice packs a playful punch of memories while drawing on the wholesome benefits of homemade bread.
Remember that moderation is key. A slice of this bread can be around 250 calories, depending on your ingredients and portion sizes. It’s perfect for a special occasion or as an occasional indulgence! For more nutritional insights, check out the USDA’s [Learn About Bread](https://www.usda.gov) page.
Frequently Asked Questions
1. **Can I use gluten-free flour?**
Yes, you can. Look for a gluten-free flour blend that includes xanthan gum for best results. Keep in mind that the texture may differ slightly from traditional bread.
2. **What’s the best way to store this bread?**
Wrap the loaf tightly in plastic wrap or foil and store it at room temperature for up to three days. For longer storage, slice and freeze in an airtight container to keep it fresh.
3. **Can I add nuts or dried fruits?**
Certainly! Feel free to create your own variations by mixing in your favorite nuts or dried fruits, but bear in mind that changes to ingredients can affect texture and moisture.
4. **How can I tell when the bread is done?**
The bread is done when it’s golden brown on top, sounds hollow when tapped, and internal temperature reads 190°F to 200°F. If you want an extra crispy crust, you can bake it a little longer.
5. **Can I double the recipe?**
Absolutely! This recipe can easily be doubled if you want to bake two loaves. Just make sure you have enough space in your oven and adequate mixing bowls to manage the larger batch.
In conclusion, Fruity Pebbles Bread isn’t just a baked good; it’s a labor of love that transports you back to those carefree childhood mornings filled with bright colors and sweet flavors. Perfectly fluffy yet packed with crispy shards of cereal, every bite is a celebration of nostalgia and joy.
So why not bake this delightful bread tonight? I can assure you that it will fill your kitchen with warmth and excitement. Don’t forget to snap a photo and tag me on Instagram; I would love to see your creations! If you adored this recipe, [Read also: Irresistible Rainbow Cake] to keep the sweetness flowing! Happy baking!