Prep time: 20 minutes
Cook time: 12 minutes
Total time: 32 minutes
Servings: 24 cookies
When you think of cozy winter evenings or heartwarming family gatherings, there’s nothing quite like the smell of freshly baked cookies wafting through your home. One cookie that stands out is the Gingerbrave cookie, a delightful spiced treat that transports you back to childhood celebrations and comforting memories. Imagine biting into a cookie that is perfectly crisp on the outside, yet soft and chewy on the inside, infused with the aromatic flavors of warm spices like ginger, cinnamon, and cloves. This Gingerbrave cookie recipe is not only a delectable indulgence but an invitation to create cherished moments in your kitchen.
In this article, I’ll guide you through every step of making these delicious Gingerbrave cookies, from their rich, spiced flavor profile to helpful tips for success. You’ll discover easy variations to tailor the recipe to suit your taste, along with answers to common questions you might have as you bake. Whether you’re a busy parent trying to whip up a quick batch after school or a beginner just diving into the world of baking, this recipe is both accessible and incredibly satisfying. So, let’s get started!
What Is Gingerbrave Cookies (Spiced Cookie Recipe)?
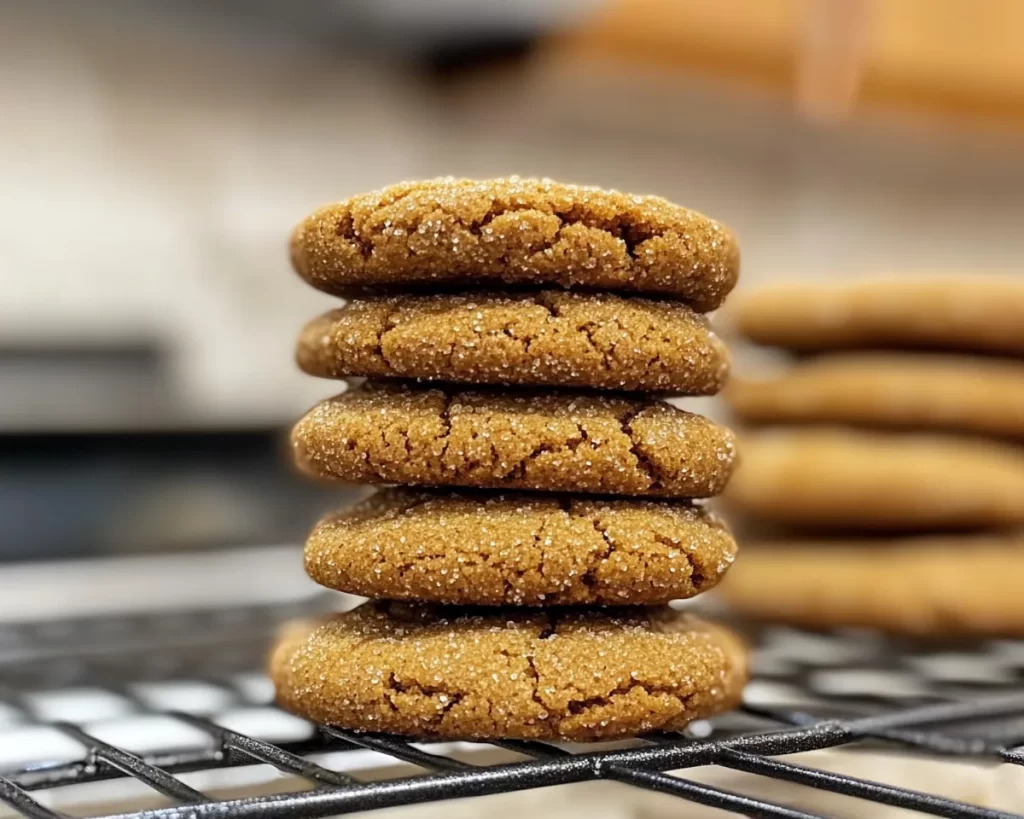
Gingerbrave cookies, inspired by the classic tradition of gingerbread but with a twist, are spiced cookies that deliver an explosion of flavors. Originating from various holiday customs across Europe, these cookies are known for their use of aromatic spices like ginger, nutmeg, and cinnamon, creating a warm, inviting taste and aroma. The use of molasses adds a deep, rich sweetness that complements the spices beautifully.
The texture is another highlight: they’re crisp on the edges while remaining soft and tender on the inside, making each bite a delightful contrast. These cookies can be enjoyed year-round, but they’re especially cherished during the holiday season, often served at celebrations and family gatherings. As you enjoy them with a cup of tea or coffee, you’ll find they bring people together, sparking joy and conversation. They can also be decorated in various ways, turning them into personalized treats for any occasion.
In essence, the Gingerbrave cookies are more than just a recipe; they are a delightful blend of history, flavor, and heartwarming memories. In the following sections, you’ll learn everything there is to know about making these scrumptious cookies from scratch.
Why You’ll Love This
There are countless reasons to fall in love with these Gingerbrave cookies! First and foremost, the taste is simply irresistible. The warm spices create a nostalgic flavor profile that hits all the right notes, making each cookie a delightful experience. Furthermore, the ease of preparation is another significant benefit. You don’t need to be a baking expert to make these cookies; even beginners can successfully execute this recipe with just a few simple steps.
On top of that, these cookies are budget-friendly! Most of the ingredients like flour, sugar, and spices are staples in your pantry, making this an accessible recipe for everyone. The recipe also lends itself well to variations, as you can easily substitute ingredients or adjust the spice level to fit your family’s preferences.
Common misconceptions about ginger cookies often lead people to think they require tricky techniques as seen in more complex baked goods; however, that’s not the case. You will find that with just a little bit of patience and the right ingredients, you can create cookies that rival those from any bakery. Let’s face it; who doesn’t love the smell of baking cookies wafting through the house? It’s an enchanting aroma that draws everyone in, bringing a sense of warmth and coziness that only freshly baked treats can provide.
Ingredients You’ll Need
To make these delicious Gingerbrave cookies, gather the following ingredients:
- 3 cups all-purpose flour: This is the base of your cookie dough. For a healthier option, consider using whole wheat pastry flour.
- 1 teaspoon baking soda: This will help the cookies rise, giving them a nice fluffy texture.
- 1 tablespoon ground ginger: A key ingredient that provides the signature spiciness of these cookies.
- 1 teaspoon ground cinnamon: Adds warmth and sweetness to the flavor profile.
- 1/2 teaspoon ground cloves: These give an aromatic punch that enhances the overall taste.
- 1/2 teaspoon salt: Balances out the sweetness and enhances the flavors of the spices.
- 1/2 cup unsalted butter, softened: Contributes to the rich, tender texture of the cookies. You can also use coconut oil for a dairy-free option.
- 1 cup brown sugar: The molasses in brown sugar provides moisture and a hint of caramel flavor.
- 1/2 cup molasses: This is crucial for achieving that deep flavor and chewy texture.
- 1 large egg: Acts as a binding agent and contributes to the richness of the dough.
These ingredients work together to create the unique flavors and textures that make Gingerbrave cookies so special. Remember, high-quality spices can elevate your cookies, so don’t hesitate to invest in fresh spices for the best results.
How to Make
Making Gingerbrave cookies is straightforward and enjoyable! Follow these step-by-step instructions to create your delicious batch:
- Prepare your workspace: Start by preheating your oven to 350°F (175°C). This ensures your cookies will bake evenly. Line a baking sheet with parchment paper to prevent sticking.
- Mix dry ingredients: In a medium bowl, whisk together the all-purpose flour, baking soda, ground ginger, ground cinnamon, ground cloves, and salt. This step is crucial as it ensures even distribution of the leavening agents and spices throughout the dough.
- Cream the butter and sugar: In a large mixing bowl, use an electric mixer to beat together the softened unsalted butter and brown sugar until the mixture is light and fluffy. This process should take about 2-3 minutes.
- Add wet ingredients: Beat in the molasses and the egg until everything is well combined. This will give your cookies their characteristic texture and flavor. Make sure to scrape down the sides of the bowl with a spatula to ensure all ingredients are incorporated.
- Combine wet and dry mixtures: Gradually add the dry ingredients to the wet mixture, mixing on low speed. Be careful not to over-mix; you want just combined dough. Over-kneading can yield dense cookies.
- Chill the dough: For best results, wrap the dough in plastic wrap and chill it in the refrigerator for at least 30 minutes. Chilling the dough helps develop flavors and prevents the cookies from spreading too much while baking.
- Scoop and shape dough: Once chilled, use a cookie scoop or tablespoon to portion out dough onto the prepared baking sheet, spacing them about 2 inches apart. You can roll them into balls to ensure a uniform shape.
- Bake: Place the baking sheet in the preheated oven and bake for 10-12 minutes. The cookies should be slightly golden at the edges but still soft in the centers. Remember, they will continue to cook a bit after being removed from the oven.
- Cool and enjoy: Remove the cookies from the oven, and let them cool on the baking sheet for about 5 minutes before transferring them to a wire rack to cool completely. This will help them firm up without becoming too hard.
Enjoy the process, and don’t be afraid to make it your own! The aroma that fills your kitchen while these cookies bake is a comforting reminder of home and tradition.
Variations & Substitutions
Gingerbread People Variation: You can cut these cookies into fun shapes like gingerbread men, women, or even festive holiday shapes. Simply roll out the chilled dough to about 1/4 inch thick on a floured surface and use cookie cutters to shape them. Decorate with royal icing or simple glazes to bring these adorable cookies to life, turning a simple treat into a festive centerpiece.
Gluten-Free Variation: If you have gluten sensitivity or are following a gluten-free diet, replace the all-purpose flour with a 1:1 gluten-free flour blend. This substitution generally works well, but make sure to check that all other ingredients are gluten-free, especially any processed items.
Dairy-Free Variation: For a dairy-free version, substitute the unsalted butter with coconut oil or a nut butter. This not only keeps the cookies dairy-free but can also add a unique flavor twist.
Spiced Nuts Addition: For an added crunch and nutty flavor, consider adding chopped pecans or walnuts to your cookie dough. This will provide a delightful texture contrast to the soft and chewy cookie and add a nutritional boost.
Each of these variations allows you to personalize your Gingerbrave cookies while keeping their essence intact. Don’t hesitate to experiment with different spices or toppings to make this recipe truly yours!
Common Mistakes to Avoid
When baking cookies, a few common pitfalls can affect the final outcome. One of the most prevalent mistakes is overmixing the dough. Remember, overmixing can lead to tougher cookies, so mix just until combined. Another issue might arise if you forget to chill the dough, which can result in cookies that spread too much in the oven. If you find your cookies spreading unexpectedly, consider chilling the dough longer next time.
Also, be cautious when measuring your flour. Use the spoon-and-level method: scoop the flour into your measuring cup with a spoon and then level it off with a knife. This technique ensures you don’t pack the flour down, which could lead to a denser cookie. Keep a close eye on your cookies as they bake; every oven varies, and you may need to adjust baking time accordingly. If in doubt, take them out a minute earlier to avoid over-baking.
Storage, Freezing & Reheating Tips
Storing your Gingerbrave cookies correctly ensures that they retain their delightful texture and flavor. Once completely cooled, store the cookies in an airtight container at room temperature for up to a week. If you’d like to keep them fresh longer, consider freezing them. Simply place the completely cooled cookies in a single layer on a baking sheet and freeze until solid. Then transfer them to a zip-top freezer bag, labeling it with the date. They can last up to three months in the freezer.
To reheat frozen cookies, just remove them from the freezer and let them sit at room temperature for about 10 minutes. Then, pop them in a preheated oven at 350°F (175°C) for 5-7 minutes or until warmed through. This will bring back their fresh-out-of-the-oven texture, making for an irresistible treat.
Practicing good food safety is crucial, especially if you plan to give these cookies as gifts. Be sure to store them in clean, dry containers to prevent moisture build-up, which could lead to mold growth.
Frequently Asked Questions
Can I make the dough ahead of time?
Absolutely! You can prepare the cookie dough up to a day in advance. Just wrap it tightly in plastic wrap and store it in the refrigerator until you’re ready to bake. This can actually enhance the flavors as the spices meld.
What if my cookies turn out too hard?
If your Gingerbrave cookies come out too hard, it may be due to over-baking. Always keep an eye on them in the last few minutes of baking. If they are hard, try adding a slice of bread to the cookie container to keep them moist; this will often help soften them over time.
Can I use fresh ginger instead of ground ginger?
While you can use fresh ginger, keep in mind that the flavor will be more intense. For this recipe, if you choose to use fresh ginger, approximately 1 tablespoon grated fresh ginger should suffice for a spicier kick.
What is the best way to decorate Gingerbrave cookies?
You can get creative with decorating! Use royal icing, fondant, or edible markers to add faces or festive patterns. Sprinkles and colored sugar can also enhance their visual appeal, making them fun for kids and festive for parties.
Can I modify the spice levels in the recipe?
Absolutely! If you prefer milder cookies, reduce the quantity of the spices like ginger and cloves. Alternatively, if you’re a spice lover, you can add more. Just remember to taste the dough before baking for a better idea of the final flavor.
Conclusion:
Gingerbrave cookies are much more than just a treat; they are a deeper connection to warmth, family, and shared moments. With their delightful texture and enticing warmth from spices, these cookies cater to a variety of preferences and occasions, making them perfect for any time of year. I encourage you to try this recipe in your kitchen; each baking session will not only refine your culinary skills but also create delightful memories to cherish for years to come. Whether you stick to the classic recipe or explore the variations, you’re in for a truly special experience—one that you’ll want to share with family and friends! Happy baking!


