Let’s Get Real
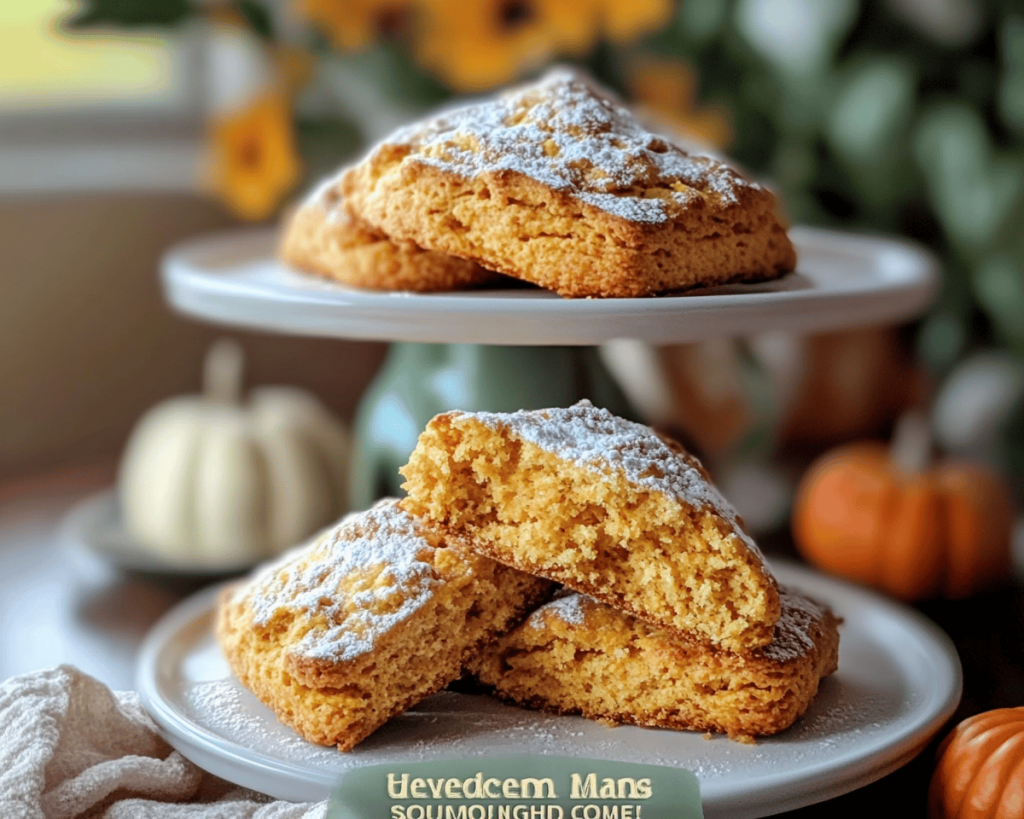
Okay, so here’s the thing — I never really cared for pumpkin-flavored anything until a few years ago. I know, I know, that seems like blasphemy in food blogger land, especially when autumn rolls around and everyone instantly transforms into pumpkin spice devotees. But every time I’d eat something pumpkin-flavored, it always felt like chewing on a spongy cloud of something vaguely sweet but mostly bland. Fast forward to the moment I whipped up these **Heavenly Pumpkin Scones**, and suddenly I was a changed person. Honestly? These scones are like a warm hug on a brisk morning, and let me tell you, the day I got it right, it felt like winning the pastry lottery.
Now, let’s not kid ourselves, it’s not all sunshine and rainbows when baking. The first time I tried making scones, I ended up with a gooey, flour-coated disaster that resembled a sad pancake more than an elegant scone. But I dug deep, friends. I watched some YouTube videos (shout-out to the food influencers who make everything look ridiculously easy) and failed a few more times until I finally managed to conquer these little puffs of joy. They’re not just destined for your coffee shop visit, people — they deserve a spot in your kitchen, too!
So, whether you’re looking to impress brunch guests or just want a delightful breakfast for yourself (because self-love, right?), grab your apron, because it’s time to dive into **Heavenly Pumpkin Scones**. If they can turn my pumpkin-hating heart, imagine what they can do for you!
Ingredients, Unfiltered
What’s Really in Heavenly Pumpkin Scones
Let’s break it down, shall we? Here’s what you need to put together for these delightful nuggets of fall spirit.
All-Purpose Flour: This is the base of our scone. I’m a huge fan of King Arthur flour for its consistency and the way it brings everything together. Blame my High-Functioning Baker Self for getting picky about flour brands!
Granulated Sugar: A necessary evil, because we do want some sweetness here, but not too much. You’re not making a cake, after all; this is scone territory!
Baking Powder: This is where the magic happens. It’s what gives our scones that fluffy lift. I prefer using a double-acting baking powder because nobody has time to wait for things to rise.
Spices: Now, here’s where you can have a bit of fun. I use a blend of cinnamon, nutmeg, and ginger. Why? Because autumn is basically a spice parade, and I refuse to skimp. Feel free to go wild and add cardamom or allspice if you’re feeling adventurous.
Salt: Just a pinch to balance everything out. Trust me, these little grains are crucial for flavor enhancement. I mean, even I can’t survive on sweetness alone.
Butter: The unsung hero of scones. I use unsalted butter because I like to control how much salt I’m working with. The colder the better, folks — room temperature butter has no business in scone-making.
Pumpkin Puree: Here’s where the glorious pumpkin goodness comes in. Use the canned stuff, or if you’re feeling particularly ambitious, roast and puree your own pumpkins. Me? I stick with the can — it’s a shortcut, and I am not mad about it.
Heavy Cream: Because scones need that rich moisture. This is not the time for skim milk – it’s like wearing flip-flops in a snowstorm. Embrace the creaminess!
Vanilla Extract: A splash of this adds a warming sweetness that works beautifully with the pumpkin.
Egg: This will bind everything together and give your scones a lovely richness. Plus, it makes you feel like you’re doing something healthy since it’s a protein!
Let’s Talk Health (or Not)
Is This Even Healthy? Let’s Discuss
Now, let’s have a little heart-to-heart about the healthiness of these scones. Because, look, I could sit here and tell you how “healthy” pumpkin is, with its betacarotene and fiber, but let’s be real — we aren’t here to talk about kale salad or quinoa bowls. We want some scones, and yes, they contain **butter** and **heavy cream**. But you know what? I sleep like a baby after eating these *heavenly* delights.
Sure, there’s sugar, and sure, we all know that the butter probably weighs more than my last failed attempt at stress baking, but it’s okay! Life’s about balance. So go ahead, grab that pumpkin-flavored goodness and cherish those bites guilt-free — after all, you deserve that lovely, crumbly embrace.
Your Grocery List
Here’s What You’ll Need
– 2 cups all-purpose flour (preferably King Arthur)
– ½ cup granulated sugar
– 2 ½ teaspoons baking powder
– 1 teaspoon ground cinnamon
– ½ teaspoon ground nutmeg
– ½ teaspoon ground ginger
– ½ teaspoon salt
– ½ cup unsalted butter, cold and cubed
– ½ cup pumpkin puree (canned is fine — I won’t tell)
– ½ cup heavy cream
– 1 teaspoon vanilla extract
– 1 large egg
These quantities should yield about 8 scones, depending on how generous you are with the scooping!
The Actual Cooking Part
Okay, Let’s Make This
Alright, buckle up! Here’s how to bring these heavenly scones to life.
1. **Preheat That Oven:** First things first, preheat your oven to 425°F (218°C). We’re aiming for a hot environment to get those scones puffing up nice and fluffy.
2. **Mix the Dry Ingredients:** In a large bowl, whisk together the **flour**, **sugar**, **baking powder**, **spices**, and **salt**. Look at that beautiful blend of autumnal colors and make a mental note that you’re basically a culinary wizard at this point.
3. **Cut in the Butter:** Here’s the tricky part. Take the cold, cubed **butter** and toss it into the flour mixture. Use a pastry cutter or your fingers to blend it until the mixture resembles coarse crumbs. Yes, you might feel like you’re digging for gold, but this is where the texture magic happens. Just try not to get butter everywhere — a kitchen tidier than mine is always preferable!
4. **Wet Ingredients Party:** In a separate bowl, whisk together the **pumpkin puree**, **heavy cream**, **vanilla extract**, and **egg**. This is where the party really starts heating up. The colors alone should make you swoon.
5. **Combine and Stir:** Slowly pour the wet mixture into the dry ingredients, folding it together until it’s just combined. It’s okay if it’s a little shaggy — in fact, I encourage a slight mess at this stage! Don’t overmix, though; we’re not making bread here!
6. **Shape That Dough:** Turn that glorious, scraggly mound of pumpkin dough onto a floured surface. Gently knead it a couple of times until it comes together. Then pat it into a circle about 1 inch thick. Don’t panic if this looks messy — it’s supposed to! Life’s messy, and so are our beloved baked goods.
7. **Cut Into Scones:** Use a sharp knife or a bench scraper to cut the dough into wedges. Or use a round cutter if you’re feeling fancy. I mean, they can be whatever shape makes you happy! Transfer these babies onto a baking sheet lined with parchment paper.
8. **Bake, Baby, Bake:** Pop them in the oven for about 15-20 minutes, or until they puff up and are lightly golden. The smell wafting through your kitchen at this moment is basically pure bliss.
9. **Cool Down:** Once they’re out, let them cool on a wire rack for as long as you can bear. Trust me — this wait is totally worth it. Don’t worry; you can grab a rogue crumb or two that might have fallen off during the transfer… I won’t judge.
Side Notes & Sassy Hacks
Bonus Tips You Didn’t Ask For
– **Spice It Up:** Feel free to adjust the spices to suit your palate. Don’t want nutmeg? Leave it out! You can even toss in some chocolate chips if you want to add a little seductive sweetness!
– **Glazing:** Want to take these to the next level? Brilliant move! Mix a simple glaze with powdered sugar and a little milk and drizzle it on top before serving. It’s like putting a crown on a queen!
– **Chill Your Dough:** If you really want to make these perfect, let the dough chill in the fridge for 30 minutes before baking. Seriously, it helps solidify the butter, and the result is a flakier scone. But, if you want the instant gratification, go ahead and skip this step — who has time to wait, right?
– **Make Ahead:** You can absolutely make the dough ahead of time and freeze it. Just thaw overnight in the fridge and bake when you’re ready! It’s like having a scone fairy waiting in your kitchen.
Final Words of (Culinary) Wisdom
Now that you’re all set to create your own *heavenly pumpkin scones*, I want you to know how proud I am of you! If you try these, tag me in your photos. I love seeing your beautiful creations in action! Or just send me a mental high-five; either way, I’m cheering for you. Embrace the chaos, enjoy the process, and remember: food is about connection, warmth, and a bit of flavorful fun! Happy baking, my friends!