Prep time: 15 minutes
Cook time: 0 minutes
Total time: 15 minutes
Servings: 4 servings
High-Protein Cheesecake Jars are not just a dessert; they are a guilt-free indulgence that combines taste and nutritional value. Perfect for busy individuals or families, these jars deliver a rich, creamy flavor while packing in protein and keeping sugar lows. Imagine the convenience of delicious cheesecake layered in a jar that takes only minutes to prepare. Ideal for meal prepping or a quick snack, these cheesecake jars will satisfy your sweet tooth without derailing your healthy eating goals.
What Is High-Protein Cheesecake Jars?
High-Protein Cheesecake Jars are a modern twist on the classic cheesecake. Instead of the heavy crust and high sugar content, this recipe offers a light, creamy filling made rich with protein-packed ingredients. The idea is to create a delicious and creamy cheesecake filling layered in a jar, providing an easy, on-the-go dessert. This recipe enables you to enjoy cheesecake without the lengthy preparation time and heavy calorie count, making it a perfect choice for health-conscious individuals and busy parents alike.
Why You’ll Love This
These High-Protein Cheesecake Jars are a perfect treat. Here are a few reasons to fall in love with this recipe:
- Quick and Easy: The preparation takes just minutes, ideal for those busy weeknights.
- Healthy Ingredients: Each jar is loaded with protein, making it a nutritious alternative to traditional desserts.
- Customizable: You can easily modify the flavors or toppings according to your preferences.
- Great for Meal Prep: Prepare several jars at once to enjoy throughout the week.
- Family-Friendly: Kids and adults alike will love this delicious and satisfying treat.
Ingredients You’ll Need
Here is what you will need to make these delicious High-Protein Cheesecake Jars:
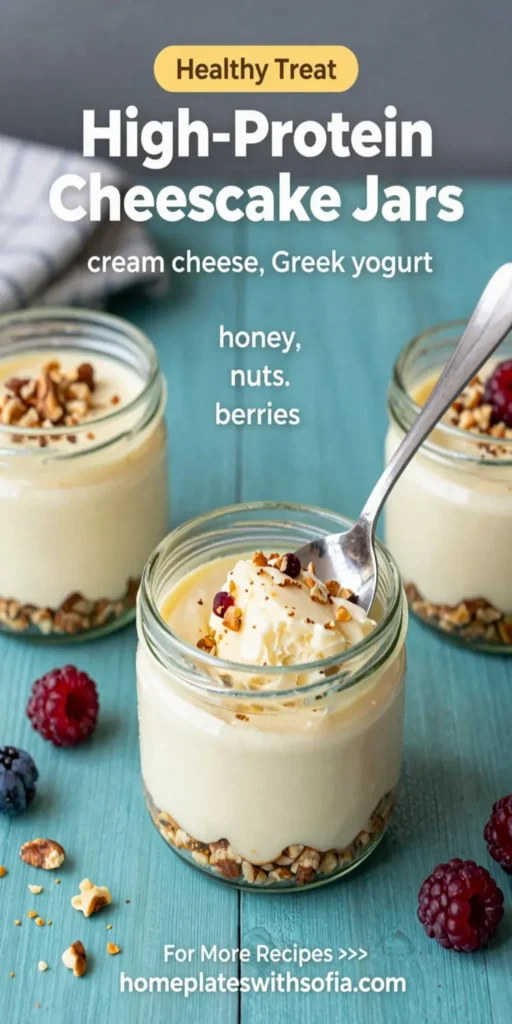
- 2 cups Greek yogurt: Provides a creamy base rich in protein and probiotics.
- 1/2 cup low-fat cream cheese: Adds creaminess and richness, balancing the tartness of the yogurt.
- 1/4 cup honey or maple syrup: Natural sweeteners that give the dessert a touch of sweetness without adding refined sugars.
- 1 teaspoon vanilla extract: Enhances flavor and adds a sweet aroma to the cheesecake.
- 1/2 teaspoon lemon juice: Brightens the flavors and adds a slight tang to the cheesecake.
- Your choice of toppings: Fresh fruits, nut butter, or granola for added texture and flavor.

How to Make
Making High-Protein Cheesecake Jars is as easy as 1-2-3! Follow these steps to create your delightful treat:
- Prepare the Base: In a mixing bowl, combine the Greek yogurt, low-fat cream cheese, honey (or maple syrup), vanilla extract, and lemon juice. Using a hand mixer or whisk, blend until the mixture is smooth and creamy. Make sure there are no lumps for a velvety texture.
- Layer the Jars: In serving jars or cups, start with a layer of the cheesecake mixture. Use a spoon to gently scoop out the mixture and ensure an even base. Smooth the top with the back of the spoon for a polished layer.
- Add Toppings: Top your cheesecake layer with your favorite toppings. This could be fresh berries for a burst of flavor, a drizzle of nut butter for richness, or granola for some crunch. Feel free to get creative!
- Chill in the Refrigerator: Place the jars in the refrigerator for at least 1 hour to let the flavors meld and the filling set slightly. This step helps to enhance the flavor and ensures a pleasant, creamy texture.
- Enjoy: Serve chilled, and dig in! These jars are perfect for dessert or a healthy snack.
Variations & Substitutions
One of the standout features of these High-Protein Cheesecake Jars is their versatility. You can customize them to suit your taste preference or dietary requirements.
Chocolate Lovers’ Variation: Add 2 tablespoons of unsweetened cocoa powder to the cheesecake mixture for a chocolatey indulgence. Top with chocolate shavings or a drizzle of chocolate syrup. This version is both rich in flavor and packed with protein.
Fruit-Infused Variation: Puree your favorite fruits, such as strawberries or mangoes, and mix them into the cheesecake base before layering. This not only adds a fresh flavor but also incorporates more vitamins and nutrients into your dessert. You can even layer sliced fruits between the cheesecake layers for a stunning presentation.
Nut Butter Swirl Variation: For a unique twist, swirl in a tablespoon of peanut or almond butter into the cheesecake mixture. This adds a nutty flavor and healthy fats to enhance the texture and taste.
Dairy-Free Variation: Substitute the Greek yogurt and cream cheese with dairy-free options like coconut yogurt and cashew cream. Sweeten with maple syrup for a creamy, satisfying treat that everyone can enjoy.
Common Mistakes to Avoid
Making cheesecake jars is generally straightforward, but there are a few common pitfalls to watch out for:
Using Full-Fat Ingredients: While it might seem tempting to use standard cream cheese or full-fat yogurt, this could raise the calorie count significantly. Opt for low-fat versions to keep your cheesecake light but still creamy.
Overmixing the Ingredients: Mixing the ingredients too much can introduce air into the mixture, causing the texture to become too fluffy rather than creamy. Blend just until smooth for optimal texture.
Skipping Chilling Time: Rushing this step may leave you with an overly soft texture. Allow at least 1 hour in the refrigerator for the ingredients to firm up and flavors to develop.
Storage, Freezing & Reheating Tips
These High-Protein Cheesecake Jars are fantastic for meal prep! Here are some tips for storage:
– **Storage:** Keep the jars covered in the refrigerator. They can last for about 3 to 4 days without compromising texture or flavor.
– **Freezing:** If you want to prepare them in advance, you can freeze the cheesecakes. Just make sure to use freezer-safe jars or containers. They can be frozen for up to 2 months. When you’re ready to enjoy, transfer them to the refrigerator to thaw overnight.
– **Reheating:** These jars are not meant to be reheated, as the cold creamy texture is part of their charm. You can take them straight from the fridge and enjoy them cold.
Frequently Asked Questions
Can I make these cheesecake jars ahead of time?
Yes, these jars are perfect for meal prepping! You can prepare them a few days in advance and store them in the refrigerator. This is great for busy weekdays when you want a quick and healthy dessert.
What can I substitute for sweeteners?
If you’re looking for alternatives to honey or maple syrup, consider using stevia, agave syrup, or even mashed ripe bananas. Adjust the quantity according to your taste and the sweetness levels of the substitute.
Can I make these jars vegan?
Absolutely! Use plant-based yogurt and cream cheese alternatives. Sweeten the mixture with agave syrup or maple syrup to keep it vegan-friendly.
How do I know when my cheesecake is set?
Ideally, the cheesecake filling should feel firm but not rubbery. After chilling, it will thicken and have a creamy texture. For a firmer result, you can chill them longer.
What are some good toppings?
You can’ve endless options when it comes to toppings. Fresh fruits like blueberries, strawberries, or bananas work wonderfully. You can also drizzle nut butters, add dark chocolate chips, or even sprinkle granola for extra crunch.
Conclusion: High-Protein Cheesecake Jars are quick to prepare and deliciously satisfying, making them a perfect addition to your recipe collection. Enjoy the healthy combination of flavors while indulging in a protein-rich treat that suits the busy lifestyle. Whether you’re meal prepping for the week or creating a delightful snack for family, these jars are your go-to dessert that everyone will love!