Let’s Get Real
Okay, let me paint a picture for you. It’s one of those dreary, rainy days where the sky looks like a sad gray blanket just draped over the world. I’m cozied up on my couch, the kind of day where doing anything productive feels like a monumental task. You know what that calls for? Cookies. Or brownies. Or, heck, both! But then I got to thinking: why not combine my childhood obsession with those crispy Biscoff cookies and the comforting goodness of brownies? Spoiler alert: this was the best decision I made all week.
Now, I’ll admit, I didn’t always love brownies. Who am I kidding? As a kid, I would have traded a plate full of brownies for a single donut (don’t ask me how I felt about carrot cake). But fast forward to adulthood, and you would not believe how many brownie flavors I’ve tried. Brownies had been lying in wait, subtly attempting to win my heart over the years until one fateful moment when homemade Biscoff cookie butter was brought into my life—Oh my goodness! It’s rich, it’s chewy, and it’s everything I didn’t know I needed. Honestly, my childhood self was INTERNALLY screaming.
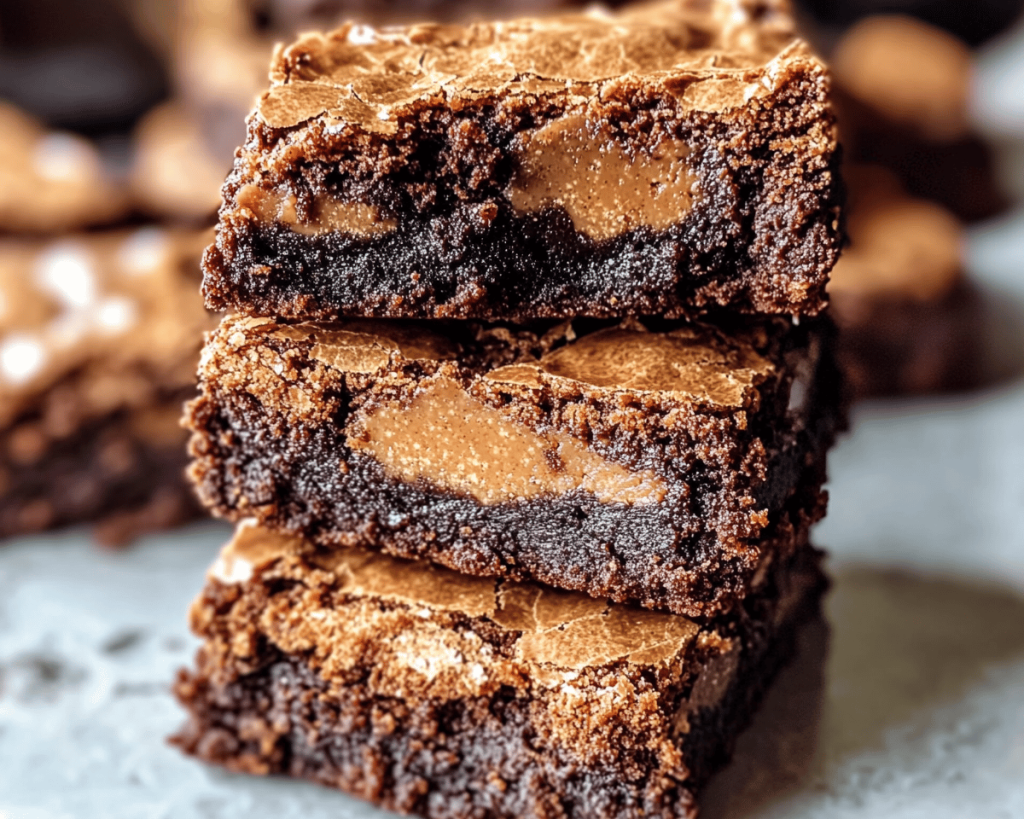
I knew in that moment, I had to infuse my love for cookie butter into the brownie equation. And thus, my Homemade Biscoff Cookie Butter Brownies were born. Let me take you through this delicious journey of making these perfect little squares of joy that you won’t be able to resist. But be warned! The first bite might just make you question all your life choices leading up to this deliciously gooey moment.
Ingredients, Unfiltered
What’s Really in Homemade Biscoff Cookie Butter Brownies
Let’s break down these ingredients and really get to the heart of why this recipe is magic—or, at least, mildly enchanting.
Unsalted Butter: Listen, if there’s one ingredient I go hard for, it’s butter. You could argue that I’ve spent more time melting butter than learning calculus, and you wouldn’t be wrong. Just make sure it’s unsalted because we don’t need any salt drama ruining our sweet vibes.
Granulated Sugar: This is where things get really sweet. Sugar is like that fun friend who is always there to lift your spirits, or in this case, your brownies. It helps with that lovely gooey texture as we whisk it together with the butter like we’re building a sweet little kingdom.
Brown Sugar: Mixed with granulated sugar, brown sugar adds complexity and that coveted chewiness. I like to think of it as the sultry sidekick to our granulated sugar—a little deeper, a little more mysterious.
Eggs: Now, you could argue that eggs hold the whole brownie together, and I would say you’re absolutely right. Use room temperature eggs for better mixing—because we’re fancy and we want to be thorough in our brownie adventures. You’re going to need two of these bad boys.
All-Purpose Flour: This is your traditional white flour, but let’s not kid ourselves. We all know flour is the backbone of our thick and chewy brownie dreams. No whole wheat nonsense in this house; we came here for indulgence!
Unsweetened Cocoa Powder: You can’t have brownies without cocoa powder. It gives that deep, luscious chocolate flavor while keeping things rich. Consider this ingredient your ticket to brownie bliss.
Biscoff Cookie Butter: Ah, the star of the show! If you’ve never tried this magical spread made from crushed Biscoff cookies, prepare to have your mind blown. It adds that lovely caramelized flavor and a dreamy texture—little swirls of happiness that will have you partnering up with your spoon and eating it right from the jar if you’re not careful. Pro tip: buy more than one jar; trust me.
Chocolate Chips: Okay, I may be biased, but I’m convinced that chocolate chips are the fairy dust of any brownie recipe. Not only do they create those delightful little pockets of melted chocolate, they also make for an irresistible look.
Let’s Talk Health (or Not)
Is This Even Healthy? Let’s Discuss
I’d love to sit here and pretend that these brownies are the epitome of health food—like some magical health brigade flew in and sprinkled kale dust into the mix. But let’s be honest: these bad boys are not winning any health awards. But you know what? Who cares! Life is too short for sad, flavorless snacks.
Let’s run through the health “pros” and “cons.”
– **Pros:**
– You’re using actual food, not some weird powdered mix.
– There’s some nutrition in your eggs and cocoa (those are antioxidant-rich, right?).
– **Cons:**
– There’s butter—I’m not here to lie to you; we’re reduced to mere mortals who love their butter.
– Sugar—both granulated and brown sugar are essentially refined happiness and hold hands with a devil-may-care attitude.
So yes, I encourage you to enjoy these brownies on that rainy-day couch while you binge-watch your favorite show—or heck, while you tackle life’s absurdities, one chewy brownie at a time. If anyone asks how many you’ve eaten, just smile and say “self-care.”
Your Grocery List
Here’s What You’ll Need
– ½ cup (1 stick) unsalted butter
– ⅔ cup granulated sugar
– ⅓ cup brown sugar (packed)
– 2 large eggs (room temperature)
– 1 teaspoon vanilla extract (because we’re not dull)
– 1 cup all-purpose flour
– ½ cup unsweetened cocoa powder
– 1 teaspoon baking powder
– ¼ teaspoon salt
– ½ cup Biscoff cookie butter
– ½ cup chocolate chips (or more if you’re feeling wild)
This recipe should yield about 16 chewy, scrumptious brownies that could cheer up a pizza on a Monday night.
The Actual Cooking Part
Okay, Let’s Make This
1. **Preheat Your Oven**: Welcome to the oven preheating club! Set that beauty to 350°F (175°C). Make sure you’re ready to use an 8×8 inch baking pan or a 9×9 inch—just don’t use something gigantic; these brownies need to keep their chewy character.
2. **Melt the Butter**: In a microwave-safe bowl (you know, the one you hardly use aside from heating up store-bought meals), melt your unsalted butter. Don’t take your eyes off it; you don’t want butter explosions on your kitchen walls! I still hear my microwave’s shameful past from where it melted a block of chocolate—never again!
3. **Mix the Sugars**: Combine the warm melted butter with granulated sugar and brown sugar, and whisk that golden goodness until it’s mostly smooth. At this point, I like to think I’m a chemist, stirring my own concoction of happiness.
4. **Add Eggs and Vanilla**: Crack those eggs in like a champ, along with the vanilla extract. Remember, room temperature = better mixing, so don’t skip that step! Mix until you’re feeling good about it; we’re not looking for perfection, just a good vibe.
5. **Combine Dry Ingredients**: In a separate bowl, whisk together your flour, cocoa powder, baking powder, and salt (which may feel unnecessary, but trust me, you need it!). Add them to the wet ingredients and fold gently (more like an enthusiastic hug) until combined. Don’t overmix—it’s brownies, not bread!
6. **Incorporate Biscoff Cookie Butter**: Now we get to the moment of truth—scoop in the Biscoff cookie butter. Swirl it into that brownie batter gently. If you get a little miffed about how the swirls look, just tell yourself they’ll all come together in a perfect union of yumminess once baked.
7. **Fold in Chocolate Chips**: Finally, toss in your chocolate chips, because honestly, what kind of brownie doesn’t have chocolate chips? Oh, and don’t hesitate to eat a few chips while you stir. Quality control is important!
8. **Pour and Spread**: Now, pour the brownie batter into your prepared baking pan. Make sure to spread it even-ish (I’m not a perfectionist, so if it looks a little wonky, I think of it as character).
9. **Bake**: Into the preheated oven they go—set your timer for 25 minutes. Pro tip: if you’re anything like me, you’d set your timer and forget. I once left a brownie batch in so long they could’ve auditioned for a role as a geological wonder. Keep a close eye on them; when a toothpick inserted comes out with moist crumbs, you’re in business!
10. **Cool and Cut**: Once done, let those brownies cool in the pan for a solid 15-20 minutes before slicing them. I know it’s torture, but trust me, they’ll be easier to cut and less likely to fall apart. Plus, you know what they say about molten chocolate goodness—it’s never too late for a brownie.
Side Notes & Sassy Hacks
Bonus Tips You Didn’t Ask For
– **Substitution Station**: Don’t have Biscoff cookie butter? Crying into your keyboard is not an option. You can sub it with Nutella or any chocolate spread, but well, it won’t have that delightful hint of spices. If all else fails, consider going with almond butter for a nutty spin.
– **Extra Chewy**: For that perfect chewy consistency, replace half the flour with additional cocoa powder. But don’t tell anyone who’s watching because they might judge you for bending the rules.
– **Swirls and Twirls**: If you want to really fancy things up, swirl some extra Biscoff on top before baking. I call this the “do-it-for-the-Instagram” approach. Everyone needs that aesthetic in their life.
– **Serving Suggestion**: Serve these brownies with a scoop of vanilla ice cream on top and watch the smiles unfold. It’s like the cherry on top of your favorite sundae, but in brownie form.
– **Chaos Confession**: I once turned my back for one minute while my brownies were cooling and my dog, who clearly has zero respect for human creations, got her paws (literally) into the pan. Let’s just say camera evidence of that moment is forever burned in my brain. No rest was had that day.
Final Words of (Culinary) Wisdom
So there you have it—Homemade Biscoff Cookie Butter Brownies that will speak to your soul (and likely your waistline). Whether you choose to scarf these down on a gloomy day or serve them to guests like some kind of pastry superhero, just know that these brownies will absolutely not disappoint.
If you give these a go, I’d love to see how they turn out! Tag me on social media—or just sneakily send me a mental high-five across the universe. Happy baking, my friends, and remember: always have extra Biscoff on hand for *ahem* experimentation! 🍫