Prep time: 20 minutes
Cook time: 0 minutes
Total time: 20 minutes
Servings: 24 patties
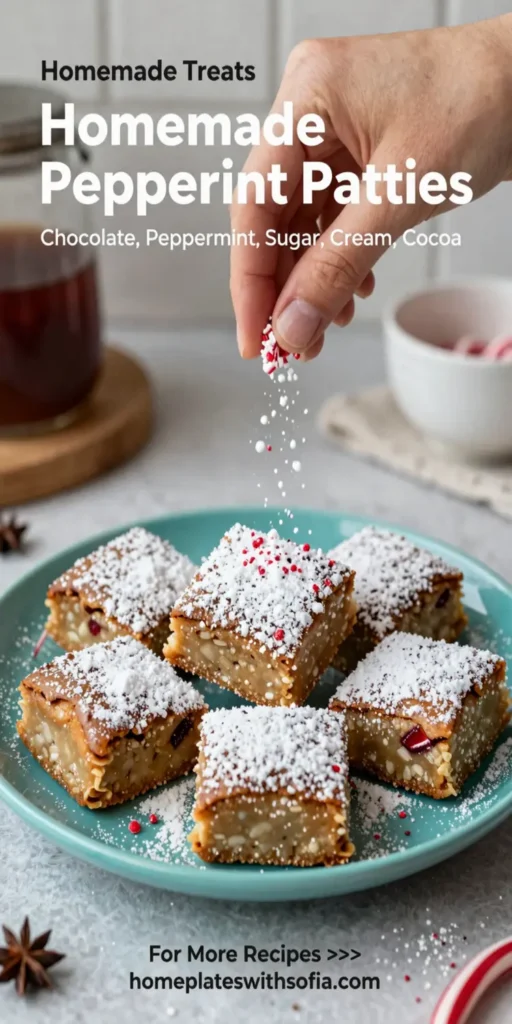
Homemade peppermint patties are a delightful treat that combines a refreshing mint flavor with a smooth chocolate coating, making them an ideal indulgence for any occasion. Whether you’re looking to satisfy your sweet tooth or impress guests at a gathering, these homemade candies are not only easy to prepare but also a fun and rewarding culinary project. Forget the store-bought versions; with homemade peppermint patties, you can control the ingredients and customize the flavor to your preference.
What Is Homemade Peppermint Patties?
Homemade peppermint patties are confectioneries made from a creamy peppermint filling that is often coated in rich chocolate. This classic candy is a favorite during the holidays but can be enjoyed year-round. The unique combination of cool mint and sweet chocolate provides a fresh taste that stands out, making it both a nostalgic and innovative treat. Each bite offers a crunch from the chocolate exterior followed by a soft, melt-in-your-mouth texture of the mint filling.
Why You’ll Love This
There are several reasons why you will fall in love with homemade peppermint patties. First, they are incredibly simple to make, using just a few common ingredients that you likely already have in your pantry. This makes it an achievable project for even the busiest of home cooks. Secondly, you can tailor the sweetness and mintiness to your liking. The fun doesn’t stop there; these patties are perfect for gifting, making them an excellent choice for party favors or holiday treats. Also, knowing exactly what goes into your candy eliminates any unwanted preservatives and artificial flavors that are often found in commercial candies.
Ingredients You’ll Need
- 2 cups powdered sugar: This serves as the base for the mint filling, providing sweetness and body.
- 4 tablespoons unsweetened cocoa powder: Used for the chocolate coating, enhancing the rich flavor of the patties.
- 2 tablespoons unsalted butter, softened: Adds creaminess and helps bind the filling together.
- 1 teaspoon peppermint extract: Provides a refreshing flavor; adjust more or less to taste.
- 2 cups semi-sweet chocolate chips: Used for dipping, creating a luscious coating that contrasts with the minty filling.
- 1 tablespoon coconut oil: To be added to the chocolate to ensure a smooth melting and coating experience.

How to Make
- Begin by combining the powdered sugar, softened butter, and peppermint extract in a large mixing bowl. Use a rubber spatula to mix the ingredients until they form a thick paste. This might take a bit of arm muscle as you want the mixture to be firm yet pliable.
- Once fully combined, test the mixture for flavor. If you want a stronger mint flavor, add a few more drops of peppermint extract, mixing well after each addition to avoid overpowering it.
- Roll the filling into small balls, approximately the size of a dollar coin. Flatten each ball into a disc shape, about 1/2 inch thick. Create a smooth surface by gently pressing and rolling them between your palms.
- Place the discs on a parchment-lined baking sheet and freeze them for about 20 minutes. This helps the patties firm up, making them easier to dip in chocolate without falling apart.
- Meanwhile, melt the semi-sweet chocolate chips along with the coconut oil in a microwave-safe bowl. Heat in 30-second intervals, stirring after each, until the mixture is smooth and glossy. This step is crucial; a burnt chocolate coating will ruin your patties.
- Once the mint discs are firm, dip each one in the melted chocolate using a fork for easy handling. Shake off any excess chocolate and place them back on the parchment paper to set. If you want a double chocolate layer, let the first dip set for a few minutes then repeat the process.
Variations & Substitutions
Dark Chocolate Variation: For a richer flavor, substitute semi-sweet chocolate chips with dark chocolate chips. This offers a deeper taste, balancing the sweetness of the mint filling. Dark chocolate has its own health benefits, adding a nice touch to your peppermint patties.
Vegan Variation: To make these patties vegan-friendly, simply replace the unsalted butter with a plant-based butter alternative. Ensure the chocolate chips used are also dairy-free. Enjoy the same minty freshness without the animal products.
Flavor Infusions: Besides peppermint, consider infusing your patties with other flavors. A dash of orange or lemon extract can create a citrus twist that complements the chocolate beautifully. Remember, when experimenting with flavors, adjust the amounts to suit your taste.
Color Variations: Want to make your peppermint patties more festive? Add food coloring to the mint filling. A touch of green for St. Patrick’s Day or red for Christmas can add a visually appealing touch that makes them even more special.
Chocolate Coating Alternatives: While chocolate is the traditional coating, consider using white chocolate for a different flavor profile. You can even garnish with crushed candy canes for a holiday-inspired look and feel.
Common Mistakes to Avoid
One common mistake is not testing the mint flavor during preparation. Be sure to taste the filling before shaping, as it’s easier to adjust flavors in the bowl than later. Adding too much liquid can lead to a too-soft filling; always start with less and increment as needed.
Another pitfall is improperly melting chocolate. Microwaving it for too long or at too high a temperature can cause it to seize. Always use low temperatures and stir frequently. When coating your patties, failing to shake off excess chocolate can also lead to uneven and clumpy coatings.
Storage, Freezing & Reheating Tips
Homemade peppermint patties can be stored at room temperature in an airtight container for about a week. To ensure they last even longer, consider placing them in the fridge, where they can last for 2-3 weeks.
If you’re planning on making them ahead of time, freeze individual patties between layers of parchment paper in an airtight container. They can stay frozen for up to 3 months. When you’re ready to enjoy them, just take them out and let them thaw at room temperature for about 15 minutes before serving. This ensures they maintain their texture and flavor.
Frequently Asked Questions
Can I use different extracts instead of peppermint? Yes! While peppermint is classic, you can experiment with other flavors like spearmint, orange, or even almond. Just adjust the quantity to prevent overwhelming the base flavors.
How can I prevent the chocolate from cracking? The key to a smooth chocolate coating is proper melting. Ensure you’re using a microwave-safe bowl and stirring frequently to avoid overheating. Additionally, dipping the patties at room temperature can help minimize cracking.
What should I do if my filling is too sticky? If you find your filling is sticky and hard to handle, you can add a little more powdered sugar until the consistency is manageable. Be careful not to add too much at once; small amounts can help you achieve the right balance.
How can I make these gluten-free? The beauty of this recipe is that it’s naturally gluten-free! Ensure your powdered sugar and chocolate chips are certified gluten-free, and you’re all set to enjoy these treats.
Can I use chocolate candy melts for coating? Absolutely! Chocolate candy melts are a great alternative for dipping and can give your patties a colorful twist if you choose to use colored melts. Just be sure to follow package instructions for melting.
Conclusion: Homemade peppermint patties are not only a nostalgic dessert but also an enjoyable project for cooks of all skill levels. With their simple ingredients and delightful flavor, they are sure to be a hit in your home. Whether making them for yourself or as gifts, these patties embody sweetness, freshness, and a touch of creativity. Plus, with the ability to create variations, you can tailor this recipe to suit any occasion!