Prep time: 20 minutes
Cook time: 25 minutes
Total time: 45 minutes
Servings: 12 cupcakes
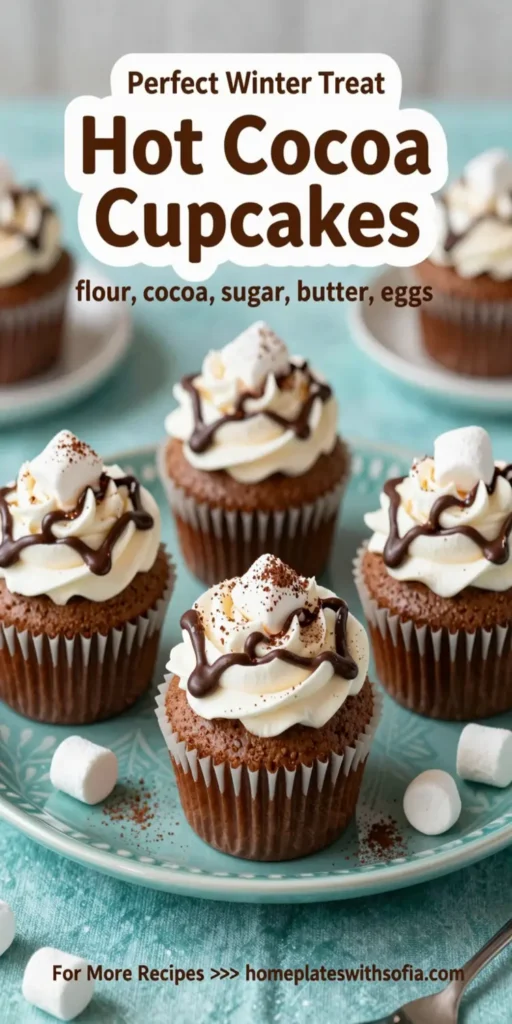
Hot cocoa cupcakes combine the warmth of classic hot chocolate with the delightful charm of cupcakes, creating an indulgent treat perfect for any occasion. Light and fluffy, these cupcakes are topped with a rich chocolate frosting that mimics the taste of your favorite hot cocoa. Whether you’re enjoying them on a chilly winter night or serving them up for a special celebration, these delectable cupcakes are sure to please both kids and adults alike.
What Is Hot Cocoa Cupcakes?
Hot cocoa cupcakes are a unique dessert that captures the essence of hot chocolate in a cupcake form. They’re made with cocoa powder to give them a deep chocolate flavor, while the addition of marshmallows in the batter adds a fun twist that enhances their warmth and sweetness. Often topped with a cream cheese or buttercream frosting, these cupcakes can also feature a drizzle of chocolate sauce and mini marshmallows for an extra touch.When you bite into them, you will experience a moist, tender crumb that transports you right back to your favorite cozy drink.
Why You’ll Love This
You will absolutely love these cupcakes because they combine the familiar and comforting flavors of hot cocoa into a convenient and fun format. They are quite easy to make, making them perfect for busy parents or kitchen beginners. The rich chocolatey flavor paired with the soft, fluffy texture makes them irresistible. Plus, they can be dressed up or down, allowing you to serve them for casual weeknight treats or elaborate parties. With every bite, you can enjoy the nostalgic flavors of a warm mug of hot chocolate, which is sure to bring a smile to your face.
Ingredients You’ll Need
- All-purpose flour: 1 ½ cups – This forms the base of your cupcakes and gives them structure.
- Cocoa powder: ½ cup – This provides the rich chocolate flavor that mimics hot cocoa.
- Granulated sugar: 1 cup – Sweetens the cupcake and gives it a moist texture.
- Baking powder: 1 tsp – Helps your cupcakes rise and become fluffy.
- Salt: ½ tsp – Balances the sweetness and enhances the chocolate flavor.
- Eggs: 2 large – Acts as a binder that adds moisture and richness.
- Milk: 1 cup – Adds moisture and contributes to a tender cupcake.
- Vegetable oil: ½ cup – Keeps your cupcakes moist and soft.
- Vanilla extract: 1 tsp – Adds depth and enhances the overall flavor.
- Mini marshmallows: 1 cup – Added to the batter for a gooey, delicious surprise.

How to Make
- Preheat your oven to 350°F (175°C). Line a cupcake tin with paper liners to make removal easy after baking. This step is crucial to avoid sticking and helps in shaping the cupcakes perfectly.
- In a large mixing bowl, whisk together the all-purpose flour, cocoa powder, baking powder, and salt until evenly combined. This ensures that the dry ingredients are evenly distributed throughout the batter, preventing any pockets of cocoa from forming later.
- In another bowl, mix together the granulated sugar, eggs, vegetable oil, milk, and vanilla extract. Pour the wet ingredients into the dry mixture and stir until just combined. Be careful not to overmix; a few lumps are perfectly fine!
- Gently fold in the mini marshmallows, being cautious not to break them apart. This will provide delightful pockets of melted marshmallow goodness in the cupcakes.
- Using a spoon or a cupcake scoop, divide the batter evenly into the lined cupcake tins, filling each about two-thirds full to allow space for rising. An even distribution ensures that they all bake uniformly.
- Bake for 20-25 minutes or until a toothpick inserted into the center comes out clean. The tops should look dome-shaped and slightly cracked, which gives a perfect look and texture.
- Once baked, remove from the oven and allow them to cool in the pan for about 5 minutes before transferring them to a wire rack to cool completely. This step prevents them from becoming soggy.
Variations & Substitutions
Nut-Free Version: If you’re aiming for a nut-free cupcake, this recipe inherently fits the bill as there are no nuts involved. Make sure to check the labels of all ingredients, especially baking powder and vanilla extract, to ensure there’s no cross-contamination.
Gluten-Free Option: Substitute all-purpose flour with a 1:1 gluten-free flour blend. This will achieve similar results, but always check the specific blend for any additional moisture requirements or advice from the manufacturer.
Vegan Hot Cocoa Cupcakes: Replace the eggs with a flaxseed meal (1 tbsp ground flax mixed with 2.5 tbsp water to replace one egg). Use non-dairy milk such as almond or soy milk and choose a vegan frosting to top them off.
Frosting Variations: Instead of traditional chocolate frosting, consider a whipped cream frosting for a lighter touch or experiment with flavored frostings like peppermint or caramel to add your unique twist.
Common Mistakes to Avoid
Overmixing the Batter: One common mistake is overmixing, which can lead to tough cupcakes. Mix just until combined for the ideal tender texture.
Not Measuring Ingredients Accurately: Precision in measuring ingredients is key to success. Use a kitchen scale or proper measuring cups to ensure each ingredient is accurately measured. Too much flour or cocoa can lead to dry or dense cupcakes.
Skipping the Cooling Time: Allowing the cupcakes to cool properly prevents them from collapsing or becoming soggy. Don’t rush to frost them right out of the oven.
Storage, Freezing & Reheating Tips
For best storage, keep your hot cocoa cupcakes in an airtight container at room temperature for up to 3 days. If you wish to extend their lifespan, consider freezing them. Place the cooled cupcakes in individual freezer-safe bags or wrap them in plastic wrap and then foil before placing them in the freezer. They can be stored for up to 3 months.
When ready to enjoy, allow the cupcakes to thaw at room temperature for a few hours, then frost and enjoy. If already frosted, place them in the refrigerator to thaw slowly, as thawing at room temperature may cause the frosting to melt. For reheating, microwave a cupcake individually for about 10-15 seconds to warm it slightly.
Frequently Asked Questions
Can I use a different type of milk for this recipe?
Absolutely! You can use any type of milk including whole, skim, almond, or soy milk. Each milk will contribute slightly differently to flavor and texture but will work beautifully for this recipe.
How do I know when the cupcakes are done?
The best way is by inserting a toothpick into the center of one cupcake. If it comes out clean or with a few moist crumbs, they are done baking. If batter clings to the toothpick, extend the bake time by a few minutes.
What frosting pairs best with hot cocoa cupcakes?
Rich chocolate buttercream or a light whipped cream frosting are excellent options. You can even sprinkle some mini marshmallows on top for an authentic hot cocoa aesthetic.
Can I make these cupcakes ahead of time?
Yes, you can make the cupcakes a day or two in advance. Simply store them in an airtight container and frost them just before serving to maintain their freshness and texture.
Can I decorate these cupcakes for special occasions?
Definitely! Feel free to add toppings like crushed candy canes for a holiday twist, drizzle with chocolate syrup, or garnish with colored sprinkles for birthdays. The possibilities are endless!
Conclusion:
Hot cocoa cupcakes are a delightful and easy-to-make treat that combines the comfort of hot cocoa with the fun of cupcakes. With their rich chocolate flavor and fluffy texture, they are sure to become a household favorite. Enjoy baking, decorating, and sharing these sweet delights with loved ones!