Prep time: 20 minutes
Cook time: 30 minutes
Total time: 50 minutes
Servings: 12 servings
When you think about desserts that effortlessly blend sweetness and a zingy burst of flavor, **lemon bars** surely come to mind. These delightful treats are perfect for sunny days and cozy gatherings alike. With their luscious tangy filling set atop a buttery, crumbly crust, **lemon bars** have earned a special place in the hearts of home bakers and dessert enthusiasts around the world. This recipe is not only easy to follow but also ensures that every bite will have you and your loved ones longing for more.
Why is this recipe special, you ask? The harmonious balance of the sweet and tart filling under a perfectly baked crust makes **lemon bars** more than just a dessert; they are an experience. You will learn how to achieve that irresistible lemon flavor while mastering the art of the shortbread crust. In this article, we will delve into the fundamental aspects of making these bars, exploring tips for success, mouthwatering variations, and all the little details that transform a simple recipe into a family favorite.
What Is Lemon Bars (Easy + Bright)?
**Lemon bars** are a classic dessert that originated in the early 20th century and have been a beloved staple in American kitchens ever since. This dessert consists of a crisp, buttery shortbread crust that serves as the base for a creamy, tangy lemon filling. The filling typically includes fresh lemon juice, sugar, eggs, and zest, all coming together to create a sweet yet tart balance that is ateasy refreshing.
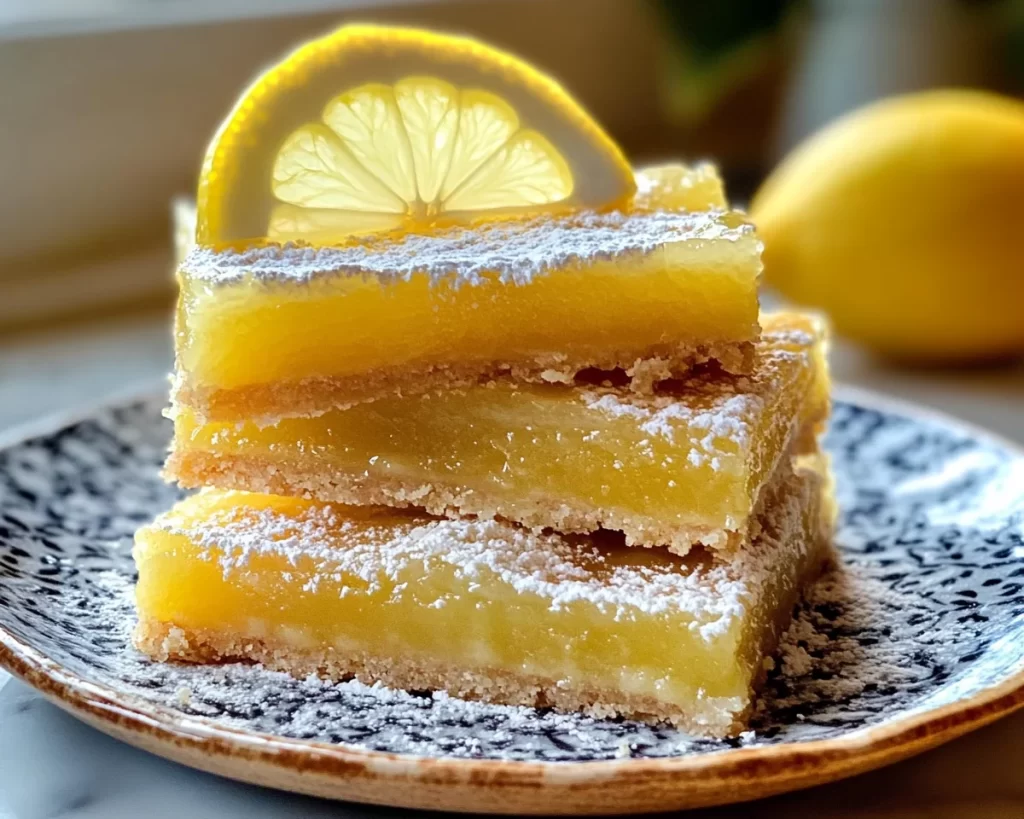
The texture of **lemon bars** is a prominent feature. The crust is crumbly and melts in your mouth while the filling is smooth and silky, creating a delightful contrast. Each bar is also dusted with powdered sugar, giving it an appealing finishing touch that promises sweetness before you even take your first bite. The vibrant yellow color of the lemon filling is like sunshine on your plate, adding to the overall appeal of this dessert.
These bars are perfect for various occasions, whether it’s a summer picnic, a birthday celebration, or just a treat for yourself after a long day. The versatility of **lemon bars** means that you can adjust the sweetness, tartness, and even texture based on your preferences. Trust me, once you try making them from scratch, you’ll see just how satisfying it is to bite into one of these zesty delights.
Why You’ll Love This
One of the biggest benefits of making **lemon bars** is their incredible taste. You’ll enjoy the flavor explosion that comes from the combination of **fresh lemons** and sugar. The sweetness of the sugar cuts through the tartness of the lemons but doesn’t overwhelm it. This balance makes the dessert both satisfying and refreshing, perfect for cleansing the palate at the end of a meal.
An added bonus is the simplicity of the recipe. Even if you’re just starting out in the kitchen, you’ll find that making **lemon bars** doesn’t require any complicated techniques or hard-to-find ingredients. This means that anyone, including busy parents and culinary beginners, can whip up a batch without feeling overwhelmed. Plus, they are fairly budget-friendly, using common pantry staples such as flour, sugar, and eggs.
Many people might think that **lemon bars** can only be enjoyed in the summer or during holiday gatherings, but that couldn’t be further from the truth. These bars can be made any time of the year. Want a winter brightener? Serve **lemon bars** as a refreshing dessert after a hearty meal. Not to mention, they can be easily customized to fit various dietary needs and preferences. With a little creativity, you can turn this classic dessert into something uniquely yours.
Ingredients You’ll Need
- All-purpose flour: This forms the base of your crust. You can substitute it with gluten-free flour if necessary.
- Granulated sugar: Used in both the crust and filling to bring sweetness to balance the tartness of lemons.
- Unsalted butter: Gives the crust its rich flavor and crumbly texture. Make sure it’s at room temperature for easy mixing.
- Eggs: Essential for the filling to create a fluffy, smooth, and cohesive mixture.
- Fresh lemon juice: The star of the show! Freshly squeezed juice ensures the cleanest and brightest flavor.
- Lemon zest: Enhances the lemon flavor and adds aromatic oils that elevate the overall taste.
- Powdered sugar: For dusting the top for a beautiful finish and additional sweetness.
Each ingredient plays a crucial role in creating the perfect **lemon bars**. For instance, using **fresh lemon juice** instead of bottled juice can greatly enhance the flavor profile, providing a vibrant, zesty experience that bottled lemon juice often lacks. When making your crust, ensure your **butter** is softened; this will help create that desirable crumbly texture rather than a dense one.
Want to make your lemon bars a bit healthier? You can opt for natural sweeteners like honey or maple syrup in moderation, adjusting the ratios accordingly.
How to Make
- Preheat your oven to 350°F (175°C). It’s important to get your oven ready ahead of time so your **lemon bars** bake evenly for that perfect texture. While the oven heats, you can start on your crust.
- In a mixing bowl, combine 1 cup of all-purpose flour, 1/4 cup of granulated sugar, and 1/4 cup of softened unsalted butter. Use a fork or your fingers to mix until the mixture resembles coarse crumbs. This is the foundation of your dessert and will provide that delicious crumble underneath the **lemon filling**.
- Press this mixture into the bottom of an 8×8-inch baking pan. Ensure you pack it down evenly. For an even crust, you can dampen your hands slightly to help mold it. Bake the crust for around 15 minutes, or until it is slightly golden.
- While the crust is baking, whisk together 2 large eggs in another bowl until they are light and fluffy. This step is crucial as it adds a light texture to your filling that contrasts nicely with the crust.
- To the beaten eggs, add 1 cup of granulated sugar, 1/4 cup of freshly squeezed lemon juice, and the zest of one lemon. Whisk everything together until smooth. Once combined, gradually fold in another 1/4 cup of all-purpose flour. This will help thicken the filling.
- After the crust is done baking, remove it from the oven and pour the lemon filling over the hot crust. Allow it to spread evenly. The heat from the crust will set the filling nicely as it bakes.
- Bake the **lemon bars** for an additional 20 minutes, or until the filling has set but has a slight jiggle in the center. This careful timing is essential to prevent a rubbery texture.
- Once baked, remove the pan from the oven and allow it to cool completely on a wire rack. This cooling period allows the filling to fully set.
- After cooling, dust the **lemon bars** with powdered sugar before slicing them into squares. A sharp knife will yield the best results.
- Serve and enjoy your delicious **lemon bars**. If you have extra lemon zest, consider garnishing it on top for added visual appeal!
It’s worth noting that timing and temperature are essential elements in creating the best **lemon bars**. You want your filling to be set but not overcooked. Also, the cooling step can feel tedious, but it really helps with cutting clean squares, essential for a polished presentation.
Variations & Substitutions
Gluten-Free Lemon Bars: If you have gluten sensitivities or prefer a gluten-free option, simply substitute the all-purpose flour with a good-quality gluten-free flour blend. Many blends mimic the texture of all-purpose flour quite well. Remember to double-check that your baking powder is also gluten-free. This variant will still yield a tasty dessert with that familiar **lemony** brightness!
Vegan Lemon Bars: To make a vegan version, you can replace the eggs with **flaxseed meal** mixed with water (1 tablespoon of flaxseed meal with 2.5 tablespoons of water equals one egg). For the butter, use coconut oil or a vegan butter substitute. Utilizing maple syrup instead of white sugar can provide a unique depth of flavor that works exceptionally well with the tartness of the lemons.
Lemon Coconut Bars: For a tropical twist, add shredded coconut to the crust and some toasted coconut on the topping. This will bring a chewy texture and extra flavor that complements the tanginess of the lemons beautifully. Pair this with a hint of **lime juice** for an exceptional flavor experience.
Berry Lemon Bars: Incorporate some fresh blueberries or raspberries into the filling for a delightful fruity twist. The berries will infuse their flavor into the bars and provide an appealing color contrast as well. Be sure to gently fold them in so they don’t break apart too much.
Herb-Infused Lemon Bars: For something unique, add a dash of fresh herbs like **thyme** or **basil** to the filling. These herbs will give your bars a surprising and refreshing dimension. Pairing herbal notes with the zesty lemon creates a sophisticated dessert that can wow your guests.
Common Mistakes to Avoid
When making **lemon bars**, there are some common pitfalls to be aware of. One major mistake is overbaking the filling. If you leave it in the oven too long, the bars can end up rubbery and lose their delightful silky texture. Always check for that slight jiggle when you take it out of the oven; it will firm up as it cools.
Another common issue is not using enough **fresh lemon juice**. Bottled lemon juice may save time, but it lacks the vibrant kick that fresh lemons offer. Always aim for **fresh lemon juice** and zest, as they greatly enhance the flavor profile of your bars.
It’s also important to allow the bars to cool completely before slicing. Cutting too soon can result in a messy presentation, making it harder to achieve perfect squares. Patience here pays off!
Lastly, don’t forget to dust your finished **lemon bars** with powdered sugar. This simple step not only enhances the visual appeal but also adds an extra touch of sweetness, balancing the tartness perfectly.
Storage, Freezing & Reheating Tips
Proper storage of your **lemon bars** can help maintain their flavor and texture. To store, place them in an airtight container at room temperature for up to 3 days. If you live in a humid area, consider refrigerating them to maintain that crispy crust.
These delightful treats also freeze exceptionally well. To freeze, ensure they are first completely cool. Wrap each bar in plastic wrap and then place them in a freezer-safe container. They can be stored in the freezer for up to 3 months. When you’re ready to enjoy, simply remove them from the freezer and let them thaw at room temperature for a couple of hours.
For reheating, if you’d like to enjoy them warm, pop your **lemon bars** in the oven at a low temperature (around 300°F or 150°C) for about 10 minutes. Thawing before heating will yield a more even texture.
In terms of food safety, always ensure that any sugary treats are stored safely, especially if they contain eggs. Keeping them in a cool, dry place will help preserve them and ensure they remain safe to eat.
Frequently Asked Questions
Can I make lemon bars ahead of time?
Absolutely! **Lemon bars** can be made a day in advance, making them a great option for dessert planning. Just make sure they are properly cooled and stored in an airtight container. The flavors may even deepen overnight, providing an even more delicious experience the next day.
What type of lemons should I use for this recipe?
For the best results, stick to **fresh lemons**. Varieties such as **Eureka** or **Lisbon** are great choices. These lemons are juicy and flavorful, ensuring that your bars have that signature zesty brightness. Avoid using lemons that are too hard; the juiciness is key in this recipe.
Can I use bottled lemon juice instead of fresh lemon juice?
While you can use bottled lemon juice in a pinch, I strongly recommend using fresh lemon juice for the best flavor. **Bottled lemon juice** often lacks the freshness and brightness that only real lemons can provide.
How do I know when my lemon bars are done baking?
A great way to test is to look for a slight jiggle in the center of the filling when you take them out of the oven. The edges should be set, and the center should have a soft, creamy consistency.
Can I use other citrus fruits for making bars?
Certainly! You can swap out **lemons** for **limes, oranges, or even grapefruits**. Each citrus fruit will provide a unique flavor profile, allowing you to experiment with different tastes while following the same foundational recipe.
Conclusion:
This recipe for **lemon bars** has everything you need for a delightful and refreshing dessert that is easy to make and a joy to share. From the buttery, crumbly crust to the bright, tangy filling, every bite encapsulates the essence of sunshine. Whether you choose to experiment with variations or stick to the classic, you will find that these bars offer incredible satisfaction for both the baker and the eater. So roll up your sleeves and embark on this baking adventure. Your friends and family will thank you, and soon these bars will be a cherished part of your dessert repertoire. Enjoy the process, savor the results, and encourage others to indulge in this timeless treat!