# No-Bake Butterfinger Caramel Bars
## Meta Title
Delicious No-Bake Butterfinger Caramel Bars Recipe
## Meta Description
Learn how to create amazing No-Bake Butterfinger Caramel Bars with this easy recipe. Indulge in sweet layers of flavor without turning on the oven!
## Introduction
Picture this: a warm afternoon, the aroma of sweet caramel hanging in the air, and the sound of cheerful chatter echoing from the kitchen. This sensation is not far from reality when you’re about to make mouthwatering NO-BAKE BUTTERFINGER CARAMEL BARS. These indulgent treats combine creamy, rich layers of butter, luscious caramel, and crunchy Butterfinger candy, delivering a delightful balance that dances on the palate. Best of all, there’s no baking involved, making them perfect for a quick dessert or a delightful surprise for friends and family.
In this article, you will learn how to make these incredible bars step-by-step, discover variations to suit your taste, and explore complementary dishes to elevate your dessert experience. Get ready to indulge in a world of flavor with these easy decadent treats!
—
## What Are No-Bake Butterfinger Caramel Bars?
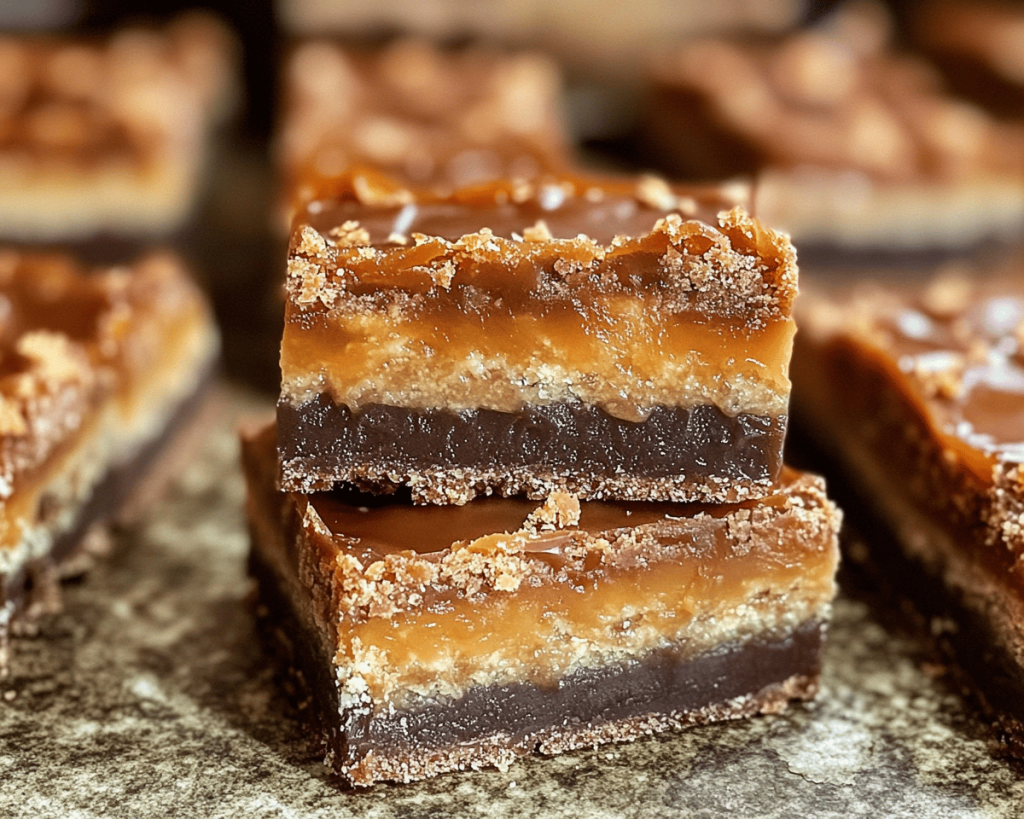
NO-BAKE BUTTERFINGER CARAMEL BARS are a delicious confection made without the need for an oven. They feature a flawless layer of crumbled Butterfinger candy layered with creamy caramel, all perfectly balanced on a crunchy base. The versatility of these bars allows for a combination of textures and flavors that are faintly reminiscent of your childhood favorites but elevated to a new level of enjoyment.
### Culinary Background
Originating as a playful twist on traditional baked treats, these no-bake bars emerged as a popular choice for those seeking quick dessert solutions. The trend of no-bake desserts has grown, especially among those with busy lifestyles or kitchens without access to an oven.
### Cultural Significance
The Butterfinger candy bar, created in 1923, was designed to delight chocolate lovers with its distinctive peanut butter flavor coated in chocolate. Combining these flavor elements into a no-bake dessert has created a beloved treat suitable for any occasion, from casual gatherings to festive celebrations.
### Key Flavors
The prominent flavors in these bars come from the buttery caramel, the crunchy and slightly nutty Butterfinger pieces, and a touch of salt to enhance sweetness. Together, they marry beautifully, creating a layered flavor experience that satisfies the sweetest tooth.
### Texture and Sensory Profile
You will be delighted by the contrasting textures: the crunchy base, the gooey caramel, and the crispy Butterfinger top layer. Each bite is a burst of sweetness mixed with slight crunchiness, making these bars irresistible.
### Why They Are Beloved
NO-BAKE BUTTERFINGER CARAMEL BARS are cherished not just for their delightful taste and texture but also for their quick preparation time. They are the ultimate simple treat—perfect for last-minute gatherings or satisfying your sweet cravings without the hassle of baking.
**Bonus Tip:** Keep a batch of these bars on hand for unexpected guests. They store beautifully in the refrigerator!
—
## Why You Will Love This No-Bake Butterfinger Caramel Bars
1. **Quick and Easy**: Prepare in less than 30 minutes without turning on the oven.
2. **Decadent Flavor**: Experience a rich combination of butter, caramel, and chocolatey Butterfinger crunch.
3. **No Baking Required**: Perfect for beginners or those without baking equipment.
4. **Customizable**: Easily swap ingredients to match your taste preferences.
5. **Great for Special Occasions**: Impress friends and family with this delightful dessert.
6. **Makes Great Gifts**: Wrap them up beautifully for a personal touch.
7. **Kid-Friendly Activity**: Involve your children in a fun kitchen project.
**Extra Idea:** Use cookie cutters to shape these bars into fun designs for special occasions!
—
## Ingredients You Will Need
– **1 cup of CRUSHED GRAHAM CRACKERS**: Choose plain or honey-flavored for a subtle sweetness.
– **½ cup of UNSALTED BUTTER, melted**: This adds richness and helps bind the crust together.
– **1 cup of SWEETENED CONDENSED MILK**: Provides a creamy texture and sweetness to the layer.
– **1 cup of CARTERED BUTTERFINGER BARS, crumbled**: This is the star ingredient — use fresh bars for the best flavor.
– **10 oz of CARAMEL SAUCE**: Store-bought options work well; make sure it’s pourable.
– **1 cup of CHOCOLATE CHIPS**: Semi-sweet chocolate pairs beautifully; consider dark chocolate for a richer taste.
### Ingredient Alternatives
| Ingredient | Alternative |
|———————–|———————————-|
| Crushed Graham Crackers | Digestive biscuits, Oreo crumbs |
| Unsalted Butter | Coconut oil, vegan butter |
| Sweetened Condensed Milk | Coconut milk, almond milk (thicker) |
| Butterfinger Bars | Peanut brittle, chocolate-covered pretzels |
| Caramel Sauce | Homemade caramel, date caramel |
| Chocolate Chips | White chocolate, butterscotch chips |
—
## How to Make No-Bake Butterfinger Caramel Bars Step by Step
1. **Prepare the Base**: In a mixing bowl, combine the CRUSHED GRAHAM CRACKERS and MELTED UNSALTED BUTTER. Stir until the mixture is well combined, resembling wet sand. Press this mixture firmly into the bottom of a greased 9×9-inch baking dish, ensuring even coverage. **Pro Tip**: Use the bottom of a measuring cup to pack it tightly for a sturdy base.
2. **Add the Caramel Layer**: In a saucepan over low heat, melt the CARAMEL SAUCE until it thins out. Pour half of the melted caramel evenly over the crust. Spread it gently with a spatula, avoiding disrupting the graham cracker layer too much. **Pro Tip**: If you prefer extra gooeyness, try using a slightly thicker caramel sauce.
3. **Layer the Butterfinger**: Sprinkle the crumbled CARTERED BUTTERFINGER BARS generously over the caramel layer, ensuring they cover it completely. You can press them down gently to secure them into the caramel. **Pro Tip**: For added flavor, try sprinkling in a bit of sea salt before this layer for a delightful contrast.
4. **Finish with Chocolate**: Melt the CHOCOLATE CHIPS in a microwave-safe bowl in 30-second intervals, stirring in between until fully melted. Pour the chocolate over the Butterfinger layer, spreading it evenly. Drizzle any remaining caramel sauce over the chocolate for a decorative touch. **Pro Tip**: To achieve a glossy finish, avoid overheating the chocolate.
5. **Chill and Set**: Refrigerate the dish for at least 2-3 hours or until the layers are set, making it easier to cut into bars. Once chilled, lift them out using the edges of the baking dish for easy slicing. **Advanced Technique**: For cleaner cuts, warm your knife slightly before slicing.
—
## Chef Tips, Variations, and Substitutions
1. **Vegan Variations**: Use coconut oil instead of butter, plant-based sweetened condensed milk, and dairy-free chocolate chips for a vegan-friendly treat.
2. **Gluten-Free Adaptations**: Opt for gluten-free graham crackers or use a combination of almond flour with nuts for the crust.
3. **Flavor Additions**: Stir in a teaspoon of vanilla extract into the melted caramel or base for enhanced flavor.
4. **Texture Adjustments**: For a chewier bar, use more caramel, or alternatively, sprinkle chopped nuts such as peanuts or walnuts.
5. **Time-Saving Strategies**: Prep the bars the day before serving to allow ample chill time and ensure they are perfectly set.
**Extra Variation:** Top these bars with colorful sprinkles or drizzle with white chocolate for festive occasions!
—
## What to Serve With No-Bake Butterfinger Caramel Bars
1. **Ice Cream**: Vanilla bean ice cream complements the sweet richness of the bars perfectly.
2. **Fruit Salad**: A refreshing mix of fruits adds brightness and balances the richness.
3. **Coffee or Hot Chocolate**: The warm drinks provide a comforting contrast to the cool bars.
4. **Milk**: A classic pairing that enhances the nostalgic feel of enjoying Butterfingers.
**More Inspiration:** These bars can also be served alongside a selection of cookies for a dessert platter at your next gathering.
—
## Storage and Meal Prep Tips
– **Refrigeration**: Store your bars in an airtight container in the refrigerator for up to one week.
– **Freezing Methods**: For long-term storage, freeze individually wrapped pieces in freezer-safe bags for up to three months.
– **Reheating Instructions**: If frozen, thaw in the refrigerator overnight before serving.
– **Best Containers**: Use glass or plastic containers with tight lids to maintain freshness.
– **Make-Ahead Strategies**: Prepare the bars two to three days in advance for optimal flavor and texture, as the layers meld beautifully over time.
**Meal Prep Bonus:** Consider doubling the recipe to have an extra batch ready for easy desserts or unexpected guests.
—
## Nutrition Highlights
NO-BAKE BUTTERFINGER CARAMEL BARS are indulgent yet can offer nutritional benefits from the ingredients used:
– **Protein**: The inclusion of nut butter or additional nuts can boost protein content significantly.
– **Fiber**: The graham crackers or nut crusts provide dietary fiber, aiding in digestion.
– **Vitamins**: Depending on added ingredients like nuts or dark chocolate, expect some vitamins such as E and B-complex.
– **Minerals**: Nuts provide minerals such as magnesium and zinc, contributing to overall health.
– **Antioxidants**: Chocolate, especially dark varieties, is loaded with antioxidants that may benefit heart health.
This recipe is suitable for those looking to indulge without guilt, fitting comfortably into various dietary habits, including vegetarian and occasional high-protein plans.
**Nutrition Insight:** For a more balanced dessert experience, consider serving your bars with fresh fruit or a nut-based topping.
—
## Frequently Asked Questions
1. **Can I substitute the Butterfinger bars?**
Yes! You can use other candy bars like Reese’s or Snickers, or even a mix of crunchy nuts and toffee bits for variations.
2. **What is the best way to cut these bars?**
To achieve cleaner cuts, use a warm knife and cut the bars while they’re chilled. This minimizes breaking and mess.
3. **How long can I store these bars?**
In the refrigerator, they will stay fresh for up to one week, and in the freezer, they can last for three months if properly wrapped.
4. **Can I make these bars ahead of time?**
Absolutely! Preparing them a day or two in advance allows the flavors to meld beautifully.
5. **How do I prevent the chocolate from hardening too much?**
Ensure you don’t overheat the chocolate; use gentle heat and keep it warm but pourable when applying.
—
## Variants Section
1. **Chocolate Peanut Butter Variation**: Add creamy peanut butter to the chocolate layer for extra richness.
2. **Minty Fresh Bars**: Mix peppermint extract into the melted chocolate for a refreshing twist.
3. **Coconut Lovers**: Fold in shredded coconut into the butterfinger layer for a tropical flair.
4. **Strawberry Drizzle**: Top bars with a homemade strawberry sauce or fresh diced strawberries for added freshness.
5. **Espresso Infusion**: Incorporate espresso powder in the chocolate layer for a mocha flavor boost.
6. **S’mores Style Bars**: Replace Butterfinger with toasted marshmallows and chocolate chips for a campfire-inspired treat.
7. **Nut Lover’s Delight**: Add chopped nuts, such as almonds or pecans, to the base or sprinkle on top for added crunch.
—
## Conclusion
Indulging in NO-BAKE BUTTERFINGER CARAMEL BARS is more than just enjoying a sweet treat; it’s creating a moment filled with flavors, textures, and memories. The delightful harmony of buttery caramel, crunchy Butterfinger, and a crisp foundation makes for an unforgettable dessert experience that’s both satisfying and simple to prepare. Try this No-Bake Butterfinger Caramel Bars tonight — your kitchen will smell amazing, and everyone will ask for seconds.