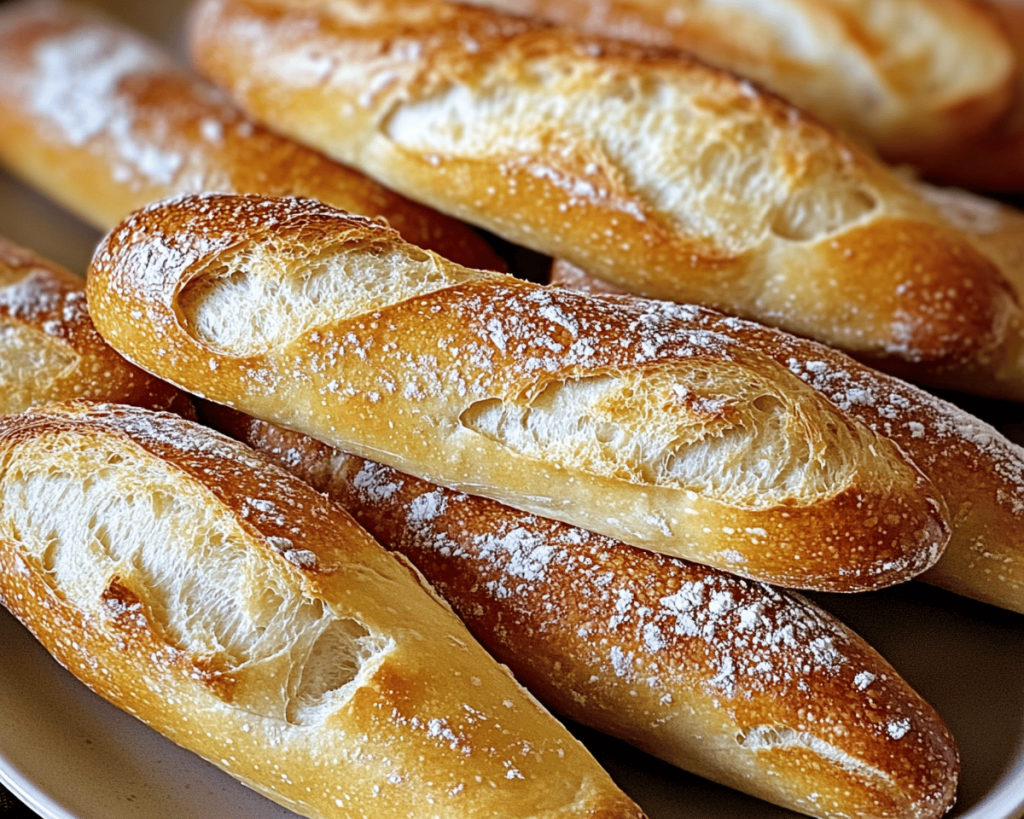
Crusty Mini Baguettes
Prep Time: 15 minutes
Rise Time: 1.5–2 hours
Cook Time: 20–25 minutes
Total Time: 2–2.5 hours
Servings: 6 mini baguettes
Few things feel as satisfying as pulling your own mini baguettes out of the oven—deep golden, crackly on the outside, and soft and airy inside. The sound of the crust gently crackling as they cool, the smell of fresh bread drifting through the house… suddenly your kitchen feels a little bit like a small French bakery.
These CRUSTY MINI BAGUETTES are designed to look professional without requiring years of baking experience. With a simple dough and a few shaping tricks, you’ll get those classic baguette-style loaves in a cute, mini format that’s perfect for dinners, cheese boards, or sandwiches.
If you’ve ever wanted to try bread baking but felt intimidated, this recipe is a great place to start—minimal ingredients, clear steps, and very rewarding results.
What Are Crusty Mini Baguettes?
CRUSTY MINI BAGUETTES are a smaller, more manageable version of the traditional French baguette. They keep everything you love about the classic:
-
A crisp, golden crust
-
A soft, open crumb inside
-
A simple ingredient list: flour, water, yeast, and salt
In France, bakers have been refining baguette techniques for generations. The magic lies in patience, proper fermentation, and handling the dough gently. Even in mini form, these baguettes still deliver the classic contrast: shatteringly crisp outside, tender and airy inside.
They’re incredibly versatile: serve them with soups and stews, slice them for sandwiches, or simply tear them apart and enjoy with butter, olive oil, or cheese.
Bonus Tip:
Dust the shaped baguettes lightly with flour before baking for that rustic, bakery-style look.
Why You Will Love These Crusty Mini Baguettes
-
They look impressive – Perfect for guests, charcuterie boards, or special meals.
-
Crunchy crust, soft center – Classic baguette texture in mini form.
-
Versatile – Great for sandwiches, sides, appetizers, or snack boards.
-
Freezer-friendly – Make a batch and freeze for future meals.
-
Simple ingredients – Just pantry staples; no fancy equipment required.
Extra Idea:
Stir in grated cheese or dried herbs to the dough for a flavorful twist.
Ingredients You Will Need
-
3 ½ cups all-purpose flour
Forms the base of the baguettes and gives structure and chew. -
2 teaspoons salt
Enhances flavor and helps control yeast activity. -
1 ½ teaspoons active dry yeast
Makes the dough rise and develops flavor. -
1 ½ cups warm water (about 110°F / 43°C)
Activates the yeast and hydrates the flour. -
1 teaspoon sugar (optional)
Helps feed the yeast and can give a slightly faster rise.
Ingredients Summary Table
| Ingredient | Measurement |
|---|---|
| All-purpose flour | 3 ½ cups |
| Salt | 2 teaspoons |
| Active dry yeast | 1 ½ teaspoons |
| Warm water | 1 ½ cups |
| Sugar (optional) | 1 teaspoon |
Step-by-Step Instructions
1. Mix the Dough
In a large mixing bowl, whisk together 3 ½ cups flour and 2 teaspoons salt.
In a separate bowl, combine 1 ½ teaspoons active dry yeast, 1 teaspoon sugar (if using), and 1 ½ cups warm water. Let it sit for 5–10 minutes until it becomes foamy on top.
Pour the yeast mixture into the flour mixture and stir with a wooden spoon or spatula until a shaggy dough forms.
Pro Tip:
If the dough feels very sticky, add a little flour at a time. It should be soft and slightly tacky, not dry.
2. Knead the Dough
Turn the dough out onto a lightly floured surface. Knead for about 10 minutes until it becomes smooth, stretchy, and elastic.
You can use the windowpane test: gently stretch a small piece of dough—if it becomes thin and translucent without tearing immediately, it’s ready.
Pro Tip:
Try not to add too much extra flour while kneading. A slightly wetter dough gives a nicer crumb inside.
3. First Rise
Place the dough into a lightly greased bowl, turning once to coat. Cover with plastic wrap or a damp cloth and let it rise in a warm spot for 1–1.5 hours, or until doubled in size.
Pro Tip:
You can briefly preheat your oven for a minute or two, turn it off, and place the covered bowl inside for a cozy rising environment.
4. Shape the Mini Baguettes
Gently punch down the risen dough to release excess air. Turn it out onto a lightly floured surface and divide into 6 equal pieces.
For each piece:
-
Pat it into a small rectangle.
-
Fold the long sides toward the center, then roll tightly into a log.
-
Gently roll the log with your hands to lengthen it into a mini baguette.
Pro Tip:
Pinch the seam underneath each baguette well so it doesn’t burst open awkwardly while baking.
5. Second Rise
Place the shaped baguettes on a parchment-lined baking sheet (or a floured couche if you have one), leaving some space between each.
Cover with a clean, damp kitchen towel and let them rise again for 30–40 minutes, or until noticeably puffy.
Pro Tip:
If you have a baking stone or baking steel, you can preheat it in the oven and bake your baguettes on it for even better oven spring and crust.
6. Prep for Baking
Preheat your oven to 450°F (230°C).
Just before baking, use a sharp razor blade or serrated knife to make several diagonal slashes on the top of each baguette. This helps control how the dough expands in the oven and gives that signature baguette look.
Pro Tip:
Spritz the inside of the hot oven with water just before and right after placing the tray inside. The burst of steam helps create a crisp, blistery crust.
7. Bake
Bake the mini baguettes for 20–25 minutes, or until they are deep golden brown and sound hollow when tapped on the bottom.
Pro Tip:
Rotate the baking sheet halfway through baking to ensure even browning.
Advanced Technique
Want to level up the flavor?
-
Try using a poolish (a simple overnight pre-ferment)
-
Or incorporate a sourdough starter for more complex, tangy notes
Both methods add depth of flavor and improve the crust and crumb.
Chef Tips, Variations, and Substitutions
-
High-hydration dough:
Slightly increase the water for a more open, airy crumb (just know the dough will be stickier). -
Gluten-free version:
Use a gluten-free bread flour blend—texture will be different, but still tasty. -
Flavor add-ins:
Mix dried herbs (rosemary, thyme, oregano), grated cheese, or garlic powder into the dough. -
Vegan-friendly:
This recipe is naturally vegan as written—no dairy or eggs required. -
Serve with herbed butter:
Whip softened butter with herbs, garlic, or lemon zest to serve alongside for a restaurant-style touch.
Extra Variation:
Fold in chopped olives for a Mediterranean-style mini baguette.
What to Serve With Crusty Mini Baguettes
-
French onion soup – Perfect for dipping, soaking up all that rich broth and cheese.
-
Fresh salads – Add sliced baguette on the side or turn it into crunchy crostini.
-
Charcuterie boards – Ideal for spreading with soft cheeses, pâtés, or topping with cured meats.
More Inspiration:
Toast slices, drizzle with olive oil and balsamic vinegar, and top with tomatoes for a simple bruschetta-style appetizer.
Storage and Meal Prep Tips
-
Short-term:
Keep cooled baguettes in a paper bag at room temperature for a day or two to maintain the crust. -
Freezing:
For longer storage, let baguettes cool completely, then wrap in plastic wrap and foil, and freeze for up to 3 months. -
Reheating:
Place frozen or thawed baguettes in a 375°F (190°C) oven for about 10 minutes to revive the crust and warmth.
Meal Prep Bonus:
Bake a double batch, freeze several mini baguettes, and you’ll always have fresh “bakery” bread ready for soups, salads, and last-minute guests.
Nutrition Highlights
CRUSTY MINI BAGUETTES are mainly a source of carbohydrates, providing quick energy. When enjoyed as part of a balanced meal—paired with protein, healthy fats, and vegetables—they can fit nicely into many eating styles.
Using part whole wheat or spelt flour boosts fiber and adds extra nutrients. For more detailed nutrition breakdowns, references like Healthline or USDA databases can help you tailor portion sizes to your needs.
Nutrition Insight:
Think of the baguette as the “carb” portion of your meal: pair with lean protein (chicken, fish, beans) and healthy fats (olive oil, avocado, nuts) to keep things balanced.
Frequently Asked Questions
1. Can I use whole wheat flour?
Yes. You can replace part or all of the all-purpose flour with whole wheat flour. Start with 25–50% whole wheat to keep the texture light, as 100% whole wheat can make the bread denser.
2. How can I make my baguettes extra crusty?
Use steam in the oven (spritz water or place a pan with hot water on the bottom rack) and bake directly on a preheated stone or steel if possible.
3. How do I know when the baguettes are fully baked?
They should be golden brown, feel light for their size, and sound hollow when tapped underneath. An internal temperature around 190°F (88°C) is a good indicator.
4. Can I add toppings before baking?
Absolutely. Sprinkle sesame seeds, poppy seeds, everything bagel seasoning, or grated cheese on top after scoring and just before baking.
5. What’s the best way to keep them fresh?
Enjoy them the same day for peak crispness. After that, store in a paper bag for 1–2 days or freeze and reheat as needed.
Variants Section
-
Cheese-Stuffed Mini Baguettes – Wrap small pieces of cheese inside the dough for a melty center.
-
Olive & Rosemary Baguettes – Add chopped olives and fresh rosemary.
-
Sweet Breakfast Baguettes – Mix in a little sugar, cinnamon, or raisins.
-
Sundried Tomato & Basil Baguettes – Perfect for Italian-style sandwiches.
-
Spelt Mini Baguettes – Swap in spelt flour for a nuttier, heartier flavor.
-
Garlic & Herb Baguettes – Mix roasted garlic and herbs into the dough or brush with garlic butter after baking.
-
Spicy Chorizo Baguettes – Fold in small cubes of chorizo for a savory, spicy loaf.
Conclusion
Baking CRUSTY MINI BAGUETTES at home is one of those simple pleasures that feels incredibly rewarding. With just a few basic ingredients and a little time, you can create mini loaves that look and taste like they came from a bakery.
Serve them warm, listen to that crust crackle, and enjoy every bite—crispy on the outside, soft on the inside, and totally homemade.
Try these CRUSTY MINI BAGUETTES tonight — your kitchen will smell amazing, and everyone will ask for seconds.