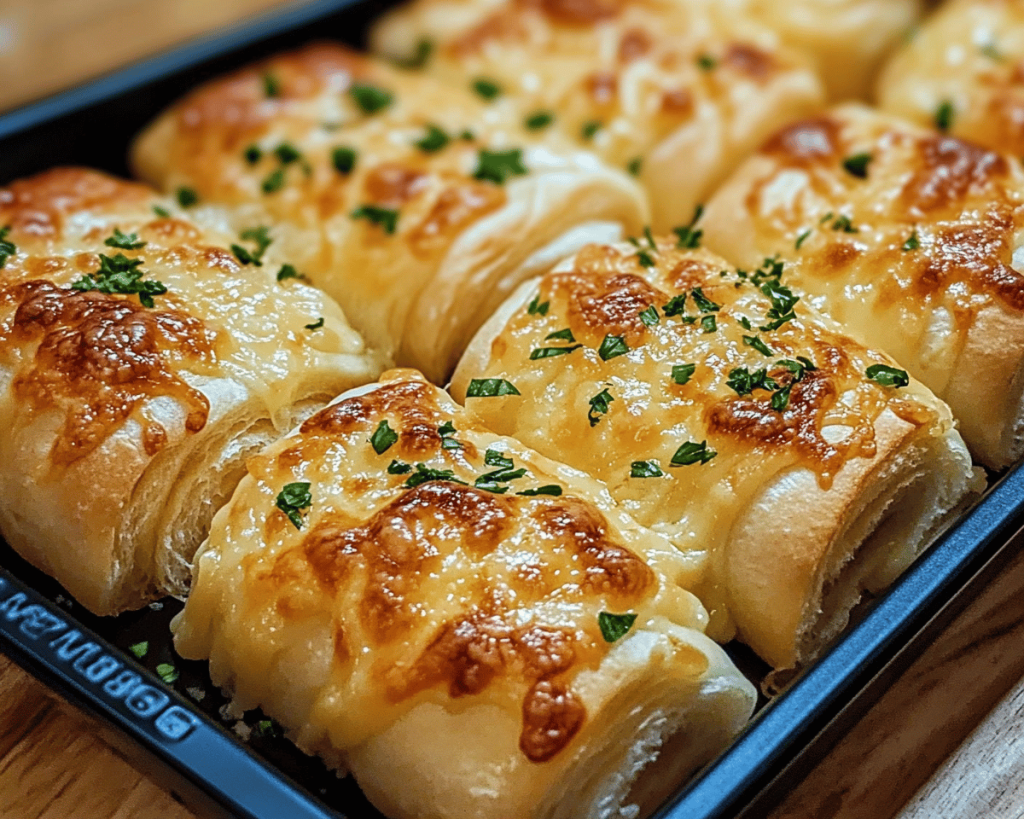
Make These Cheesy Garlic Butter Rollups Tonight For Easy Comfort Food
Meta Title
Delicious Cheesy Garlic Butter Rollups Recipe.
Meta Description
Indulge in cheesy garlic butter rollups tonight for an easy and comforting meal your whole family will love.
Introduction
There’s something undeniably comforting about cheesy garlic butter rollups that draws people in. The moment you pull them from the oven, the aroma of rich, melted cheese and freshly minced garlic mingles in the air, promising a warm embrace with each bite. Picture a soft, pillowy dough wrapped around gooey cheese, all coated in a fragrant garlic butter sauce that glistens invitingly. With the first taste, your senses will be tantalized as the delicious savory flavors meld together, creating a delightful symphony on your palate. These rollups not only satisfy hunger but also evoke memories of love-filled kitchens and the joy of sharing a meal.
What Are Cheesy Garlic Butter Rollups?
Cheesy garlic butter rollups are a delightful comfort food that combines the best of both worlds: warm, soft dough and rich, savory flavor. Originating in various cultures that celebrate bread and cheese, these rollups have become beloved in homes across the globe. They can be seen as a twist on traditional stuffed rolls, where the filling is not only cheese but is also infused with the aromatic essence of garlic and butter.
Typically made using simple ingredients such as all-purpose flour, yeast, garlic, butter, and cheese, these rollups are easy to bake at home. They boast a light, fluffy texture that contrasts beautifully with the creamy, melty cheese inside, creating a dish that is not only visually appealing but also irresistible. These rollups can be served as a side dish, appetizer, or even a main course when paired with a salad or hearty soup.
Bonus Tip: Consider using a mix of cheeses like mozzarella for stretchiness and Parmesan for a nutty flavor, making them even more delectable.
Why You Will Love This Cheesy Garlic Butter Rollups
- The comforting combination of flavors makes these rollups perfect for any occasion, from family gatherings to cozy movie nights.
- They are incredibly easy to prepare, requiring minimal ingredients and steps, making them an ideal quick recipe for even the busiest of weeknights.
- These rollups can be customized with a variety of cheeses and additional fillings, ensuring that each batch can be a unique experience.
- The irresistible smell of baking garlic butter will draw everyone to the kitchen, creating a warm and inviting atmosphere.
- They can be served as an appetizer or a main course, making them versatile enough to fit any meal plan.
- Perfect for meal prep, these rollups can be made ahead of time and stored, allowing for easy reheating later.
- Your family will adore them, ensuring they become a regular family favorite and a recipe you return to time and again.
Extra Idea: For an added zing, sprinkle some red pepper flakes or Italian herbs into the garlic butter mix to elevate the flavor profile.
Ingredients You Will Need
Main Ingredients
- All-Purpose Flour – This serves as the base for your dough and can create a tender, fluffy rollup. For a healthier option, consider whole wheat flour.
- Yeast – Active dry yeast helps the dough rise, giving the rollups their characteristic lightness. Always check expiration dates for optimal rising.
- Garlic – Fresh garlic is ideal for the best flavor, but you can also use garlic powder in a pinch. The aroma when it bakes is just divine.
- Butter – Unsalted butter adds rich flavor and moisture to the dough and garlic mixture. You can replace it with olive oil for a healthier twist.
- Cheese – Mozzarella is the classic choice for its gooey nature, but feel free to mix in cheddar or feta for added complexity.
Additional Ingredients
- Salt – Enhances the flavor of all ingredients. Use kosher salt for better measurements in baking.
- Sugar – A small amount helps activate the yeast and balances the flavors. Brown sugar can give a more complex taste.
- Warm Water – This activates the yeast without killing it, bridging the dough ingredients together.
Ingredient Substitutions Table
| Ingredient | Substitute |
|---|---|
| All-Purpose Flour | Whole Wheat Flour |
| Active Dry Yeast | Instant Yeast |
| Butter | Olive Oil |
| Garlic | Garlic Powder |
| Mozzarella | Cheddar or Feta |
Step-by-Step Instructions
Step 1
In a small bowl, mix warm water and sugar until dissolved, then sprinkle the yeast on top. Let it sit for about 5–10 minutes until it becomes frothy. This step ensures your yeast is active; if it doesn’t froth, your yeast may be expired, and you’ll need to start again. Pro Tip: Use lukewarm water (approximately 110°F) to activate the yeast properly.
Step 2
While the yeast is activating, in a separate large bowl, combine the flour and salt. Mixing these dry ingredients promotes even distribution of the salt throughout the dough, which is essential for flavor.
Step 3
Once the yeast has activated, create a well in the center of the flour mixture and pour in the yeast mixture along with melted butter. Stir everything together with a wooden spoon until a sticky dough forms. Pro Tip: If the dough is too sticky, add a little extra flour, one tablespoon at a time.
Step 4
Turn the dough out onto a floured surface and knead for about 5–7 minutes until smooth and elastic. Kneading helps develop gluten, giving the rollups their delightful chewy texture.
Step 5
Place the dough in a greased bowl, cover it with a damp cloth, and let it rise in a warm place for about 1 hour or until doubled in size. This second rising contributes to a fluffy interior.
Step 6
Once risen, punch down the dough gently to release any air pockets, and then shape it into a rectangle on a floured surface. The gentle handling of dough maintains the air bubbles needed for tender rollups.
Step 7
Sprinkle your choice of cheese generously over the dough rectangle, then roll it tightly from one end to the other. This rolling technique encases the melted cheese, ensuring everyone gets a gooey center in every bite.
Step 8
Slice the rolled dough into equal sections, about 2 inches each, to create your individual rollups. Arrange them in a greased baking dish, standing upright or lying on their sides for a more rustic look. Pro Tip: Give each rollup a little space in the pan for optimal rising.
Step 9
While the rollups are rising again, preheat your oven to 375°F (190°C). This ensures they will bake evenly and come out golden brown. Allow them to rise for another 30 minutes.
Step 10
For the finishing touch, mix the melted butter and minced garlic together and brush generously over the tops of the rollups. This infused garlic butter not only adds flavor but helps with browning.
Step 11
Bake the rollups in the preheated oven for 20-25 minutes or until golden brown. The moment you see golden tops, you’ll know they’re ready to be devoured.
Step 12
Once out of the oven, allow them to cool for a few moments before serving, as the insides will be excruciatingly hot. Enjoy them warm, and watch everyone swoon at the first bite! Advanced Technique: Brush with additional melted garlic butter after they come out of the oven for an extra flavor boost.
Chef Tips, Variations, and Substitutions
- For a vegan swap, consider using dairy-free alternatives such as vegan butter and cheese, allowing everyone to enjoy these delicious rollups.
- If you’re short on time, using store-bought dough can simplify the process significantly while still delivering delightful results.
- Add cooked, crumbled bacon or sautéed spinach to the cheese filling for an even richer flavor profile.
- Mix in additional herbs like rosemary or thyme to the garlic butter to create an aromatic drizzle over the rollups.
- To add a spicy kick, incorporate jalapeños or crushed red pepper flakes into the cheese filling.
Extra Variation: Try stuffing these rollups with pesto alongside cheese for a fresh, herby flavor explosion, perfect for summer!
What to Serve With Cheesy Garlic Butter Rollups
- Pair these rollups with a fresh side salad for a balanced meal that complements the rich flavors of the cheese and butter.
- Serve with a warm marinara or Alfredo sauce for dipping to amplify the Italian vibes of your meal.
- A bowl of hearty vegetable soup makes for a warm, comforting pairing that contrasts with the soft rollups.
- Roasted vegetables sprinkled with Parmesan can enhance the meal, providing a crunch beside the softness of the rollups.
- For breakfast, they pair delectably with eggs or fresh fruit, making them easy to enjoy any time of day.
More Inspiration: Consider pairing them with a savory quiche for a brunch that delivers both comfort and elegance.
Storage and Meal Prep Tips
To store leftovers, place them in an airtight container in the refrigerator, where they will last for up to 3 days. When reheating, wrap them in foil to preserve moisture and softness, then warm them in a preheated oven at 350°F (175°C) until heated through.
For meal prep, these rollups can be made a day in advance and stored in the refrigerator. They can also be frozen after baking; just ensure they are cooled completely before placing them in a freezer-friendly container.
Meal Prep Bonus: To save time during the week, make the dough over the weekend and freeze it in portions; thaw overnight in the fridge before rolling and baking!
Nutrition Highlights
These cheesy garlic butter rollups can be both comforting and nourishing. Each serving typically contains carbohydrates from the dough, protein from the cheese, and fats from the butter. When using whole wheat or a gluten-free flour blend, you can enhance the fiber content, making them even healthier.
With the addition of garlic, it adds not just flavor but numerous health benefits; garlic has been noted for its anti-inflammatory and immune-boosting qualities. Cheese provides essential calcium, making these rollups a balanced option for enjoying comfort food without straying too far from nutritious eating.
For more information, consider checking out Healthline to learn about garlic’s health benefits and the USDA for nutritional profiles of common cheeses.
Nutrition Insight: For a healthier twist, consider incorporating vegetables like spinach or artichokes into the cheese filling to add flavor and nutrients!
Frequently Asked Questions
Question 1
How can I make these rollups gluten-free?
To make this recipe gluten-free, substitute the all-purpose flour with a gluten-free flour blend. Ensure that the blend contains xanthan gum or a similar binder to mimic the elasticity of traditional dough. Keep in mind that the texture may vary slightly but will still be delicious!
Question 2
Can I prepare the dough the night before?
Absolutely! You can prepare the dough up until the first rise. After kneading, cover it tightly with plastic wrap and refrigerate it overnight. The next day, let it sit at room temperature for about 30 minutes before proceeding with the recipe.
Question 3
What type of cheese works best for the filling?
While mozzarella is the classic choice for its melting properties, you can use a combination of cheeses such as cheddar, Monterey Jack, or gouda for varied flavors. Feel free to experiment with different cheeses to tailor the taste to your preference!
Question 4
How do I know when the rollups are fully baked?
Check the color of the rollups. They should be golden brown on top and will have a slightly firm feel when pressed lightly. Additionally, the savory aroma of garlic and cheese should be unmistakable!
Question 5
Can I freeze the rollups after baking?
Yes, these rollups freeze beautifully! Once they’re fully cooled, place them in an airtight container or a freezer bag. To enjoy, reheat them from frozen, wrapped in foil in the preheated oven until warmed through.
Variants Section
- Create a sweet version by swapping garlic for cinnamon and filling with cream cheese, then drizzling with frosting after baking.
- Make a super cheesy version by layering different types of cheeses like mozzarella, provolone, and parmesan.
- Add a burst of flavor by including sun-dried tomatoes or olives in the cheese filling.
- Substitute the butter for herb-infused oils to introduce a unique flavor twist.
- Use store-bought pizza dough for an ultra-quick option that still delivers delicious flavor.
- Include a layer of pesto alongside the cheese for an Italian-inspired delight.
- Spice them up by adding diced jalapeños or spicy Italian sausage to the cheese mixture for a kick.
Conclusion
Cheesy garlic butter rollups are a delightful culinary treat, providing warmth and comfort to your dining experience. They’re not just a quick recipe, but a family favorite that brings everyone together around the table. The combination of aromatic garlic, melty cheese, and soft dough will surely become a staple in your kitchen.
Try this Cheesy Garlic Butter Rollups tonight — your kitchen will smell amazing, and everyone will ask for seconds!