Prep time: 20 minutes
Cook time: 12 minutes
Total time: 32 minutes
Servings: 24 cookies
There’s something undeniably comforting about the sweet aroma of baking cookies wafting through the house. If you’re on the hunt for a treat that brings back nostalgic memories of childhood, look no further than these delightful classic milk cookies. This recipe captures the essence of home and family gatherings, making every bite a delicious reminder of simplicity and joy. Not only are these cookies soft and chewy, but they also carry a subtle richness from the milk that enhances their flavor, making them a go-to snack for both kids and adults. You will find that this recipe is straightforward enough for novice bakers, yet offers enough charm and flavor to impress even the most seasoned cookie aficionados.
As you embark on this journey of cookie-making, you’ll discover not just the easy steps to prepare these treats, but also tips to customize them to your preferences. Whether you want to add a hint of vanilla, mix in some chocolate chips, or even adjust the sweetness level, there are numerous ways to elevate your milk cookies. Let’s dive deep into everything you need to know about making the perfect classic milk cookies that will fill your home with warmth and joy.
What Is Milk Cookies: Classic Milk Cookies (Soft)?
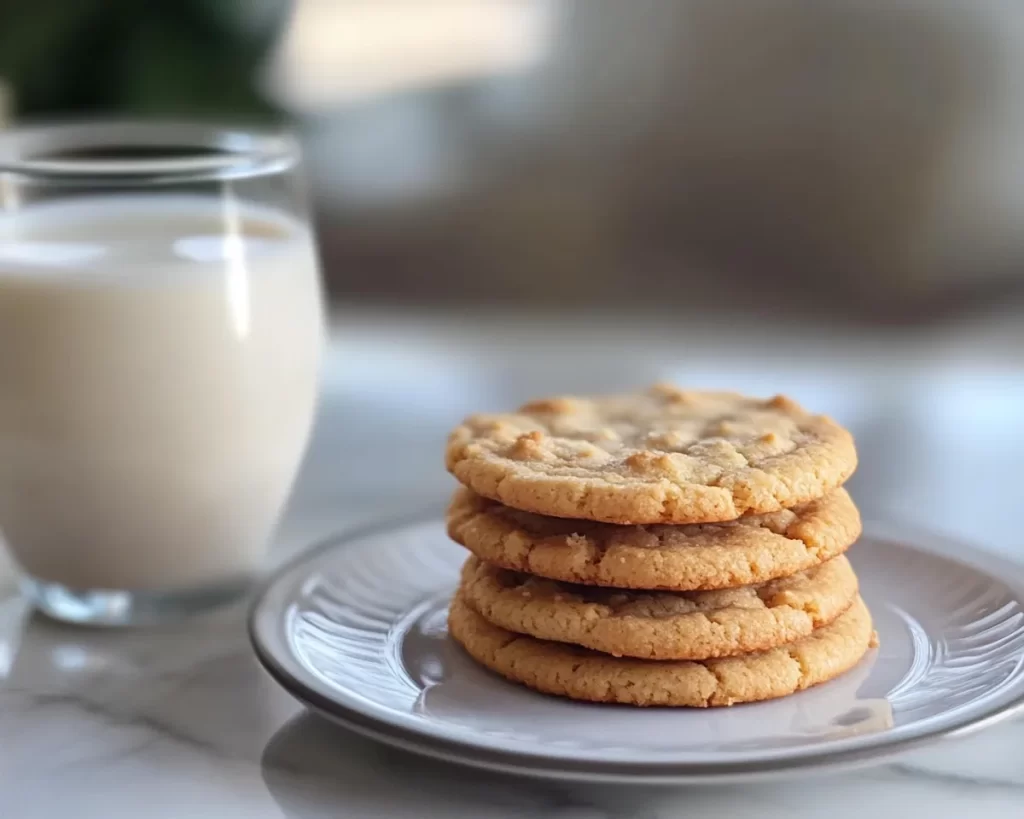
Milk cookies, particularly the classic version, are a delightful treat that boasts a tender, soft texture paired with a subtle sweetness. The origins of milk cookies can be traced back to simple, home-cooked traditions where ingredients were chosen not just for taste but for availability and affordability. This cookie utilizes the basic ingredients of flour, sugar, butter, and, of course, milk, which provides a delightful moisture that contributes to their fluffy interior.
The flavor profile of milk cookies is wonderfully balanced. The vanilla and milk work harmoniously to create a sweet, creamy taste that lingers on your palate. The texture is unlike any other; it’s soft yet slightly crisp on the edges, making it a perfect companion for a glass of milk—true to its name. When made correctly, these cookies have the ability to melt in your mouth, making them a favorite among cookie lovers of all ages.
What’s fascinating about milk cookies is their versatility; they can be enjoyed as-is or enhanced with additional ingredients such as chocolate chips, nuts, or even dried fruits. This adaptability is part of what makes them a timeless recipe in many households, and it’s a great way to encourage kids’ creativity in the kitchen as they design their unique cookie variations.
Why You’ll Love This
You’ll fall head over heels for these milk cookies not just because of their delightful taste and soft texture, but also due to their simplicity and ease of preparation. The ingredients are typically staples in a pantry, which means you won’t need to make an extra trip to the grocery store. This accessibility also helps in keeping costs low, making it a fantastic choice for budget-conscious families.
One common misconception is that creating soft, delectable cookies requires advanced baking skills; however, this recipe proves otherwise. Even if you’re a beginner in the kitchen, you can achieve impressive results by following the straightforward steps outlined below. Plus, the room-filling aroma of cookies baking will certainly charm your family and friends.
Milk cookies also offer versatility. They can be served straight from the oven, cooled and packaged for gifts, or stored for days to come. They resonate with various dietary needs; for instance, if you require gluten-free options, substituting with alternative flours opens the door for everyone to partake in this treat.
Ingredients You’ll Need
- 2 ½ cups all-purpose flour — This provides the structural backbone of the cookies. For a gluten-free option, consider using a gluten-free all-purpose flour blend.
- 1 cup granulated sugar — Adds sweetness and helps the cookies achieve a lovely golden-brown color when baked.
- 1 cup softened unsalted butter — This is essential for a rich flavor and soft texture. If you prefer, you can use coconut oil for a dairy-free alternative.
- ¼ cup milk — The star ingredient that ensures the cookies remain moist and tender. Any kind of milk works; almond or oat milk are good alternatives.
- 1 large egg — Acts as a binding agent, helping to unify the dough.
- 1 teaspoon vanilla extract — Enhances the overall flavor and gives a lovely aroma.
- 1 teaspoon baking soda — Helps the cookies rise and achieve that desirable softness.
- ½ teaspoon salt — Balances the sweetness and enhances the other flavors.
Understanding each ingredient’s role is pivotal for both beginners and seasoned bakers. The synergy of these components is what makes the classic milk cookie so delightful. For instance, omitting the salt can lead to overly sweet cookies that lack depth. Similarly, using a different kind of sugar could alter the texture and flavor, emphasizing the need for careful composition in cookie baking.
How to Make
1. **Preheat your oven to 350°F (175°C).** Start by ensuring your oven is at the right temperature for baking. This step is crucial for achieving that golden-brown exterior. Allowing the oven to preheat thoroughly means your cookies will cook evenly, and this will help develop their delightful texture.
2. **Combine dry ingredients.** In a large mixing bowl, whisk together the flour, baking soda, and salt. This step helps distribute the baking soda evenly throughout the flour. It’s essential for creating uniform cookies. If you see any clumps of baking soda, break them up as they can lead to uneven rising in your cookies.
3. **Cream together butter and sugar.** In another mixing bowl, use an electric mixer to cream the softened butter and granulated sugar on medium speed until the mixture is light and fluffy. This process introduces air into the butter, which creates a tender crumb. You should see a noticeable change in texture and color—aim for a pale, fluffy mixture.
4. **Add the egg, vanilla, and milk.** Once your butter and sugar mixture is fluffy, add in the egg, vanilla extract, and milk. Beat these in until combined. Don’t rush this step; ensuring everything is well mixed will enhance the flavor profile of your cookies. You want the mixture to be smooth and glossy.
5. **Gradually mix in dry ingredients.** Slowly add the dry flour mixture into the wet ingredients, mixing on low speed until just combined. Avoid overmixing, as this can lead to tough cookies. It’s okay if there are a few small lumps; they will disappear during baking.
6. **Scoop the dough onto a baking sheet.** Using a cookie scoop or a tablespoon, drop balls of cookie dough onto a greased or parchment-lined baking sheet. Leave space between each ball, as the cookies will spread while baking. If you prefer smaller cookies, you can adjust the size; just remember to modify the baking time accordingly.
7. **Bake for 10 to 12 minutes.** Place the baking sheet in the preheated oven. Keep an eye on them—the cookies should be just set and lightly golden around the edges when done. Avoid overbaking, as this can result in a cookie that is more crispy than chewy, which is not the goal here.
8. **Cool on a wire rack.** Let the cookies cool on the baking sheet for about 5 minutes before transferring them to a wire rack. This allows them to firm up slightly while retaining their softness inside. Letting them cool completely will enhance their flavor, and they will be easier to store without breaking.
Each of these steps is designed to guide you toward creating the ideal milk cookie. The aroma that fills your home while baking will undoubtedly make your kitchen feel cozy and inviting.
Variations & Substitutions
Chocolate Chip Milk Cookies
If you’re a fan of chocolate, adding a cup of chocolate chips can elevate these milk cookies to new heights. The rich, melting chocolate pairs fabulously with the sweetness of the milk cookies. When incorporating chocolate chips, consider using semi-sweet or dark chocolate for a contrast in flavors. This variation is perfect for families who are chocolate lovers and enhances the cookies’ indulgence while still being straightforward to make.
Nutty Milk Cookies
For those who enjoy a bit of crunch in their cookies, adding chopped nuts like walnuts or pecans can bring an exciting texture to your milk cookies. Plus, this variation increases the nutritional value. Just be mindful of any nut allergies if you’re serving these cookies to others. Use a cup of finely chopped nuts, mixing them in with the flour for an even distribution.
How About Some Oats?
For a heartier cookie, consider adding rolled oats. Substitute ½ to 1 cup of oats for some of the flour. This gives your milk cookies a delightful chewiness and a rustic feel. Oats can also provide added fiber, making the cookies slightly healthier without sacrificing flavor.
Spiced Milk Cookies
For a cozy, seasonal twist, add spices such as cinnamon, nutmeg, or even pumpkin spice to your milk cookie dough. Start with a teaspoon of cinnamon and adjust based on your taste preference. These spices not only enhance the flavor profile but also add an aromatic element that can make your kitchen smell amazing. This variation is perfect during the fall and winter months.
Each variation presents an opportunity to experiment and make these cookies your own. Don’t hesitate to get creative; the base recipe is flexible, allowing for numerous possibilities while still delivering a delightful treat.
Common Mistakes to Avoid
One common mistake is not measuring your ingredients accurately. Baking is a science that requires precise ratios, and even small deviations can lead to cookies that are either too dry or too gooey. Make sure to use measuring cups correctly and level off the flour for the best results.
Another error is baking overly long or at too high a temperature. Overbaking will lead to tough edges, and cookies that are too crisp don’t do justice to the classic milk cookie experience. Ensure your oven temperature is accurately set, as sometimes oven calibrations can differ.
Additionally, neglecting to check for freshness can affect your outcome. Old baking soda loses its potency, leading to cookies that do not rise properly. Always check the dates on your ingredients for optimal results.
Finally, avoid overcrowding your baking sheet with cookie dough. If the cookies are too close together, they will bake into each other, resulting in an uneven texture. Ensuring adequate spacing allows each cookie to develop its perfect shape and texture.
Storage, Freezing & Reheating Tips
After baking your classic milk cookies, proper storage is essential to maintain their softness. Allow the cookies to cool completely on a wire rack before transferring them to an airtight container. They can typically last up to one week at room temperature stored correctly. If you plan to keep them for more extended periods, consider freezing them.
To freeze milk cookies, place them in a single layer on a baking sheet, ensuring they do not touch one another. After a few hours of freezing, transfer the cookies to a freezer-safe bag or container. They should maintain their freshness for up to three months. When you’re ready to enjoy them, thaw at room temperature or pop them in the microwave for a few seconds to regain a fresh-baked warmth.
When reheating, always do so in small increments to avoid overcooking. Keeping the cookies in a sealed container will also aid in keeping them moist. For a special treat, you can microwave a cookie for about 10 seconds, then add a small dollop of ice cream for a delicious dessert classic.
Remember to follow food safety guidelines while storing and freezing your cookies to prevent any spoilage.
Frequently Asked Questions
Can I make these milk cookies gluten-free?
Absolutely! You can use gluten-free all-purpose flour as a direct substitute for regular flour in this recipe. Ensure that it has xanthan gum added, or you may need to include that to mimic the properties of gluten. Many brands offer gluten-free options that work well in cookies, and you’ll find that the milk and other ingredients will contribute to a consistently delicious outcome.
Can I use brown sugar instead of granulated sugar?
Yes, you can substitute brown sugar for granulated sugar in this recipe. Brown sugar will add a deeper flavor profile with hints of caramel. Just remember that it can also contribute to a slightly denser cookie, which some may find appealing. If you’re looking for extra moisture, the combination of brown and granulated sugar can yield an excellent texture.
How can I ensure my cookie dough doesn’t spread too much while baking?
Refrigerating your cookie dough for about 30 minutes before baking can help control spreading. Cold dough helps the cookies retain their shape, giving you that desired thickness. Additionally, make sure your baking sheet is at room temperature rather than hot when placing the dough on it, which can also lead to excess spreading.
What is the best way to remove cookies from the baking sheet?
Allow the cookies to cool on the sheet for about 5 minutes before transferring them to a wire rack. This cooling time helps them firm up slightly, making them less likely to break. Use a spatula to carefully slide under each cookie, making sure to support them adequately while moving to prevent crumbling.
Can I add flavors like almond or coconut extract instead of vanilla?
Yes, this recipe is versatile! You can certainly substitute vanilla extract with almond or coconut extract for a unique twist. Keep in mind that these flavors can be quite potent, so you may want to start with half the amount and adjust according to your liking.
Conclusion:
In summary, these classic milk cookies are not just a delightful treat—you now know how to create them with ease. This recipe is a fantastic way to bring the joy of homemade baking into your kitchen, allowing for numerous variations to suit any taste. Whether you leave them plain, add chocolate chips, or experiment with spices, each version offers delicious results. So go ahead, gather your ingredients, and bring delightful memories to life while making these sweet treats. Don’t hesitate to share your baking adventures or customize the recipe to fit your family’s preferences. Happy baking, and may these cookies bring warmth and joy to your home!