Prep time: 20 minutes
Cook time: 15 minutes
Total time: 35 minutes
Servings: 12 servings
There’s something utterly enchanting about soft cookies, especially when they’re sandwiched with a sweet filling. If you’ve ever bitten into a cookie that just melts in your mouth, you’re familiar with the magic of a well-made cookie. Today, we’re diving deep into the world of **Milk Cookies: Soft Milk Cookie Sandwiches**. These delightful treats strike a perfect balance between nostalgia and flavor, enveloping you in warmth, like your Grandma’s hugs. They are not just cookies; they are vessels of **sweet memories** and a reminder that the simplest ingredients can create a symphony of flavors.
As we embark on this culinary adventure, you’ll discover how easy it is to create these cookies at home. You’ll be amazed at their **soft texture**, which comes from a perfect blend of ingredients, as well as the versatility in flavors you can add to your filling. Whether you prefer a classic vanilla buttercream or a decadent chocolate ganache, there’s something for everyone here. So, put on your apron, let your whisk do the dancing, and let’s dive into the world of Milk Cookies!
What Is Milk Cookies: Soft Milk Cookie Sandwiches?
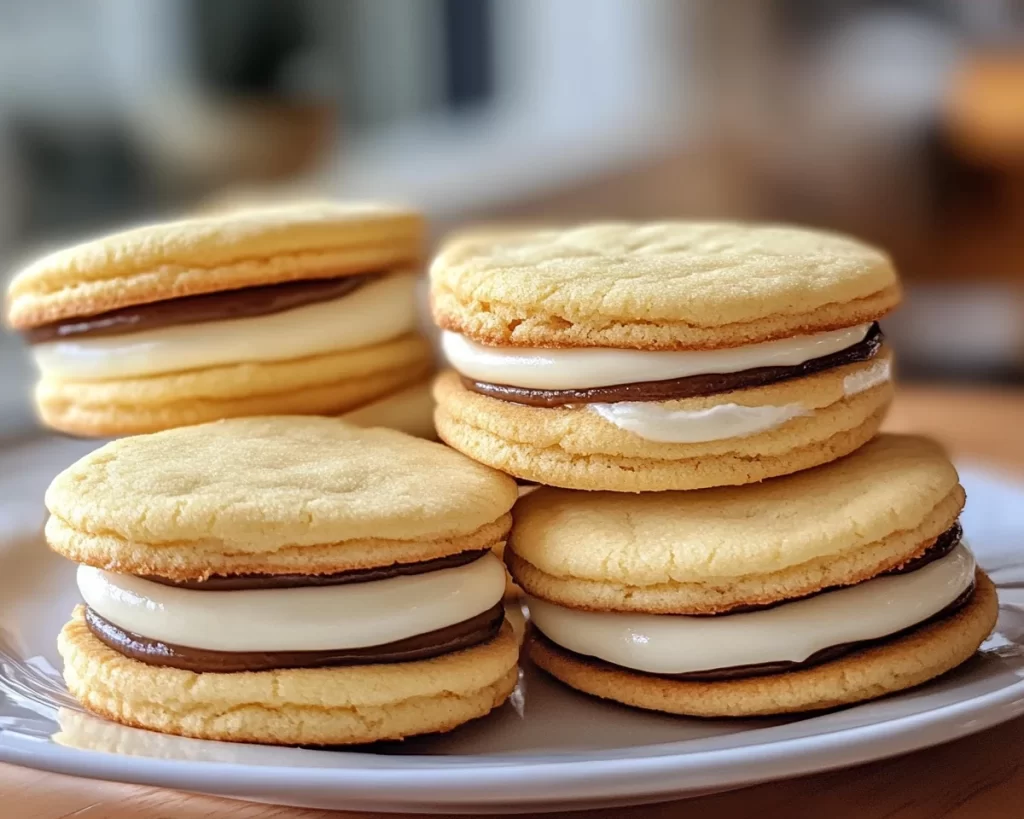
Milk Cookies, particularly Soft Milk Cookie Sandwiches, are delightfully soft cookies that derive their name from the addition of milk, which provides a subtly rich flavor and moisture that makes them melt-in-your-mouth delicious. These cookies have origins that can often be traced back to home kitchens where families would gather over warm treats. Milk Cookies often boast a smooth texture that harmonizes perfectly with a sweet filling, creating a delightful crunch versus softness experience akin to a warm hug.
The flavor profile is subtly sweet, allowing for **flexibility** in fillings and toppings. You can easily adapt these cookies to complement your tastes, adding flavors like cinnamon, chocolate, or even a hint of citrus zest. The balance of sweetness, combined with the creamy filling, has made these sandwiches not just a dessert but a cherished treat, often enjoyed during gatherings or as an after-school snack for kids.
Why You’ll Love This
You’re going to adore these Milk Cookie Sandwiches for a multitude of reasons! First and foremost is their **delectable taste**. Each bite melts in your mouth, releasing flavors that charm your taste buds. The added **benefit** is of course the ease of preparation—these cookies are simple enough for beginners yet impressive enough to serve at a gathering.
When you think about cost, you’ll be surprised how budget-friendly they are. The ingredients are mostly staples you likely have in your kitchen, making them a perfect choice for busy parents or anyone looking to whip up something sweet without breaking the bank. Plus, the versatility of this recipe means it can cater to various dietary needs or personal preferences; whether you’re craving classic vanilla or something more extravagant, you have the freedom to customize.
One common misconception is that good desserts have to be complicated or use exotic ingredients. This is simply not true! These Milk Cookies prove that all you need is love, a little patience, and basic kitchen skills to create something that stands out and makes people smile.
Ingredients You’ll Need
- 2 cups all-purpose flour — This is the main structure for the cookies, providing a soft and chewy texture. Consider using whole wheat flour for a healthier option.
- 1 teaspoon baking powder — This is crucial for achieving that soft and light texture.
- 1/2 teaspoon salt — A little salt enhances the sweetness.
- 1/2 cup unsalted butter (softened) — Adds richness and flavor.
- 1 cup granulated sugar — Sweetens the cookies beautifully. Brown sugar can also be used for a richer flavor.
- 1 large egg — This acts as a binder and brings moisture.
- 2 tablespoons milk — The star ingredient that lends moisture and softness.
- 1 tablespoon vanilla extract — Creates an aromatic, sweet flavor in the cookies.
- Filling of your choice (vanilla buttercream, chocolate ganache, or cream cheese frosting) — This is where you can get creative, allowing you to customize based on your preferences.
Each ingredient plays a critical role in creating the perfect cookie. The combination of **all-purpose flour** and **baking powder** ensures a soft and chewy consistency, while the **butter** and **sugar** work together to create a rich flavor base. Milk is imperative not just for taste but for achieving that melt-in-your-mouth quality.
How to Make
1. **Preheat Your Oven**: Start by preheating your oven to 350°F (175°C). This step is critical for ensuring that your cookies bake evenly. If you’re impatient and don’t preheat, the cookies may end up rising improperly and losing that soft texture.
2. **Combine Dry Ingredients**: In a medium bowl, whisk together the flour, baking powder, and salt. Mixing these ingredients separately before adding them to the wet ingredients ensures an even distribution, which promotes uniform baking.
3. **Cream the Butter and Sugar**: In a large mixing bowl, use an electric mixer to cream together the softened butter and granulated sugar. Beat them until the mixture becomes light and fluffy, typically about 2-3 minutes. This step is vital as it incorporates air into your mix, making for fluffier cookies.
4. **Add Wet Ingredients**: Next, add the egg, milk, and vanilla extract to the creamed mixture. Continue to mix until everything is well combined. At this point, you should see a smooth batter beginning to form.
5. **Incorporate Dry Ingredients**: Gradually add the dry mixture to the wet mixture. Mix until just combined. Do not over-mix, or the cookies may turn out dense. The dough will be slightly sticky but should hold together well.
6. **Shape the Cookies**: Using a tablespoon or a cookie scoop, drop spoonfuls of dough onto a lined baking sheet, spacing them about two inches apart to allow for spreading. If you want extra flavor, you could sprinkle a little sea salt on top before baking.
7. **Bake the Cookies**: Place them in the preheated oven and bake for about 12-15 minutes, or until the edges are lightly golden. Trust your senses! You should be able to smell the delicious aroma wafting through your kitchen.
8. **Cool Down**: Remove from the oven and let the cookies cool on the baking sheet for about 5 minutes before transferring them to a wire rack to cool completely. This step prevents them from breaking apart before they fully set.
9. **Prepare the Filling**: While your cookies are cooling, whip up your filling. If you’re making vanilla buttercream, simply beat together butter, powdered sugar, and vanilla extract until fluffy. If you’re using ganache, melt your chocolate with cream and let it cool slightly.
10. **Assemble the Sandwiches**: Once the cookies are fully cooled, take one cookie and spread a generous amount of your filling on the flat side. Top it off with another cookie flat side down to create a sandwich. Press gently to secure.
11. **Serve and Enjoy**: Finally, plate your delightful Milk Cookie Sandwiches and serve them fresh to your friends and family. Watch as smiles bloom!
Variations & Substitutions
Chocolate Milk Cookies: If you’re a chocolate lover, why not add cocoa powder? Simply substitute 1/4 cup of flour with unsweetened cocoa powder. This will give you incredibly rich chocolate cookies, making them absolutely delectable when paired with a chocolate filling or even a raspberry jam.
Gluten-Free Option: If gluten is a concern for you, swapping out the all-purpose flour for a 1:1 gluten-free flour blend can work beautifully in this recipe. The **texture** may vary slightly, but many blends will provide excellent results.
Vegan Milk Cookies: For those following a vegan lifestyle, substitute the butter with coconut oil or a vegan butter alternative, and replace the egg with a flaxseed meal (1 tablespoon flaxseed mixed with 3 tablespoons water) as a binder. The milk can easily be replaced with almond milk or oat milk for a vegan version that still packs a punch.
Chewy Oatmeal Milk Cookies: Incorporating oats gives a different texture and a hearty feel. Simply add 1 cup of quick oats to your dough and reduce the flour by 1/2 cup. This will yield chewy cookies with more depth and a satisfying crunch.
Each variation opens up a new realm of flavor and enjoyment. Don’t be afraid to experiment based on your preferences or what you have in your pantry. The key to successful baking is being adaptable and letting your taste guide you.
Common Mistakes to Avoid
A few common mistakes can be made when creating these delightful desserts, but fear not! With a little awareness, you can avoid them easily. One major issue is overmixing your dough. Doing so can develop the gluten in the flour, resulting in tough cookies rather than the *soft and tender* ones you’re aiming for. Remember: mix until just combined.
Another critical point is neglecting to properly cream your butter and sugar. This is essential for incorporating air into your dough, so take the time to ensure this step is executed well. Skimping on the cooling time can also lead to breaking cookies. Allow them to cool sufficiently on the baking sheet before transferring them to a wire rack.
Also, be mindful of your oven temperature. Even if you preheat, not every oven is calibrated the same way. Consider investing in an oven thermometer to ensure accuracy, as this can prevent under or overbaked cookies.
Storage, Freezing & Reheating Tips
For proper storage, place your Milk Cookie Sandwiches in an airtight container at room temperature, and they’ll stay fresh for about 3-5 days. This will keep them soft and delightful, ready to be enjoyed anytime.
If you want to make a batch ahead of time, freezing is a wonderful option. Simply freeze the cookies individually laid out on a baking sheet for about an hour, then transfer them to a resealable freezer bag. You can freeze them for up to three months. Just remember to let them thaw at room temperature before digging in.
For reheating, pop them in the microwave for about 10-15 seconds if you desire that warm, fresh-baked experience. This brief heating will revive their *soft texture* without overcooking them.
Frequently Asked Questions
Can I use whole wheat flour instead of all-purpose flour?
Yes, you can certainly use whole wheat flour for a healthier alternative. However, be aware that it may create a denser cookie. To achieve a balance, you might consider mixing half whole wheat and half all-purpose flour.
How can I make these cookies less sweet?
If you prefer a less sweet cookie, you can reduce the amount of sugar in the recipe. Consider cutting it down by 1/4 cup, but keep in mind that sugar also contributes to the texture and moisture of the cookies.
What can I do if my cookie dough is too sticky?
If your dough is too sticky to work with, try refrigerating it for about 30 minutes. This will help firm it up. Alternatively, you can also add a bit more flour, a tablespoon at a time, until the consistency is manageable.
Can I make mini cookie sandwiches?
Absolutely! If you wish to create mini versions, simply scoop smaller amounts of dough and adjust the baking time accordingly. Mini cookies typically bake for around 8-10 minutes.
Is it possible to make the cookies ahead of time?
Yes, you can prep the dough and refrigerate it for up to 2 days before baking. You can also bake the cookies ahead of time and assemble them later. Just remember, if making ahead, to store them properly to keep their freshness.
Conclusion:
Milk Cookies: Soft Milk Cookie Sandwiches are a delightful treat that marries nostalgia with modern flavors. Their versatility allows you to customize them to fit any occasion, whether you’re entertaining guests or simply treating yourself. The method is straightforward, making them accessible for beginners and busy families alike. I encourage you to try your hand at making these cookies, customize them according to your preferences, or even share them with friends as a token of love. You won’t regret it, and I promise you’ll make memories along the way that will last a lifetime!