Prep time: 15 minutes
Cook time: 10 minutes
Total time: 25 minutes
Servings: 24 cookies
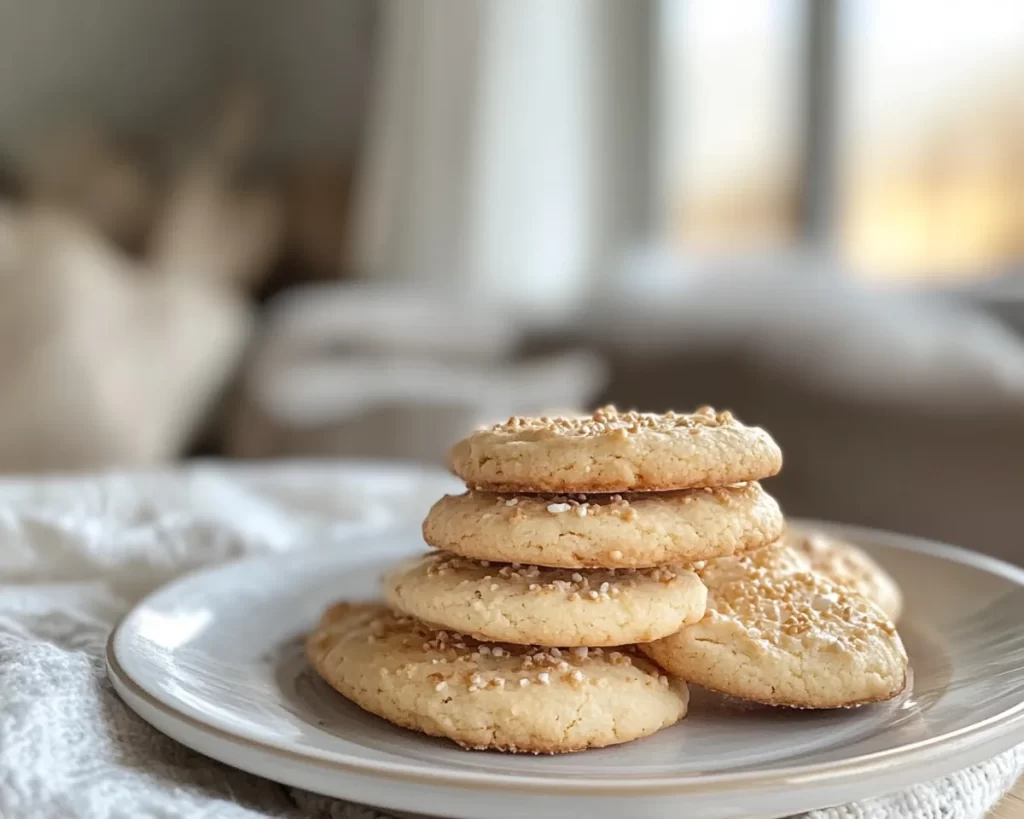
If you have ever taken a bite of a freshly-baked cookie that melts in your mouth and has a subtle sweetness that makes your heart skip, you will understand the magic of milk cookies. These Soft Milk Cookies not only remind you of childhood memories spent in the kitchen but also envelope you in a warm hug with every bite. They serve as a delightful solution to satisfy cravings, especially after a long day. In just 25 minutes, you can whip up a batch of cookies that’s perfect for any occasion—whether it’s a busy weekday or a weekend treat. Get ready to embark on a baking journey, where you’re about to learn not only how to make these cookies but also some fantastic tips, variations, and common pitfalls to avoid.
What Is Milk Cookies: Soft Milk Cookies?
Milk cookies fall into a category often regarded as comfort food. Originating from traditional family recipes, these cookies are primarily made with simple ingredients that most of us have in our pantry. The soft texture sets them apart from your typical cookie, offering a delightful chewiness that pairs well with various beverages, especially milk. As you bite into one, you’ll discover a rich, buttery flavor that tantalizes your taste buds while the hint of vanilla adds an aromatic touch to every bite.
The distinctive feature of milk cookies lies in their creamy, tender crumb that holds moisture, making them less likely to become hard or crumbly. This quality makes them particularly appealing for families with children or anyone looking to enjoy a nostalgic treat. The simplistic nature of this recipe allows for customization, meaning you can easily adapt it to your flavor preferences while retaining that essential softness that milk cookies are known for.
Why You’ll Love This
These Soft Milk Cookies are the perfect balance of flavors, making them an instant favorite. Firstly, they are incredibly easy to make, requiring only basic baking skills. Even if you’re a beginner, you will find this recipe straightforward and achievable, allowing you to impress friends and family without much fuss. More importantly, the cost of the ingredients is low, making it financially sensible to whip up a large batch for gatherings or snack prep.
One common misconception is that cookies require elaborate techniques or special ingredients to taste good. Not true! With the right proportions and some attention to detail, you can produce bakery-quality cookies right from your kitchen. Additionally, these cookies cater to various dietary preferences. For instance, you can easily switch out regular dairy for plant-based milk or alter the sweetener to suit your taste preferences. Whether you enjoy them fresh from the oven or as part of a dessert platter, these milk cookies will not disappoint.
Ingredients You’ll Need
- 2 ½ cups all-purpose flour – This acts as the primary structure for your cookies. If you need a gluten-free option, you can substitute it with a 1:1 gluten-free flour blend.
- 1 cup unsalted butter, softened – Butter enriches the flavor and helps create that soft texture. Ensure it’s at room temperature for easier mixing.
- 1 cup granulated sugar – This sweetens your cookies. You may use brown sugar for a richer flavor, but it could slightly alter the texture.
- ½ cup milk – This is the star ingredient that keeps your cookies moist and enhances the flavor. Any type of milk works, including almond or oat milk.
- 1 egg – The egg acts as a binder, ensuring that your cookies hold together while providing richness.
- 2 teaspoons vanilla extract – Vanilla heightens the flavor profile of your cookies. Homemade vanilla extract can add an extra layer of depth.
- 1 teaspoon baking soda – This leavening agent assists in creating a soft, chewy texture.
- ½ teaspoon salt – Salt balances the sweetness and enhances all the flavors in your cookies.
How to Make
- Preheat your oven: Start by preheating your oven to 350°F (175°C). This ensures that the cookies bake evenly once they’re ready to go in. Meanwhile, line your baking sheets with parchment paper to prevent sticking.
- Prepare the wet ingredients: In a large mixing bowl, cream together the softened unsalted butter and granulated sugar until the mixture is light and fluffy. This usually takes about 3-5 minutes using an electric mixer. You’re aiming for a texture that looks whipped—this step is crucial as it helps incorporate air, leading to that desired softness.
- Add the egg and vanilla: Next, add in the egg and the vanilla extract. Mix these ingredients until they’re well incorporated. Make sure the egg is at room temperature as it helps bind the ingredients better and contributes to a softer cookie.
- Combine dry ingredients: In a separate bowl, whisk together the all-purpose flour, baking soda, and salt. Gradually add this dry mixture to your wet ingredients. Mix on low speed until just combined; avoid overmixing as it can lead to tougher cookies.
- Incorporate the milk: Slowly pour in the milk to the mixture, mixing until you achieve a smooth, cohesive dough. The texture should be soft but not overly sticky. If it feels too sticky, a little extra flour can be added, but remember, the dough should stay moist for that fabulous chewy texture.
- Scoop and shape the cookies: Using a cookie scoop or a tablespoon, drop your dough onto the prepared baking sheets about 2 inches apart to allow for spreading. For a uniform size, try to use the same tool for each scoop.
- Bake the cookies: Place your baking sheets in the preheated oven and bake the cookies for about 10 minutes. You want the edges to be lightly golden while the centers remain soft. If you prefer a crispier texture, you can bake them an extra 2 minutes, but keep an eye on them to prevent burning.
- Cool and enjoy: Once baked, remove the trays from the oven and allow the cookies to cool on the sheets for about 5 minutes before transferring them to wire racks. This cooling time is vital; it allows them to firm up without becoming too stiff.
Variations & Substitutions
Chocolate Chip Milk Cookies: For an extra indulgent twist, add 1 cup of chocolate chips to the dough after mixing in the milk. This will elevate the flavor and provide a delightful melt in your mouth experience. This variation is perfect for chocolate lovers and kids alike!
Nutty Milk Cookies: If you want to incorporate more texture, consider adding ½ cup of chopped nuts, such as walnuts or pecans, into the dough. The nuts not only add crunch but also enrich the flavor. Make sure to check for nut allergies if you’re making these for a group.
Oatmeal Milk Cookies: Replace 1 cup of all-purpose flour with rolled oats for a chewy mouthfeel. This variation also adds a wholesome element, making them somewhat healthier. If you want to make them a bit sweeter, consider adding raisins or dried cranberries for a fruity touch.
Spiced Milk Cookies: For those who love autumn flavors, try adding a teaspoon of cinnamon or nutmeg to the dry ingredients. These spices can transform your cookies into a seasonal delight that’s perfect for holidays. Additionally, you can swap out the vanilla extract for almond extract for different flavor depth.
Vegan Milk Cookies: You can easily modify this recipe to be vegan by substituting the egg with a flaxseed meal (1 tablespoon of flaxseed meal mixed with 2.5 tablespoons of water as a replacement for one egg) and using vegan butter or coconut oil. Almond milk or any plant-based milk can replace regular milk in this recipe. Your outcome will be equally delicious and satisfyingly soft.
Common Mistakes to Avoid
One of the most common pitfalls in cookie baking is overmixing the dough. Overmixing can lead to tough cookies, which is the opposite of what we’re aiming for with these soft milk cookies. Keep your mixing to a minimum once the dry ingredients are added!
Another frequent mistake is skipping the cooling time. Always remember that cookies continue to cook after being removed from the oven due to residual heat. If you don’t let them cool on the baking sheet first, they may break apart when you try to transfer them to a cooling rack.
Lastly, be cautious about measuring flour accurately. Flour is often packed down or scooped loosely, leading to inconsistencies in your dough. Use the spoon-and-level method: spoon the flour into your measuring cup and level it off with a knife for a precise measurement.
Storage, Freezing & Reheating Tips
To store your cookies, place them in an airtight container at room temperature. They can last for up to a week, though I doubt they could resist being devoured that long! For longer storage, consider freezing them. Allow the cookies to cool completely, then place them in a single layer on a baking sheet to freeze for a couple of hours. Once frozen, transfer them to a zip-top bag, removing as much air as possible. Frozen cookies can last up to three months and are perfect for when a sweet craving hits unexpectedly.
When you’re ready to enjoy them, no need to thaw! Pop them in a preheated oven at 350°F (175°C) for just a few minutes until warm. Alternatively, you can microwave them for about 15 to 20 seconds, but be careful not to overdo it; otherwise, they may become overly chewy or tough.
Always follow food safety best practices when storing baked goods. If you’ve shared cookies at a gathering, any leftovers should be stored right away to prevent spoilage.
Frequently Asked Questions
Can I use whole wheat flour for milk cookies? Yes, you can use whole wheat flour to make your milk cookies a bit healthier. However, the texture might be denser compared to using all-purpose flour. If you’re switching entirely, consider mixing half whole wheat and half all-purpose flour for a balanced outcome.
Why do my cookies spread too much when baking? Excessive spreading can occur if your dough is too warm or if the butter is melted instead of softened. Make sure to chill your dough for about 30 minutes before baking for better control over spreading.
Can I make these cookies gluten-free? Absolutely! By substituting with a gluten-free 1:1 flour blend, your cookies will turn out delicious. Ensure that any additional ingredients like baking soda are also gluten-free.
How can I make my cookies even softer? To achieve an even softer texture, you can experiment with substituting some of the granulated sugar for brown sugar. Brown sugar retains more moisture due to its molasses content, resulting in a chewier, softer cookie.
What’s the best way to enjoy milk cookies? We recommend enjoying them fresh from the oven, paired with a glass of cold milk. They can also be easily transformed into delicious ice cream sandwiches by placing a scoop of your favorite ice cream between two cookies.
Conclusion:
In summary, these Soft Milk Cookies are not just another dessert; they are a delightful experience, filled with cozy memories and flavors that resonate with all ages. The ease of preparation makes these a go-to option for any cookie craving, and with numerous variations to suit dietary preferences, you’ll never get bored. Whether you choose to share them at a gathering or indulge all by yourself, taking the time to make these cookies will be a rewarding experience. So gather your ingredients, put on your apron, and get ready to enjoy a fantastic delight that’s bound to impress! Don’t forget to customize them to your liking and share your creation with friends and family. Happy baking!