Prep time: 15 minutes
Cook time: 10 minutes
Total time: 25 minutes
Servings: 24 cookies
There is something undeniably heartwarming about the aroma of freshly baked cookies wafting through your home. When you think of a nostalgic treat that can transport you back to childhood, Milk Cookies: Soft Milk Cookies (Melt in Your Mouth) come to mind. These delightful cookies are not only simple to make but also offer a melt-in-your-mouth experience that leaves everyone craving for more. Imagine biting into a soft, pillowy cookie that instantly reminds you of cozy afternoons spent baking with family or friends. Today, I’ll share everything you need to know about making these light, fluffy cookies that are perfect for any occasion.
In this recipe, you’ll learn how to create Milk Cookies that not only taste delicious but also require minimal ingredients and effort. You’ll discover tips for achieving the ideal texture, the best ways to mix your ingredients, and how to customize the recipe to fit your tastes. Get ready to impress your family and friends with cookies that are sure to steal the spotlight at any gathering.
What Is Milk Cookies: Soft Milk Cookies (Melt in Your Mouth)?
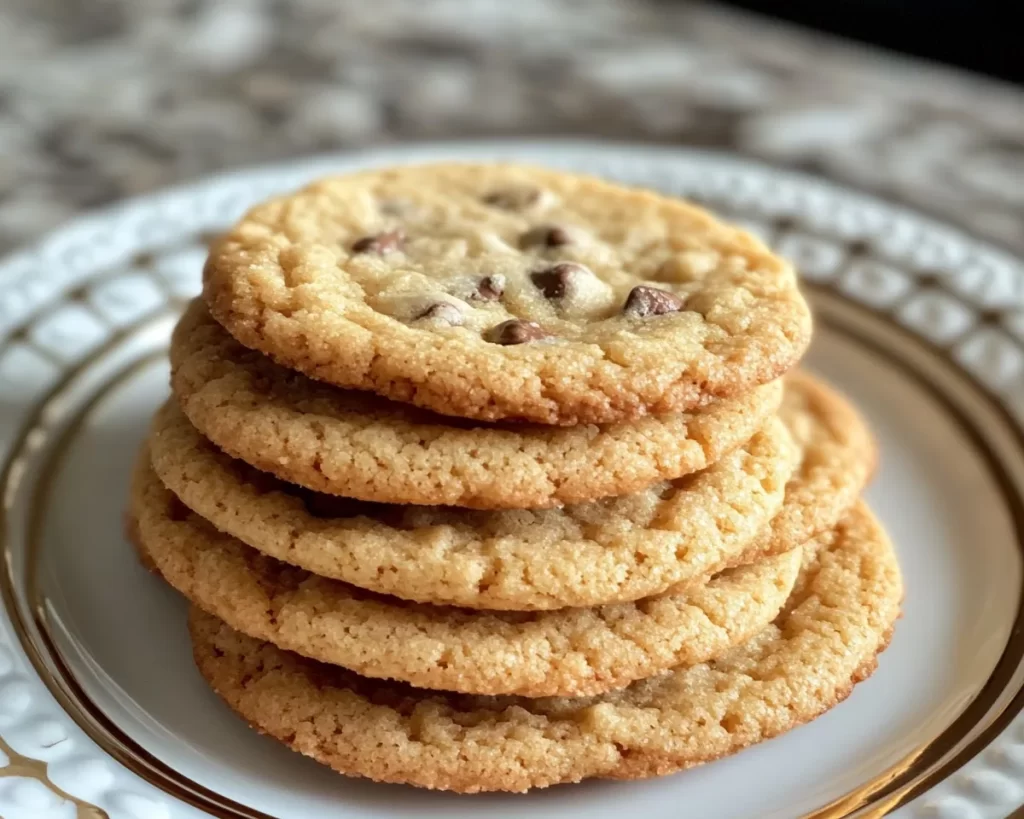
Milk Cookies are a delightful treat that originates from various cultures, where milk is often used as a central ingredient in baked goods. These cookies are known for their soft, tender texture and a subtly sweet flavor. The primary ingredients typically include flour, sugar, milk, and butter, all of which contribute to the cookies’ melt-in-your-mouth quality. When baked correctly, they have a light golden hue with a slightly chewy center and soft, delicate edges.
The flavor profile of Milk Cookies can be described as mildly sweet with a comforting richness from the milk and butter. The warmth of freshly baked cookies not only enchants your taste buds but also fills your kitchen with an inviting aroma that beckons everyone to take a bite. Unlike more traditional cookies that might have a crisp texture, Milk Cookies are designed to be soft and fluffy, making them a crowd favorite, especially among children and those who prefer a gentle, tender bite.
Another appealing aspect of Milk Cookies is their versatility; they can be enjoyed on their own or paired with various dips, toppings, and flavorings. This simplicity allows for endless possibilities, whether you’re looking to add chocolate chips, nuts, or even different flavor extracts for a unique twist.
Why You’ll Love This
There are countless reasons to fall in love with these Soft Milk Cookies! First and foremost, their irresistible taste and texture make them a perfect indulgence for cookie lovers. They’re incredibly easy to whip up, making them an ideal choice for busy parents who may need a quick and satisfying dessert. The simple ingredients ensure that you won’t have to go on a scavenger hunt at the grocery store, saving both time and money.
Additionally, these cookies lend themselves beautifully to customization. Whether you want a chocolate chip variation or prefer a citrus twist, you can easily adapt the recipe to suit your family’s preferences. Plus, because they are relatively low in sugar compared to other cookies, they can be a great option for those conscious of their sugar intake.
Many newcomers to cookie baking often make the mistake of overcomplicating the process or worrying about precise measurements. However, with Milk Cookies, the focus shifts to being joyful in creating something delicious. If you stick to the steps in this recipe, you’ll be amazed at how easy it is to bake up a batch of these delectable treats. Forget about tough or overly crispy cookies—this recipe will give you soft, tender bites every time!
Ingredients You’ll Need
- 2 ½ cups all-purpose flour: This is the main ingredient that gives the cookies their structure. You can substitute whole wheat flour for a healthier option, but it may result in a denser cookie.
- 1 cup granulated sugar: This sweetener provides the necessary sweetness. You may replace it with coconut sugar or a sugar substitute if you’re looking for a lower-calorie option.
- ½ cup unsalted butter, softened: Butter adds richness and flavor. For a dairy-free option, consider substituting with coconut oil or a vegan butter alternative for a similar texture.
- 1 cup milk: The star ingredient that gives the cookies their name. You can use any type of milk—dairy, almond, soy, or oat milk work well.
- 1 large egg: This binds the ingredients together while helping the cookies to rise. If you’re vegan or have an egg allergy, you can replace it with a flax egg by mixing 1 tablespoon of ground flaxseed with 2.5 tablespoons of water.
- 1 teaspoon vanilla extract: This adds a delicious flavor. Feel free to experiment with other extracts, such as almond or lemon, for a unique twist.
- 1 teaspoon baking powder: This leavening agent helps the cookies to rise. Make sure it’s fresh for the best results.
- ½ teaspoon salt: Enhances the flavors of the cookies. Omit if you’re using salted butter.
With this list of simple ingredients, you’re on your way to making irresistibly soft Milk Cookies. Feel free to adjust and substitute based on your dietary needs or preferences.
How to Make
1. **Prepare your baking sheet**: Preheat your oven to 350°F (175°C). Line a baking sheet with parchment paper to prevent the cookies from sticking. This also makes cleanup easier.
2. **Cream the butter and sugar**: In a large mixing bowl, combine the softened unsalted butter and granulated sugar. Use an electric mixer or a whisk to cream them together until the mixture is light and fluffy. This should take about 2-3 minutes. Properly creaming the butter and sugar incorporates air, which results in a lighter cookie.
3. **Add the egg and vanilla**: Crack the large egg into the bowl and pour in the teaspoon of vanilla extract. Mix until well combined. At this point, the mixture should be smooth and creamy. Don’t forget to scrape down the sides of the bowl to ensure all ingredients are well blended.
4. **Incorporate dry ingredients**: In a separate bowl, whisk together the all-purpose flour, baking powder, and salt. Gradually add the dry mixture to the wet ingredients while mixing on low speed. This prevents flour from flying everywhere and ensures a smooth, lump-free dough.
5. **Add the milk**: Slowly pour in the milk while continuing to mix the dough. You want it to be well combined but not over-mixed. The dough should be soft and slightly sticky.
6. **Scoop the cookie dough**: Using a cookie scoop or a spoon, drop rounded tablespoons of dough onto the prepared baking sheet, leaving enough space between each cookie to allow for spreading. This is crucial for achieving the perfect shape.
7. **Bake the cookies**: Place the baking sheet in the preheated oven and bake for about 10-12 minutes, or until the edges are lightly golden. Do not overbake; the cookies will continue to cook slightly due to residual heat even after you take them out.
8. **Cool and enjoy**: Remove the cookies from the oven and allow them to cool on the baking sheet for 5 minutes before transferring them to a wire rack to cool completely. This helps them to set properly and develop their soft texture.
By following these detailed instructions, you’ll create a batch of Milk Cookies that are perfectly fluffy and delicious. The smell of these cookies baking will surely bring family and friends flocking to your kitchen!
Variations & Substitutions
Chocolate Chip Variation: If you’re a fan of chocolate, adding semi-sweet or dark chocolate chips to the dough before baking is an excellent way to elevate these Milk Cookies. About 1 cup of chocolate chips will complement the mild sweetness of the cookies beautifully. This variation is perfect for those who love a classic flavor twist. Just fold in the chips after incorporating the milk, and follow the rest of the baking steps as mentioned.
Citrus Zest Addition: For a refreshing twist, consider adding the zest of a lemon or orange to the dough. This brightens the flavor and adds a fragrant aroma that is especially appealing during warmer months. Simply zest half of the fruit and mix it in with the wet ingredients for a delightful citrusy flavor that pairs wonderfully with the creamy milk base.
Nutty Variation: If you’re looking to add some texture, consider folding in chopped nuts such as walnuts or pecans into the dough. About ½ cup should be sufficient to give the cookies a nice crunch while still retaining their soft bite. This variation is great for those who enjoy a little added richness and complexity in their cookies.
Gluten-Free Option: To cater to gluten-sensitive individuals, swap the all-purpose flour for a gluten-free flour blend. Ensure it contains xanthan gum or add about ½ teaspoon for binding. This allows you to enjoy the same soft texture of the cookies without the gluten.
By exploring these variations, you can transform your Milk Cookies to cater to different tastes and dietary needs. The beauty of this recipe lies in its adaptability, allowing you to explore new flavors and textures without complicating the process.
Common Mistakes to Avoid
When it comes to baking Milk Cookies, there are a few common pitfalls that can affect the final result of your delightful treats.
First and foremost, failing to properly measure your ingredients can lead to disastrous consequences. Baking is a science, and even slight changes in ingredient amounts can throw off the balance. Always use a kitchen scale for more accuracy when measuring flour, as scooping can result in packing the flour and ultimately yielding dry cookies.
Another common mistake is overmixing the dough. Once you add the dry ingredients to the wet ingredients, mix just until everything is combined. The more you mix, the tougher the cookies will be. For a *soft and tender* texture, it’s best to handle the dough as little as possible.
Additionally, people often make the mistake of skipping the chilling time after mixing, which allows the dough to rest. If you find your dough is too sticky, letting it chill in the fridge for 15-30 minutes can make it easier to handle. If you opt for the chocolate chip variation, this step is especially crucial; chocolate can melt into the dough at high temperatures if not handled properly.
Lastly, keep an eye on your cookies as they bake. Each oven is different, and what may work in one kitchen might not in another. Always check your cookies a couple of minutes before the recommended baking time. Remember, they should be lightly golden around the edges but still soft in the middle.
Avoiding these common mistakes will help ensure that your Milk Cookies turn out perfectly every time, so you can enjoy their delightful flavor and texture without any hiccups.
Storage, Freezing & Reheating Tips
Storing your Milk Cookies correctly is essential for maintaining their delightful texture and flavor. Allow the cookies to cool completely before storing them in an airtight container at room temperature. They can last for about 4-5 days, retaining their legendary softness.
If you wish to extend their shelf life, consider freezing them! Place the cookies in a single layer on a baking sheet and freeze until solid. After that, transfer them to a zip-top freezer bag, squeezing out as much air as possible. They can be frozen for up to 3 months. When ready to enjoy, simply let them thaw at room temperature or microwave them for about 10-15 seconds for that fresh, baked flavor.
When reheating, make sure not to overdo it; you want to warm them just enough to bring back that fabulous softness. If you have a few cookies left over, consider placing a slice of bread in the container with them. The moisture from the bread helps keep the cookies soft!
Always keep food safety in mind: if you notice any signs of spoilage, it’s better to err on the side of caution and discard them.
Frequently Asked Questions
Can I make these cookies dairy-free? Yes, you can easily make Milk Cookies dairy-free by substituting the butter with a vegan butter alternative and using non-dairy milk, such as almond milk or oat milk. These alternatives will still yield deliciously soft cookies without sacrificing flavor.
What should I do if my dough is too sticky? If you find that your cookie dough is too sticky to work with, try chilling it in the refrigerator for 15-30 minutes. This will make it easier to scoop and shape the cookies while maintaining their soft texture during baking.
Can I add other flavors to the cookies? Absolutely! Feel free to experiment with different extracts, such as almond or maple, to change the cookie’s flavor profile. You can also fold in fruits, like raisins or dried cranberries, for a fruity twist on these delightful cookies.
How can I ensure my cookies are soft and melt-in-your-mouth? The key to achieving that soft texture lies in not overmixing the dough and removing the cookies from the oven as soon as the edges are lightly golden. They will continue to cook on the baking sheet even after you take them out, ensuring that melt-in-your-mouth softness.
Can I double the recipe? Yes, this recipe scales beautifully! Just be sure to properly measure all ingredients, and consider using multiple baking sheets to ensure even baking, as placing too many cookies on a single tray can lead to uneven cooking.
Conclusion:
Milk Cookies: Soft Milk Cookies (Melt in Your Mouth) are not only a delightful treat to enjoy but also a wonderful baking project for anyone looking to create something sweet and memorable. Their enchanting flavor and tender texture will make them a go-to recipe in your collection. Whether you stick with the classic version or experiment with various toppings and flavors, these cookies have something to offer for everyone. So, gather your ingredients, roll up your sleeves, and get baking! Share the love by bringing these cookies to friends, family, or a gathering, and watch as they disappear in no time. Happy baking!


