Prep time: 15 minutes
Cook time: 10 minutes
Total time: 25 minutes
Servings: 24 cookies
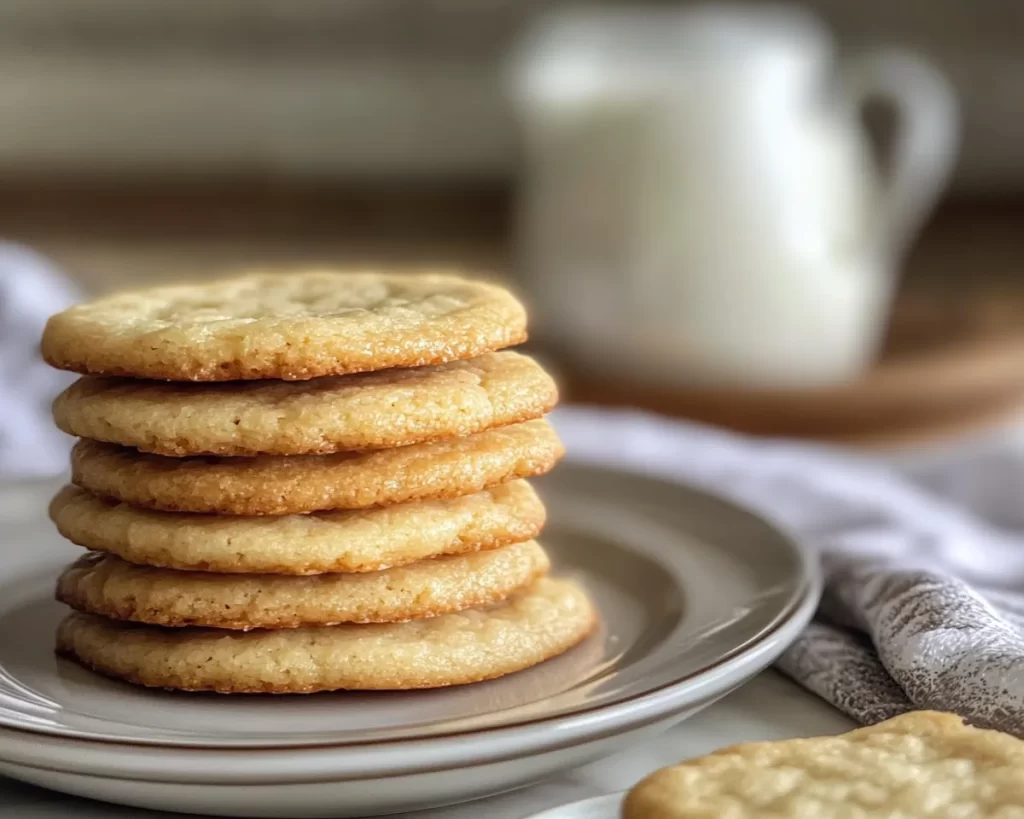
Indulging in a cozy batch of cookies is an experience that resonates with many. The smell of warm cookies wafting through the house can evoke delightful childhood memories and create new ones with loved ones. Today, we’re diving into a recipe for **Milk Cookies: Soft Vanilla Milk Cookies** that captures this magic. These cookies are beautifully soft with a rich vanilla flavor, making them the perfect treat for any occasion. Plus, they are incredibly easy to make, so even if you’re a beginner in the kitchen, you’ll find this recipe approachable and rewarding.
What sets these cookies apart is not just their luscious texture, but also how versatile they can be. You’ll learn the basics of this delightful recipe, alongside some tips, variations, and answers to any lingering questions you may have. Prepare to impress your family and friends—and perhaps even a few strangers— with these little delights.
What Is Milk Cookies: Soft Vanilla Milk Cookies?
Soft Vanilla Milk Cookies are a comforting treat that combines simple ingredients into something truly special. The concept of **milk cookies** originates from the desire to create a soft, chewy cookie that celebrates **vanilla** and the creamy richness of milk. The texture is meant to be pillowy, almost cake-like, with just the right amount of chew to satisfy your sweet tooth.
With their delicate sweetness and creamy undertones, these cookies are perfect for milk dunking, making them a delightful addition to any dessert table. Not only do they taste delicious straight out of the oven, but they also hold their flavor beautifully over time. A cookie like this is adaptable to many occasions—be it a lunchbox treat for kids, a cozy dessert for family gatherings, or even a snack to enjoy with your afternoon coffee.
The beauty of these cookies lies in their simplicity. They are quick to prepare and require minimal kitchen tools, which is a huge plus if you’re working on a busy schedule. With just a few basic ingredients, you can whip up a batch that can be enjoyed warm or stored for later, making them ideal for meal prep or when you need a sweet fix on a whim.
Why You’ll Love This
There’s a myriad of reasons why you’ll adore this recipe for **Milk Cookies: Soft Vanilla Milk Cookies**. First and foremost, the flavor is undeniably irresistible. The combination of milk and vanilla creates a soothing experience that can transport you back to simpler times. These cookies are a delicious treat without being overly sweet, making them approachable for both kids and adults alike.
Ease of preparation is another fantastic aspect. The method involves straightforward steps that make this recipe beginner-friendly, perfect for those new to baking. You won’t need fancy equipment—just a baking sheet and mixing bowl will do. Plus, the cost of ingredients is remarkably low, making this an economical choice for families or anyone on a tight budget.
One common misconception is that cookies require intricate baking techniques or hard-to-find ingredients. This recipe dispels that myth completely. Many people might wonder if they can create a delightful cookie without experience or specialized tools, and the answer is a resounding yes! Once you’ve mastered these soft vanilla milk cookies, you can confidently branch out, experimenting with various flavors and textures.
Ingredients You’ll Need
To create these delightful Milk Cookies, you’ll need the following ingredients:
- All-purpose flour: The base of your cookies, providing structure.
- Granulated sugar: For sweetness; you can substitute with brown sugar for a molasses flavor.
- Unsalted butter: Adds richness; use room temperature butter for best results.
- Milk: The star ingredient that keeps the cookies soft and moist.
- Vanilla extract: Enhances flavor; opt for pure vanilla for the best outcome.
- Baking powder: Acts as a leavening agent to help the cookies rise.
- Salt: Balances the sweetness and enhances flavors.
- Egg: Provides moisture and binds the ingredients together; a flax egg can be a substitute for vegan options.
This list of ingredients, while straightforward, is what allows you to create a cookie that is both delicious and satisfying. Each component plays a vital role in the overall flavor and texture. Feel free to experiment with the ingredients based on personal preference; for example, swap out the milk for almond or oat milk to suit dietary needs or preferences.
How to Make
Making Milk Cookies: Soft Vanilla Milk Cookies is simpler than you might think. Follow these step-by-step instructions for a successful batch:
- Preheat your oven: Begin by preheating your oven to 350°F (175°C). This initial step is crucial because it ensures that your cookies bake evenly. While the oven heats, prepare your baking sheet by lining it with parchment paper.
- Mix butter and sugar: In a mixing bowl, cream together 1 cup of softened unsalted butter and 1 cup of granulated sugar. You want to beat them until it becomes light and fluffy. This process incorporates air into your mixture, which is essential for achieving that coveted soft texture.
- Add in the egg and vanilla: Now, beat in one egg and 1 tablespoon of pure vanilla extract until they are fully incorporated. This step introduces moisture and adds flavor, setting the stage for your delicious cookies.
- Combine dry ingredients: In a separate bowl, whisk together 2 cups of all-purpose flour, 1 teaspoon of baking powder, and ½ teaspoon of salt. Slowly add this dry mixture to your wet ingredients and mix until just combined—the dough will be slightly sticky.
- Incorporate milk: Gradually mix in ½ cup of milk into your dough. This is the key to achieving those soft, tender cookies. If the dough feels too wet, you can add a touch more flour, but aim for a nice balance.
- Scoop the dough: Use a tablespoon or cookie scoop to drop the dough onto your prepared baking sheet, spaced about 2 inches apart. This spacing ensures that the cookies can spread without merging together as they bake.
- Bake the cookies: Place your baking sheet in the preheated oven and bake for 10-12 minutes, or until the edges are lightly golden. The centers will look slightly undercooked, but they will continue to firm up as they cool.
- Cool and enjoy: Once baked, remove the cookies from the oven and let them rest on the baking sheet for about 5 minutes before transferring them to a cooling rack. This step allows the cookies to set and makes them easier to move without breaking.
Once you become familiar with the basic steps, feel free to experiment by adding chocolate chips, nuts, or dried fruits to the dough for additional flavors. Just remember to keep the ratios balanced if you decide to add anything extra.
Variations & Substitutions
Chocolate Chip Variation: If you’re a chocolate lover, consider adding 1 cup of semi-sweet chocolate chips to the dough. This minor addition transforms the cookie into a delightful chocolate chip version, offering a rich, sweet contrast to the soft vanilla base. Make sure to gently fold in the chips after you have completed the dough preparation, ensuring that they are evenly distributed.
Nutty Delight Variation: For nut enthusiasts, adding ½ cup of chopped walnuts or pecans can give your cookies a delightful crunch. The nuttiness pairs beautifully with the vanilla flavor, enhancing both texture and taste. Just be cautious if you are serving these to others that may have allergies, and always go for fresh nuts to ensure a beautiful flavor.
Vegan Substitution: To make these cookies vegan, simply substitute the egg with a flax egg (1 tablespoon of ground flaxseed mixed with 2.5 tablespoons of water) and use vegan butter or coconut oil instead of regular butter. Additionally, replace the regular milk with almond milk or any other non-dairy milk option. These adjustments maintain the delicious flavor and soft texture while catering to vegan diets.
Gluten-Free Version: If you need a gluten-free option, swap the all-purpose flour with a 1:1 gluten-free baking flour. Make sure the flour blend includes xanthan gum, which helps mimic the texture of gluten. The cookies will still be delightful, allowing everyone to enjoy this treat regardless of dietary restrictions.
Spiced Variation: For those who enjoy a little spice, you can add a touch of ground cinnamon or nutmeg to your dough. This twist adds warmth to the cookies and can evoke feelings of nostalgia and comfort, especially during the colder seasons. A half teaspoon of cinnamon can wonderfully enhance the overall flavor profile.
By exploring these variations, you can cater the soft vanilla milk cookies to your specific dietary needs while also keeping them intriguing and flavorful. These additions are simple yet elevate the recipe in new ways, making it a versatile staple in your cooking repertoire.
Common Mistakes to Avoid
While making **Milk Cookies: Soft Vanilla Milk Cookies**, there are a few common pitfalls to watch out for to ensure your cookies turn out perfectly every time.
Overmixing the dough: One of the most frequent mistakes people make is overmixing the cookie dough after adding the flour. When you mix flour too long, it can develop gluten, leading to a tougher texture. Aim for just mixed, where streaks of flour still exist. Your dough should look homogenous but not overworked.
Not measuring ingredients correctly: Baking is a science, so precision is crucial. Using too much flour can lead to dry, crumbly cookies, while too little can prevent your cookies from holding shape. Use a kitchen scale if possible, or spoon flour into your measuring cup and level it off with a knife to ensure accuracy.
Skipping the cooling stage: After pulling the cookies from the oven, it’s essential to allow them to cool on the baking sheet before transferring to a wire rack. Rushing this step can cause the cookies to break or crumble. Waiting a few minutes allows them to firm up, giving you the best texture.
Not preheating the oven: Always make sure the oven is preheated before placing your cookies in. This step ensures even baking and helps achieve that lovely golden color. Baking in a cold oven results in undercooked centers and uneven texture.
By keeping these common mistakes in mind, you’ll equip yourself with the knowledge needed to create the best soft vanilla milk cookies possible, ensuring a joyful treat is always at your fingertips.
Storage, Freezing & Reheating Tips
To enjoy your Milk Cookies: Soft Vanilla Milk Cookies at their best, proper storage is vital. Allow the cookies to cool completely before storing. Place them in an airtight container at room temperature, where they can last for about a week. For longer storage, consider freezing them.
Freezing: To freeze your cookies, allow them to cool, then arrange them in a single layer on a baking sheet and freeze until solid. Once frozen, transfer the cookies to a freezer-safe plastic bag or container, where they can be securely stored for up to 3 months. When you want to treat yourself, you can simply take out a few cookies and let them thaw at room temperature or heat them gently in the microwave for a delightful warm snack.
Reheating: If you stored your cookies in the fridge or freezer, reheating is easy. For best results, preheat your oven to 350°F and place the cookies on a baking sheet for about 5-7 minutes, or until warmed through. You can also microwave them for about 10-15 seconds. Just be careful not to overdo it; you want them warm but not hard.
To ensure food safety, always check that your cookies remain good by observing any signs of spoilage which generally include changes in color or crustiness, indicating they might not be safe to consume. Properly handling your baked goods will ensure every bite is delightful!
Frequently Asked Questions
Can I use whole wheat flour instead of all-purpose flour? Yes, you can use whole wheat flour as a substitute for all-purpose flour in Milk Cookies, though it may slightly change the texture and flavor. Whole wheat flour will add a nuttier taste and denser texture. For the best results, consider using a mix of both whole wheat and all-purpose flour, or opt for a 1:1 whole wheat flour that is specifically blended for baking.
How can I make the cookies more chewy? To achieve chewier cookies, consider adding an extra egg yolk or replacing part of the granulated sugar with brown sugar. Brown sugar retains moisture better than white sugar, resulting in a softer texture. Additionally, avoiding overbaking and letting them rest slightly underbaked can greatly enhance their chewiness.
Can I add extra flavors to the cookies? Absolutely! These Milk Cookies are quite versatile. You can easily mix in chocolate chips, dried fruits, or nuts for added texture and taste. Spices such as cinnamon, nutmeg, or even matcha can supply a unique twist. Just be mindful of your proportions to keep the dough balanced.
Is there a dairy-free option for this recipe? Yes! You can make these cookies dairy-free by substituting the butter with vegan butter or coconut oil and using non-dairy milk such as almond milk or oat milk. These replacements will keep the cookies delicious while accommodating dietary restrictions.
What’s the best way to soften butter quickly? If you’ve forgotten to take out butter ahead of time, you can soften it quickly by cutting it into small cubes and allowing it to sit at room temperature for about 10-15 minutes. Alternatively, you can place it in the microwave for 5-10 seconds on a low power setting—just be cautious not to melt it.
Conclusion:
The recipe for Milk Cookies: Soft Vanilla Milk Cookies is a delightful addition to your baking repertoire. With its simple ingredients and ease of preparation, you can create warm, comforting cookies that are perfect for any occasion. Whether you’re enjoying them fresh out of the oven or as a sweet midday snack, these cookies hold the promise of coziness and joy.
So go ahead, gather your ingredients, and bake a batch today! You’ll not only be treating yourself but also those you love. Share this recipe, customize it, or even start a tradition with your family—it’s all about the sweet moments created around the table. Happy baking!