Prep time: 20 minutes
Cook time: 30 minutes
Total time: 50 minutes
Servings: 12
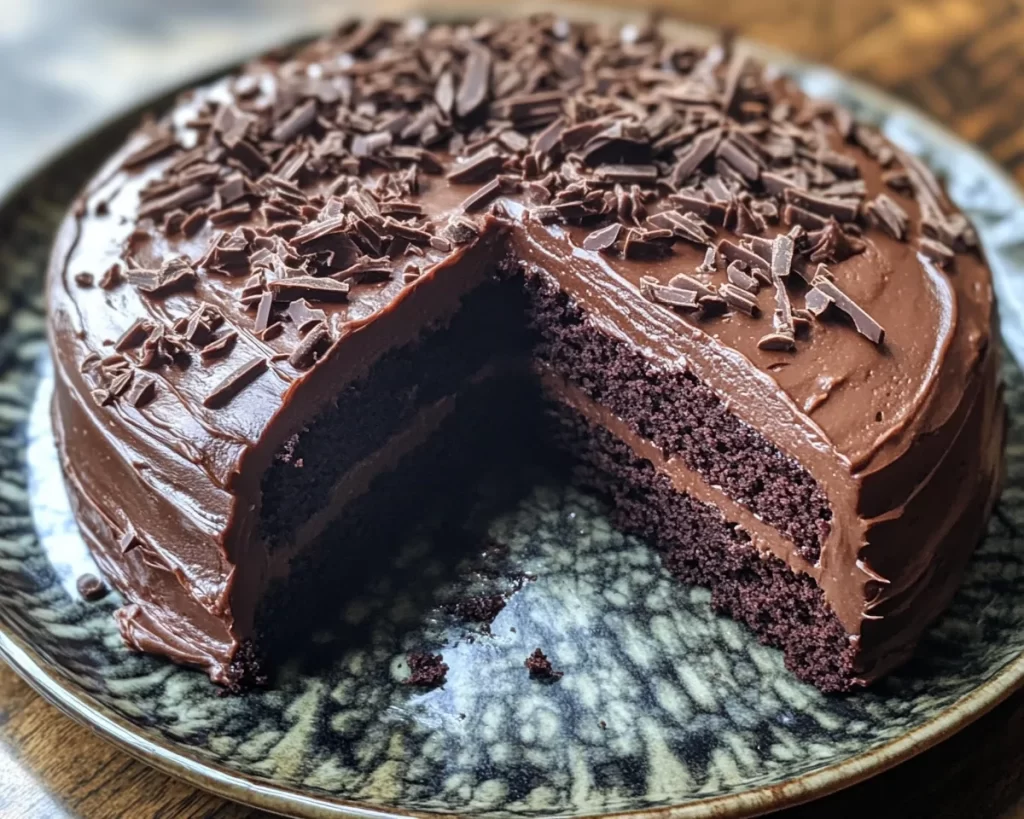
Indulging in a slice of rich, moist chocolate cake often evokes a feeling of comfort and nostalgia, especially when it comes to special occasions like Mother’s Day. Imagine a cake made from scratch, with a deep chocolate flavor that fills your kitchen with an irresistible aroma. This Mother’s Day Classic Chocolate Cake is not just a dessert; it’s a way to express love and gratitude. From the creamy frosting to the moist layers, every element works together to create a delightful experience for whoever gets a slice. In this article, you will learn not only how to make this sumptuous cake but also tips for perfecting it and variations to suit different tastes.
What Is Mother’s Day Classic Chocolate Cake?
Mother’s Day Classic Chocolate Cake is a traditional dessert that has become synonymous with celebrations, warmth, and family gatherings. The origins of chocolate cake can be traced back to the early 19th century when chocolate was first introduced in cakes. Over time, recipes have evolved into this rich, moist version you see today. The resulting texture is dense yet fluffy, and it balances sweet chocolate flavor with subtle notes from the baking process.
The standout ingredient in this cake is, of course, the cocoa powder, which contributes to its deep chocolate flavor. When combined with buttermilk, this cake gets an incredible tenderness and an almost melt-in-your-mouth quality. Topped off with a velvety chocolate frosting, this cake becomes a centerpiece that draws people in. Each layer tells a story—whether it’s memories of baking with a loved one or the excitement of serving it to guests.
Additionally, this special cake can be easily tailored to fit dietary preferences or ingredients you have on hand, making it a versatile showstopper. You can serve it as is, or you can dress it up with fruits, nuts, or extra frosting. This adaptability makes it a perfect choice for any celebration, particularly when honoring the wonderful mothers in our lives.
Why You’ll Love This
One of the main reasons you will love this cake is its incredible balance of flavors. The combination of dark chocolate and just the right amount of sweetness creates a taste sensation that’s hard to resist. You’ll find that the ingredients are simple, yet they come together to produce an extraordinary cake that feels decadent. This is a recipe that anyone can master, regardless of cooking experience, making it perfect for busy parents or beginners in the kitchen.
Another appealing aspect is its affordability. With ingredients you likely already have in your pantry, this cake becomes a budget-friendly option for celebrations. In comparison to pre-made cakes that can sometimes taste lackluster, this homemade version packs a much richer punch.
Moreover, this cake can be made ahead, so if you’re hosting guests or if the busy week has left you pressed for time, you can prepare the cake a day in advance—just frost it on the day of serving for optimal freshness. Plus, the versatility of the cake means that you can easily adapt it for different dietary needs like gluten-free or vegan substitutes, ensuring that everyone can enjoy a slice.
Ingredients You’ll Need
- All-purpose flour: 2 cups – This forms the base of the cake, giving it structure. You can substitute with gluten-free flour if needed.
- Cocoa powder: ¾ cup – Use unsweetened cocoa for that deep chocolate flavor. Consider using Dutch-processed cocoa for a mellower taste.
- Baking soda: 1 ½ teaspoons – This ingredient helps the cake rise and ensures it’s fluffy.
- Salt: ½ teaspoon – This enhances the flavors and balances the sweetness.
- Sugar: 2 cups – Granulated sugar is essential for sweetness, but brown sugar adds moisture and flavor.
- Buttermilk: 1 cup – Provides moisture and helps activate the baking soda for a fluffy cake. You can make a substitute with milk mixed with lemon juice.
- Vegetable oil: ½ cup – Keeps the cake moist; you might use melted coconut oil for a different flavor.
- Vanilla extract: 2 teaspoons – Enhances the cake’s flavor. Use pure vanilla for the best results.
- Eggs: 2 large – Acts as a binding agent, giving the cake structure and richness.
How to Make
- Preheat your oven: Start by preheating your oven to 350°F (175°C). This time ensures the cake will bake evenly. Grease and flour two 9-inch round cake pans to prevent sticking. You can also use parchment paper for easier removal once baked.
- Mix dry ingredients: In a large mixing bowl, combine flour, cocoa powder, baking soda, and salt. Use a whisk to ensure there are no lumps. Incorporating air into the dry ingredients helps with the cake’s texture.
- Combine wet ingredients: In another bowl, whisk together the sugar, buttermilk, vegetable oil, vanilla extract, and eggs until well blended. Make sure the mixture is smooth; this ensures a consistent batter.
- Mix wet and dry: Gradually add the wet ingredients to the dry mixture. Use a spatula or a wooden spoon, and mix until just combined. Overmixing can lead to a dense cake, so be careful here. The batter should be somewhat lumpy, and that’s okay.
- Pour into pans: Divide the batter equally between the two prepared pans. Tap the pans lightly on the counter to remove air bubbles. This step can also help the batter spread evenly.
- Bake the cake: Place the cake pans in the preheated oven and bake for 30-35 minutes or until a toothpick inserted in the center comes out clean. Enjoy the aroma that fills your kitchen; it transforms any space into a cozy haven.
- Cool layers: Once baked, remove the cake from the oven and let it cool in the pans for 10 minutes. Then, turn them out onto cooling racks. Allow them to cool completely before frosting; this is essential to avoid melting your icing.
- Frost the cake: Once cooled, place one layer of cake on your serving plate. Spread a generous layer of your favorite chocolate frosting on top. Then, gently place the second layer on top and frost the top and sides of the entire cake. Try to keep it smooth for an elegant presentation.
- Decorate: For a finishing touch, consider adding chocolate shavings, fresh berries, or a dusting of powdered sugar for added flair. These garnishes can enhance the visual and sensory appeal of your dessert.
Variations & Substitutions
Gluten-Free Variation: If you or your guests are gluten intolerant, you can easily convert this recipe using a high-quality gluten-free flour blend. Brands like Bob’s Red Mill offer excellent substitutes that work seamlessly in cake recipes. The flavor won’t suffer; in fact, many gluten-free flours are made from rice or almond flour, which may add a new layer of taste to your cake. Make sure to check for certification to avoid cross-contamination.
Vegan Variation: For those following a vegan diet, substitute the eggs with flaxseed meal—mix 1 tablespoon of flaxseed with 2.5 tablespoons of water and allow it to sit for 5 minutes until it forms a gel. Replace buttermilk with a plant-based milk mixed with a splash of vinegar. This works well and keeps the cake moist. Finally, use a vegan butter substitute in the frosting for a truly plant-based treat.
Chocolate Mint Variation: If you want a refreshing twist, consider adding peppermint extract to the frosting and garnishing with fresh mint leaves. This variation pairs beautifully with the rich chocolate, providing a delightful contrast that will surprise and please your guests.
Coffee Infused Variation: For a mocha twist, incorporate a strong brewed coffee into the batter. Just substitute half of the buttermilk with cooled, brewed coffee. This enhances the chocolate flavor and adds a depth that coffee lovers will adore.
Common Mistakes to Avoid
One of the most common mistakes when baking this cake is overmixing the batter. This can lead to a dense cake that lacks the fluffy texture we desire. Always mix until the ingredients are just combined to maintain that lightness in your cake. Another pitfall is underbaking; oven temperatures can vary widely. Ensure you test the cake with a toothpick and adjust baking times accordingly. Finally, not allowing the cake to cool completely before frosting can lead to a runny mess. If you can wait, your frosting will achieve the perfect consistency.
Storage, Freezing & Reheating Tips
For optimal freshness, store your chocolate cake in an airtight container at room temperature for up to three days. If you need to keep it longer, consider freezing it. Wrap each layer tightly in plastic wrap and aluminum foil to prevent freezer burn; it can last up to three months in the freezer. When you’re ready to enjoy, let it thaw in the refrigerator overnight. Reheat the slices in the microwave for a few seconds to enjoy a warm, gooey experience.
Always remember to practice food safety best practices. Make sure anything that comes into contact with the cake (utensils, plates, etc.) is clean and that you store it properly to avoid spoilage.
Frequently Asked Questions
Can I use cake flour instead of all-purpose flour? Yes, you can; however, you may need to reduce the amount slightly for the best results. Cake flour has less protein, resulting in a more tender cake. Just remember to check for consistency during mixing.
How can I make my frosting extra creamy? To achieve a smoother, creamier frosting, craft your ingredients at room temperature, especially the butter. It helps in blending more fully, giving you that velvety texture.
Is there an alternative frosting I can use? Absolutely! You can opt for a white chocolate ganache or a simple whipped cream frosting to lighten the cake. Both options provide a delicious contrast to the dense chocolate flavor.
Can I make this cake ahead of time? Yes! You can bake and cool the layers a day in advance. Simply store them wrapped in plastic wrap at room temperature. Frost just before serving for the best flavor and texture.
How do I know when the cake is done baking? A toothpick inserted in the center of the cake should come out clean or with just a few moist crumbs attached. If batter sticks to it, then it needs additional baking time.
Conclusion:
This Mother’s Day Classic Chocolate Cake brings together everything that makes a cake special—rich flavors, simple ingredients, and a loving touch. With the detailed guidelines and tips provided, you can master this delightful recipe and create cherished memories as you serve it. Don’t hesitate to customize it for dietary preferences or personal tastes, but remember, no matter how you choose to enjoy it, the experience of sharing it with others is what truly makes it magical. So roll up your sleeves and get baking; your beautifully crafted cake awaits!