Prep time: 20 minutes
Cook time: 30 minutes
Total time: 50 minutes
Servings: 16 Bars
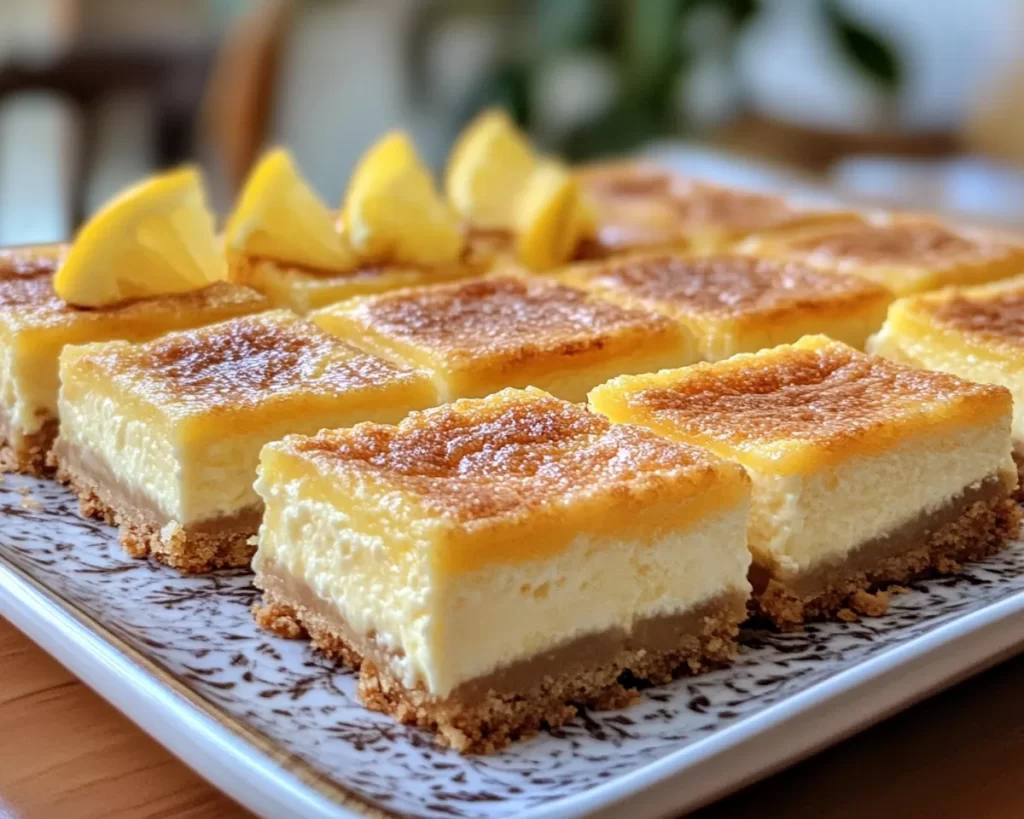
When you think of desserts that bring comfort and joy, **Mother’s Day Lemon Cheesecake Bars** take center stage. Picture this: warm days filled with sunshine and laughter, a gentle breeze, and the aroma of freshly baked treats wafting through your home. These lemon cheesecake bars encompass all that warmth, making them the ideal dessert to celebrate your loved ones. They’re tart yet creamy, light yet satisfying, perfectly honed to be a crowd-pleaser at any gathering, especially on Mother’s Day.
This recipe isn’t just about tantalizing flavors; it’s about bringing families together. With a crust that strikes the perfect balance between crumbly and buttery, complimented by a rich, creamy cheesecake filling, these bars turn any gathering into a special occasion. Beyond the delicious taste, you’ll appreciate the ease of preparation, making it a great choice even for kitchen novices or busy parents looking for a show-stopping dessert with minimal fuss. In this post, you’ll learn how to whip up these delectable treats, variations you can explore, and handy tips to ensure they turn out perfectly every time.
What Is Mother’s Day Lemon Cheesecake Bars?
Mother’s Day Lemon Cheesecake Bars are a delightful twist on classic cheesecake. Originating from traditional cheesecake recipes, this version simplifies the process by transforming the rich dish into charming and easy-to-serve bars. The creamy filling is infused with vibrant lemon zest and juice, resulting in a refreshing and zesty flavor that balances the decadent cheesecake texture. The combination creates a dessert that’s not too sweet, making it suitable for a variety of palates.
The texture of these bars is one of their standout features. You first experience the satisfying crunch of the buttery graham cracker crust, which gives way to the velvety smooth filling. This contrast enhances the overall enjoyment, appealing to both the taste buds and the senses. The bars can also be chilled for several hours, allowing the flavors to meld beautifully, resulting in a creamy texture that makes each bite feel luxurious. It’s this combination of flavor, texture, and ease of preparation that makes these Mother’s Day Lemon Cheesecake Bars so special.
Why You’ll Love This
You’ll absolutely adore making and tasting these Mother’s Day Lemon Cheesecake Bars for several reasons. First, they offer a **heavenly balance of tart and sweet** that’s undeniably refreshing, especially during spring and summer gatherings. Whether you’re catering to a crowd or enjoying a cozy family meal, these bars never fail to impress. You can also prepare them ahead of time, making hosting a breeze. Instead of spending hours in the kitchen, you can relax and enjoy the company of your loved ones.
Moreover, these bars are relatively low-cost, utilizing basic ingredients found in most kitchens. The key ingredients like cream cheese, sugar, and lemon juice are not only affordable but also readily available. For those who may be wary of making cheesecake from scratch, rest assured that this recipe minimizes complexity and maximizes **deliciousness**. If you’re concerned about baking methods or meal prep logistics, you’ll find that these cheesecake bars are simple to put together. With just a few steps, even beginners can excel and achieve professional-looking results.
Ingredients You’ll Need
- Graham cracker crumbs: These form the solid base for your bars. You can substitute them with **digestive biscuits** or **vanilla wafers** for a different flavor profile.
- Unsalted butter: This provides richness to the crust and adds flavor. Be sure to melt it before mixing with the crumbs.
- Granulated sugar: Essential for both the crust and the cheesecake filling. It balances the tanginess of the cream cheese and lemon.
- Cream cheese: The heart of the cheesecake. Opt for full-fat for a rich flavor, but you can use **light cream cheese** if desired.
- Eggs: These help bind the filling together. Make sure they’re at room temperature to ensure smooth mixing.
- Lemon juice: Freshly squeezed juice brightens up the flavor. If you can’t get fresh lemons, bottled lemon juice will work in a pinch, although fresh is preferred for the best taste.
- Lemon zest: Adds a potent citrus aroma and enhances the lemon flavor. Use a microplane for easy zesting.
- Vanilla extract: Just a splash adds depth and flavor to the cheesecake filling.
How to Make
- Preheat your oven to 350°F (175°C). This allows your bars to bake evenly. While your oven is heating, gather all your ingredients to make the process smooth.
- Line a 9×9 inch baking pan with parchment paper, leaving some overhang for easy removal later. This step prevents sticking and makes cutting the bars easier.
- In a medium bowl, combine the graham cracker crumbs, melted butter, and 1/4 cup of granulated sugar. Stir until the mixture is well combined and resembles wet sand. This mixture should hold together when pressed.
- Press this crust mixture firmly into the bottom of the lined baking pan using the back of a measuring cup. Make sure it’s even and compact for a sturdy base. Bake in the preheated oven for about 10 minutes, until slightly golden and fragrant.
- While the crust is baking, prepare the cheesecake filling. In a large bowl, beat the cream cheese using an electric mixer until smooth and creamy, ensuring there are no lumps. Add the remaining 3/4 cup of sugar, and beat until fully incorporated.
- Add the eggs one at a time, mixing well after each addition. It’s important to beat them in separately for a creamier texture. Then, mix in the lemon juice, lemon zest, and vanilla extract until combined. The batter should be smooth and glossy with a delightful lemon scent.
- Once the crust is baked, remove it from the oven and pour the cheesecake filling over the hot crust. Smooth the top with a spatula for an even finish.
- Bake for an additional 20–25 minutes or until the center just jiggles slightly when baked. Do not overbake, as this can make the filling dry. When you pull it out, it will continue to set as it cools.
- Let the cheesecake bars cool on the counter for about 30 minutes. Then, transfer them to the refrigerator to chill completely for at least 2 hours or overnight for the best texture.
- Once cooled, use the parchment overhang to lift the bars out of the pan. Cut them into squares, and dust with powdered sugar if desired. Serve chilled for a refreshing treat!
Variations & Substitutions
Coconut Lemon Cheesecake Bars: If you enjoy the tropical flavor of coconut, consider adding shredded coconut to both the crust and the filling. Use 1/2 cup of unsweetened shredded coconut in the crust and the same in the filling. This variation gives your cheesecake a delightful chewiness and a subtly sweet flavor that complements the lemon beautifully.
Gluten-Free Option: For those avoiding gluten, you can easily make this dessert gluten-free. Substitute traditional graham cracker crumbs with **gluten-free graham cracker crumbs** or even ground almonds or oat flour for the crust. The filling ingredients remain the same, ensuring that everyone can enjoy these bars regardless of dietary restrictions.
Berry Swirl Variation: To add a colorful twist and some fruity goodness, consider incorporating a berry swirl into your cheesecake. Prepare a simple berry compote by simmering raspberries, blueberries, or strawberries with a touch of sugar until thickened, and then swirl it into the cheesecake filling before baking. This fruity addition not only amplifies the flavor but also adds visual appeal, making your bars look stunning.
Vegan Option: To create a dairy-free version of these bars, substitute the cream cheese with a vegan cream cheese alternative. For the eggs, consider using **flax eggs** or **chia seeds** mixed with water to bind the filling. The rest of the ingredients can stay the same, just ensure they’re labeled as vegan to fit the dietary preferences of your guests.
Common Mistakes to Avoid
One of the most common mistakes when making cheesecake is **overbaking**. Overbaking can lead to cracks and a dry texture, detracting from the creamy experience you’re aiming for. To prevent this, always check for doneness a few minutes before your timer goes off. The bars should be set but still have a slight jiggle in the center. If you see cracks forming, it’s an indication that they were cooked too long.
Another mistake is not allowing the bars to cool properly before refrigerating. Cooling them at room temperature for about 30 minutes is crucial. Moving them straight into the refrigerator can cause **sweat** on top of the bars, leading to a soggy texture. Always prioritize patience; the better they set, the creamier they’ll be.
Lastly, ensure you use fresh ingredients, especially when it comes to the cream cheese and lemons. **Stale ingredients** will affect the flavor and texture of your bars. Always opt for fresh lemons; the aroma and zest are unbeatable and will elevate the dish to another level.
Storage, Freezing & Reheating Tips
For optimal freshness, store your Mother’s Day Lemon Cheesecake Bars in an airtight container in the refrigerator, where they can last for up to one week. This method helps maintain their creamy texture and prevents them from drying out. If you prefer enjoying them cold, they are delicious right out of the refrigerator.
If you want to prepare them in advance, these bars can be frozen for up to three months. After cutting them into squares, individually wrap each piece in plastic wrap, then place them in a freezer-safe container or bag. When you’re ready to enjoy them, remove them from the freezer and let them thaw in the refrigerator overnight. This way, you always have a refreshing dessert ready for unexpected guests or special occasions.
When reheating, it’s best to enjoy them chilled rather than trying to warm them back up, which could cause the filling to lose its texture. Just pop them in the fridge overnight before your event, and they will be perfect by serving time.
Frequently Asked Questions
Can I make these bars ahead of time? Absolutely! In fact, they taste better after chilling in the fridge for several hours or overnight. This allows the flavors to meld beautifully, resulting in richer cheesecake bars. They are perfect for preparing ahead for parties or family gatherings.
Can I substitute the cream cheese for non-dairy alternatives? Yes, you can use vegan cream cheese alternatives to keep this recipe dairy-free. Many brands now offer creamy options that work wonderfully in this recipe without sacrificing flavor or texture.
What should I do if my bars crack while baking? If you notice cracks developing during baking, it’s an indication that they may have been overcooked. To prevent this from happening, keep a close eye on the bake time and remove them once they are set but have a slight jiggle. If they do crack, a light dusting of powdered sugar can help hide imperfections.
How do I best cut the bars? To obtain clean cuts, allow the bars to cool completely and use a sharp knife. For even cleaner slices, consider warming the knife under hot water then wiping it dry before cutting. This technique helps prevent the bars from sticking to the blade.
Can I add other flavors to the filling? Certainly! You can explore other citrus flavors like lime or orange, or even add a hint of almond extract instead of vanilla for a different taste experience. Just keep experimentation fun and tweak the flavors to your liking.
Conclusion:
Mother’s Day Lemon Cheesecake Bars are more than just a dessert; they embody the spirit of togetherness, celebration, and indulgence. With their dazzling flavor and delicate texture, these bars are sure to impress family and friends alike. Encourage your creativity by adapting them to your specific tastes or dietary needs. Share this delicious treat with everyone and transform your next gathering into a memorable event. You won’t regret trying these out—your taste buds will thank you!