Prep time: 30 minutes
Cook time: 30 minutes
Total time: 1 hour
Servings: 12
Imagine a cake that embodies the essence of spring, with the sweet aroma of ripe strawberries wafting through your kitchen. The Mother’s Day Strawberry Layer Cake is more than just a dessert; it’s a celebration of love, family, and cherished memories. If you’re searching for a delightful way to honor your mom or any special woman in your life, this cake is the perfect choice. With each slice, you’ll indulge in layers of tender cake, creamy frosting, and fresh strawberries that burst with flavor. Not only will you learn how to make this exquisite cake, but you’ll also discover tips for perfecting it and variations that cater to all preferences.
One of the most appealing aspects of this cake is its versatility. It can easily be dressed up for special occasions or simplified for a quick family treat. Whether you’re an experienced home cook or a beginner in the kitchen, this recipe will guide you through each step, ensuring that your cake turns out beautifully. For those busy parents juggling a million tasks, this recipe allows you to create a stunning dessert without excessive time or effort. So let’s dive into this delightful recipe!
What Is Mother’s Day Strawberry Layer Cake?
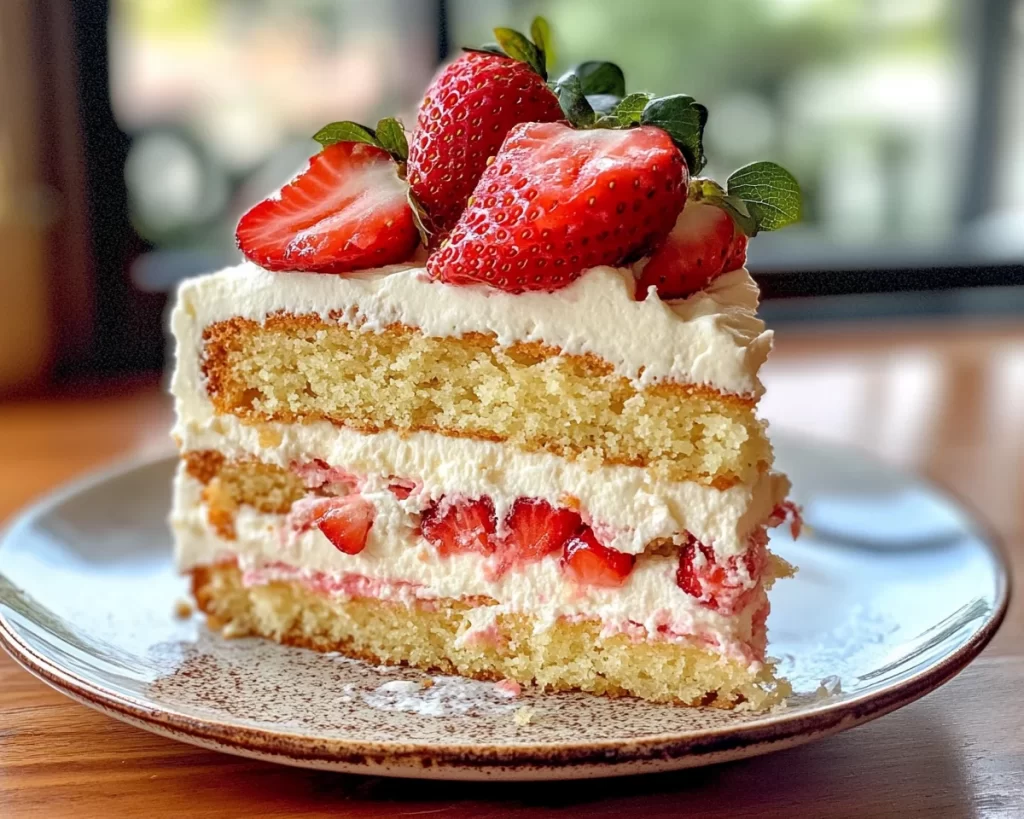
Mother’s Day Strawberry Layer Cake is a classic dessert that showcases the vibrant flavors of fresh strawberries. Originating from the American tradition of layer cakes, this dessert typically consists of multiple layers of moist vanilla or strawberry cake, filled and frosted with a luscious strawberry buttercream. Each layer is carefully assembled to create a towering beauty that is not only a feast for the eyes but also a delight for the palate.
The texture of this cake is light and fluffy, melting in your mouth with every bite. The creaminess of the frosting balances perfectly with the brightness of the strawberries, creating a harmony of flavors that is simply irresistible. The use of fresh ingredients elevates the overall experience, making it a special treat that feels indulgent yet approachable. Baking this cake feels like crafting a heartfelt gift, and the joy it brings to your loved ones makes every effort worthwhile.
Why You’ll Love This
There are countless reasons to love Mother’s Day Strawberry Layer Cake. For starters, its taste is exceptional: the balance of sweetness from the cake, the tartness of the strawberries, and the creaminess of the frosting create a delicious flavor profile that is satisfying yet not overwhelming. Moreover, this cake is easy to make; even those who are just starting to dabble in baking can successfully achieve delightful results by following the step-by-step instructions.
Another benefit is its versatility. You can easily tailor it to meet dietary preferences—whether gluten-free, vegan, or low-sugar—without compromising on flavor or texture. Many people mistakenly believe that layer cakes are daunting and time-intensive, but this recipe breaks that mold, allowing you to impress your guests without spending an entire day in the kitchen. Creating this beautiful cake can also be a wonderful bonding experience with family, making the cooking process enjoyable and rewarding.
Ingredients You’ll Need
- All-purpose flour: This is the base of the cake, giving it structure. For gluten-free options, consider almond or coconut flour.
- Baking powder: A leavening agent that helps the cake rise. Always check the expiration date for the best results.
- Sugar: Both granulated sugar for sweetness and powdered sugar for frosting. You can use coconut sugar as a healthier alternative.
- Salt: Enhances the flavor of the cake. It should always be included in baking for balance.
- Unsalted butter: Adds moisture and richness. If you’re dairy-free, use margarine or a plant-based butter substitute.
- Eggs: Provide moisture and stability. For vegans, a simple flax egg can be a good alternative.
- Milk: Contributes to the cake’s texture. Almond milk or coconut milk are great substitutes for lactose intolerance.
- Vanilla extract: Brings a lovely aroma and flavor; use pure vanilla extract for the best quality.
- Fresh strawberries: Essential for the filling and decoration. Choose ripe, in-season strawberries for maximum sweetness.
- Heavy cream: Used for making the frosting fluffy; can be replaced with coconut cream for a dairy-free option.
Every ingredient plays a crucial role in making this cake the ultimate treat for Mother’s Day or any special occasion. By selecting quality ingredients, you enhance not just the flavor but the overall experience.
How to Make
- Preheat your oven to 350°F (175°C). Grease and flour two 9-inch round cake pans. This step is essential to ensure your cakes come out easily without crumbling. Line the bottoms with parchment paper for added security.
- In a mixing bowl, combine the all-purpose flour, baking powder, and salt. Whisk these dry ingredients together until they are fully blended. This step ensures that the leavening agent is evenly distributed, which is critical for the cake’s even rise.
- In a separate bowl, cream the unsalted butter and granulated sugar together until light and fluffy, using a hand mixer or a stand mixer. This process usually takes about 4-5 minutes. A light yellow color and fluffy texture signify that you’ve successfully incorporated air into the mixture.
- Add the eggs one at a time to the butter-sugar mixture, mixing well after each addition. Pour in the vanilla extract and beat until combined. The mixture should become smooth and creamy, and the smell of vanilla will fill your kitchen!
- Gradually add the dry ingredients to the wet mixture, alternating with the milk. Start and end with the dry ingredients, mixing until just combined. This method helps to keep the batter airy and ensures you don’t overmix, which can lead to a dense cake.
- Pour the batter evenly into the prepared cake pans, smoothing the tops to ensure they bake evenly. Tap the pans gently on the counter to release any air bubbles.
- Bake the cakes in the preheated oven for about 25-30 minutes, or until a toothpick inserted in the center comes out clean. Keep an eye on the cakes during the last few minutes to avoid over-baking.
- Once baked, remove the cakes from the oven and allow them to cool in the pans for about 10 minutes. Carefully invert them onto wire racks to cool completely. Cooling is crucial; if you frost the cake while it’s still warm, the frosting might melt and slide off!
- While the cakes are cooling, wash and slice your fresh strawberries. You can also prepare the frosting by beating the heavy cream and powdered sugar together until soft peaks form. For added flavor, consider mixing in a bit of vanilla extract.
- When the cake layers are completely cool, place one layer on a serving plate. Spread a layer of frosting on top, followed by a generous amount of sliced strawberries. Top with the second cake layer and frost the top and sides of the entire cake. Decorate with additional strawberries for an elegant finish.
- Once frosted, refrigerate the cake for at least 30 minutes before slicing. This helps the layers to set, making it easier to cut and serve.
In each step, pay attention to the textures and aromas; it truly enhances the experience of baking. The rich butter aroma, the creamy frosting consistency, and the fresh strawberry scent will make your kitchen a haven of delightful smells!
Variations & Substitutions
Gluten-Free Variation: If you or a loved one is gluten intolerant, you can easily make this cake gluten-free by substituting the all-purpose flour with a gluten-free flour blend. This blend typically contains a mix of rice flour, tapioca flour, and potato starch. Make sure to check the packaging for the recommended ratios, as they can differ from regular flour. The flavor will be slightly different, but the cake will still be moist and delicious. Ensure that all other ingredients, like baking powder, are also certified gluten-free.
Vegan Variation: To transform this recipe into a vegan delight, replace the eggs with flax eggs (1 tablespoon of ground flaxseed mixed with 3 tablespoons of water per egg, left to sit for a few minutes until thick). Use plant-based butter instead of traditional butter, and for the heavy cream, consider using coconut cream or a vegan whipping cream. While the texture may differ slightly, the result is equally delightful and ethical, making it a perfect choice for plant-based diets.
Chocolate Strawberry Layer Cake: If you want to tantalize your chocolate-loving family, you can create a chocolate version of this cake. Replace half of the all-purpose flour with unsweetened cocoa powder. Keep the other ingredients the same, but consider adjusting the sugar slightly to balance the bitterness of the cocoa. This rich chocolate cake, layered with strawberries and frosting, offers a deliciously decadent twist that is sure to impress.
Common Mistakes to Avoid
A common mistake when baking is overmixing the batter. Overmixing can lead to a dense, tough cake, which is not what you want for a Strawberry Layer Cake. It’s essential to mix just until the ingredients are combined; lumps are okay. Another common oversight is not properly measuring ingredients, especially flour. Always spoon and level flour off with a knife—scooping directly can lead to packing, resulting in a dry texture.
Also, be cautious with baking times. Ovens can vary, so it’s crucial to start checking for doneness a few minutes before the timer goes off. If you allow your cake to bake for too long, it could dry out. Lastly, never frost a warm cake! The heat can melt the frosting, causing it to slide off the layers, defeating the beautiful aesthetic you aimed for.
Storage, Freezing & Reheating Tips
To store your Mother’s Day Strawberry Layer Cake, keep it in an airtight container in the refrigerator if you intend to eat it within a few days. Proper storage ensures that the cake stays fresh and the frosting remains intact. If you need to keep it longer, you can freeze slices wrapped in plastic wrap and then placed in a freezer bag. When you’re ready to enjoy them, simply thaw the slices in the refrigerator overnight.
For best results, it’s recommended to consume the cake within a week if stored in the fridge. Enjoying the cake soon after it’s made is ideal for experiencing the vibrant flavors and textures at their best. If you notice any signs of spoilage, it’s best to dispose of it for safety.
Frequently Asked Questions
Can I make this cake ahead of time?
Absolutely! You can bake the layers a day or two in advance. Just store them wrapped in plastic wrap at room temperature. If you’ve already frosted the cake, it’s best to keep it refrigerated and consume it within a few days.
What type of strawberries should I use for this cake?
Using ripe, fresh strawberries is essential for the best flavor. Look for strawberries that are bright red, firm, and have a sweet smell. Avoid mushy or overly soft strawberries, as they can ruin the texture of your cake.
Can I use frozen strawberries instead of fresh ones?
Yes, but keep in mind that frozen strawberries often have a higher moisture content. They can be used in the frosting, but it’s better to thaw and drain them first. Fresh strawberries are recommended for decoration to maintain the cake’s aesthetics.
Is this cake suitable for other occasions?
Absolutely! While it’s perfect for Mother’s Day, this Strawberry Layer Cake is versatile enough for birthdays, anniversaries, or even casual gatherings. You can adapt it for different seasons by using other fruits, such as blueberries in the summer or pumpkin in the fall.
What can I do if my cake came out dry?
If your cake is dry, consider using a simple syrup made from equal parts sugar and water to moisten the layers. Lightly brush the syrup on each layer before frosting. This technique can help revive a dry cake and keep it moist.
Conclusion:
Mother’s Day Strawberry Layer Cake is truly a remarkable dessert that embodies love, care, and delicious flavors. The unique combination of moist layers, creamy frosting, and fresh strawberries makes it a favorite among many. I encourage you to try this recipe, customize it to your liking, and share it with friends and family. The joy of baking is not just in the end result but in the moments you share with loved ones during the process. So gather your ingredients, roll up your sleeves, and create something beautiful and delicious today!