Ah, Beef Enchiladas with Homemade Red Sauce—where do I begin? Honestly, this dish warms my heart and fills my belly like nothing else! It’s one of those recipes that takes me back to my childhood, where the kitchen would be filled with the rich, tantalizing scent of spices mingling with sizzling beef. I can still hear my grandmother’s laughter ringing through the air as she walked me through the entire process, teaching me her little secrets and techniques—some of which I probably still use today (and some I forget until I find myself in a pinch, which, let me tell you, happens more often than I’d like to admit).
You see, my love affair with beef enchiladas began on a rainy Sunday afternoon. I was feeling a bit under the weather, and my grandmother knew exactly what I needed—her famous enchiladas. As she worked her magic, I sat perched on a stool, quietly observing the dance of flavors that unfolded before me. Each ingredient seemed to have a special purpose, and the feeling of community enveloped us like a warm tortilla wrap. Little did I know that this recipe would one day evolve into my go-to comfort food, a dish I whip up when I want to feel nourished, loved, and connected to my roots.
And here’s the kicker: making these enchiladas is just as rewarding as eating them! Sure, there might be a bit of chopping and sautéing involved, but it’s part of the fun. You get to bring a little piece of your kitchen to life, and trust me, the satisfaction that comes from taking your first bite is unparalleled. So grab your apron, and let’s simmer together through this delicious adventure!
What Goes Into Beef Enchiladas with Homemade Red Sauce?
Now, let’s dive into the good stuff—the ingredients that make these enchiladas sing. You’re going to want to get cozy with these items because they’re packed with flavor and nostalgia.
– Ground Beef: I usually go for some good quality ground beef—90% lean usually gives me the perfect balance of flavor and moisture. Sometimes, I mix in a little pork for an extra layer of richness, maybe out of some crazy experiment that worked out (which happens more often than you’d think in my kitchen). Just remember, a touch of fat equals a happier filling!
– Tortillas: Corn or flour? I’m a corn tortilla kind of person myself; they’ve got that chewy texture and a slightly nutty flavor I can’t resist. I recommend getting the freshest ones you can find. There’s something almost magical about the way homemade corn tortillas taste, and they’re totally worth it if you’re feeling ambitious! But the store-bought ones will do just fine; we’re making comfort food here, remember?
– Onion: For this recipe, a medium yellow onion will do the trick. Just chop it up finely. And hey, if you find yourself shedding a few tears, don’t worry; it happens to the best of us! Embrace the tears—cooking can be an emotional experience, right?
– Garlic: A couple of fresh cloves, minced or pressed—whatever floats your boat! There’s nothing quite like the aroma of sautéing garlic to get your taste buds dancing. My grandma would always say that garlic is the magic ingredient in every savory dish, and I think she was onto something.
– Chipotle Peppers in Adobo: Ah, these little beauties pack a flavorful punch that can’t be beaten. I usually use about two or three, minced. They add smokiness and depth, and I promise you’ll want to use them in other dishes, too—maybe a soup or a marinade. Just remember to keep a few extra cans on hand; you’ll be thanking yourself later!
– Cumin and Chili Powder: A pinch (or two) of each will warm your spices up nicely. I personally overdose on cumin; I don’t think there’s such a thing as too much! It’s like a warm blanket for your taste buds. And chili powder? It gives all of the heat and flavor without overwhelming the dish—just the right amount of sass!
– Sour Cream: You can’t be too liberal with that dollop of sour cream when serving these beauties. It brings brightness and a creamy texture that will elevate the whole enchilada experience. Honestly, some folks might want to skip it, but I don’t understand how anyone could resist!
– Cheese: Yes, please! I typically go for a mix of shredded cheddar and Monterey Jack cheese. You’ve got your comfort cheese right there. Just imagine all that gooey goodness melting and clinging to every inch of those enchiladas. Speaking of clinging, that’s how I feel about cheese—max effort, minimal regrets!
Now you may be wondering—not only what goes into this dish but also how much it’ll bless your body. So, let’s break that down a bit!
Is Beef Enchiladas with Homemade Red Sauce Actually Good for You?
Now, let me level with you—these enchiladas are indulgent. They’re like a warm hug in food form, and when you want comfort, that can mean a bit of a calorie overload. Sure, the ground beef is protein-packed, providing you with essential nutrients. And you might feel like a champion while on a cheese spree with your cheddar and Monterey Jack, which have calcium and are bonkers delicious!
But let’s be honest—this isn’t exactly a salad. And I wouldn’t recommend making these every single day, especially if you’re watching your waistline. Don’t get me wrong; I believe in balance! Treating yourself is totally fine, and it’s the homemade aspect that makes all the difference. You know what I mean? Plus, the love and energy you pour into cooking these enchiladas contributes to your happy hormones, which can only be good for your health!
Feel free to toss in some veggies if you feel up for it. Spinach, peppers, or even some shredded zucchini can work wonders. Sneaking in those nutrients while indulging your cravings? That’s a win in my book.
Here’s What You’ll Need
– Ground beef: 1 lb
– Corn or flour tortillas: 8–10 (depends on how Mexican pizza you want)
– Onion: 1 medium, diced
– Garlic: 2 cloves, minced
– Chipotle peppers in adobo: 2–3, minced
– Cumin: 1 tsp
– Chili powder: 1 tbsp (or more if you’re feeling it!)
– Sour cream: For serving
– Cheese (cheddar/Monterey Jack): 2 cups, shredded
– Olive oil: 1-2 tbsp (for sautéing)
– Salt and pepper: To taste
– Homemade red sauce (see below!)
And oh buddy, let’s not forget that scrumptious homemade red sauce!
How to Make Beef Enchiladas Step-by-Step
1. **Step One**: Start by warming up your olive oil in a large skillet over medium heat. Once it’s shimmering (not like a disco ball, just shiny), toss in your chopped onion. Sauté that beauty for about 5-7 minutes, until it’s soft and translucent. Just keep stirring; I’ve burned more onions than I’d like to admit, so don’t let that happen to you!
2. **Step Two**: Next, it’s garlic time! Add your minced garlic and sauté for another minute. Oh man, if you could bottle that smell, I’d wear it as perfume. Once the garlic is fragrant, stir in the ground beef. You’ll want it to brown and get all those delicious juices mixed up—about 8-10 minutes.
3. **Step Three**: After it’s nice and cooked, sprinkle in the chipotle peppers, cumin, chili powder, and salt and pepper. Stir that around for a couple of minutes, so the spices can mingle with the beef like they’re at a party. It should smell downright heavenly at this point!
4. **Step Four**: At this point, you might want to taste test your filling! I often do, just to make sure I’m not headed for a bland dish. Add more seasoning if necessary. Once it’s perfect, set that deliciousness aside.
5. **Step Five**: Now, here’s where it gets exciting. Grab your tortillas—if you’re using store-bought, warm them in the microwave for about 30 seconds; this makes them pliable. For homemade, you’re already winning!
6. **Step Six**: Preheat your oven to 350°F (175°C), and start the assembly line! Spoon about 2–3 tablespoons of the beef mixture in the middle of each tortilla, sprinkle some cheese on top, and roll that baby up tightly. Place seam-side down in a greased (trust me on this) baking dish.
7. **Step Seven**: Repeat until all your tortillas are filled and lined up like little soldiers. They should be cozy in that baking dish.
8. **Step Eight**: Pour your homemade red sauce over the top and sprinkle with whatever cheese you have left. I like to go heavy, but follow your heart (or your cheese supply).
9. **Step Nine**: Bake those enchiladas for about 20-25 minutes, just until everything is bubbling hot, and the cheese is melting into a glorious mess. Let those rest for about 5 minutes (if you can resist) before diving in.
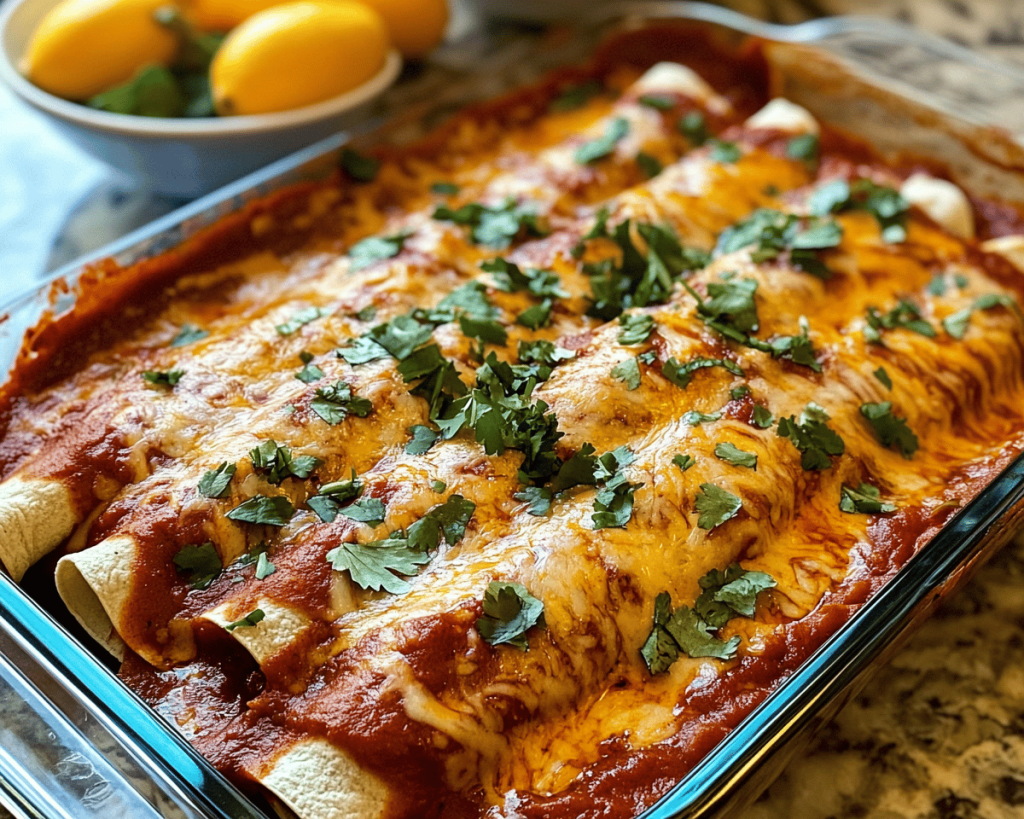
10. **Step Ten**: Serve warm with a dollop of sour cream on top and maybe a sprinkle of chopped cilantro if you’re feeling fancy.
Little Extras I’ve Learned Along the Way
Okay, let’s get real about some of the little tweaks and tips I’ve picked up along the way that have made my enchilada experience even better:
– **Go bold with the sauce**: I’d recommend making a double batch of the homemade red sauce. It’s a game changer and can be used in so many different ways! I like to reserve some for drizzling over the enchiladas just to amp up the flavor. Don’t worry if you have some left over; it’s a fantastic addition to tacos, burritos, or even a spicy chili.
– **Don’t skimp on the layering**: Sometimes I’ve been known to skimp out on the cheese layer between the tortillas. A crime, really! Sprinkle cheese as you layer in between the tortillas, not just on top. You’ll create cheesy pockets of joy that will impress everyone at the table.
– **Experiment with fillings**: While I stick to beef most of the time, feel free to throw in some beans, we often do black beans for a bit of nutrition. And if you want to go all veggie, roasted zucchini, bell peppers, and mushrooms can work nicely. My cousin once swore by using leftover chicken—if it works, I’d call that a success!
– **Cheese Varieties**: I have played with a variety of cheeses—like queso blanco or Monterey Jack—and you can never go wrong. Sometimes I even sneak in some pepper jack when I’m feeling daring!
– **Serving suggestions**: A side of Mexican rice, refried beans, or a simple green salad pairs beautifully. Or, if you can’t decide, go for all three! No one will judge, I promise.
Finally, the wonderful thing about cooking is that it allows for growth and exploration. Maybe yours won’t look Instagram-ready. But I can guarantee you—watching the faces of your family and friends light up when the dish hits the table will make all the effort worthwhile.
This one means a lot to me. It’s more than just enchiladas; it’s tradition and love tied in a warm corn tortilla. I can’t wait for you to discover this recipe in your own kitchen. Let me know if you try it—I’d love to hear your twist. Happy cooking!