Prep time: 20 minutes
Cook time: 30 minutes
Total time: 50 minutes
Servings: 12 bars
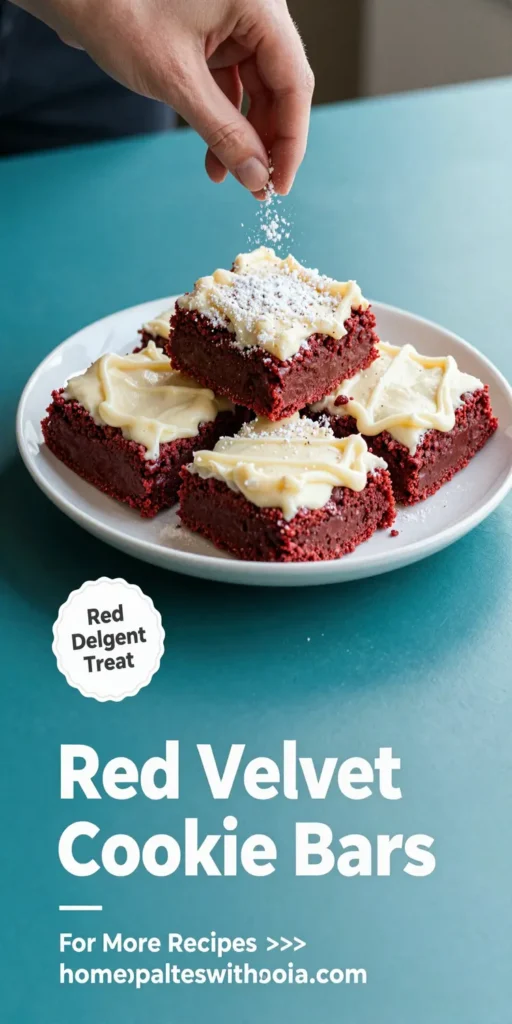
Red Velvet Cookie Bars are a delightful treat that combines the rich, buttery flavor of classic cookies with the eye-catching color and tang of red velvet cake. These bars are not only easy to prepare, but they also pack a punch in flavor, making them perfect for any gathering or simple family dessert night. With the holidays around the corner or just an average weeknight, these red velvet cookie bars will have everyone craving more. They are sure to impress both kids and adults alike, and they’ll leave everyone wondering how you got them so perfectly delicious.
What Is Red Velvet Cookie Bars?
Red Velvet Cookie Bars are a sweet dessert that features the iconic red velvet flavor we often associate with cake, but in a bar format. These bars typically have a dense, chewy texture similar to brownies, but with that signature cocoa-infused flavor profile coupled with a hint of cream cheese. Baking them in a pan makes them easy to cut into squares and serve, which is ideal for parties, holiday celebrations, or simply as a delightful snack at home.
Why You’ll Love This
There are many reasons to love Red Velvet Cookie Bars. Firstly, they are incredibly easy to make, requiring only one bowl for mixing. This simplicity makes them perfect for busy parents or anyone who needs a quick yet impressive dessert. Additionally, the colorful appearance adds a festive touch to any occasion.
Moreover, the flavor is absolutely divine! The combination of cocoa and buttermilk gives these bars a distinctive taste that is both rich and slightly tangy. Topped with a luscious cream cheese frosting, they become a true indulgence that satisfies any sweet tooth. Finally, these bars are highly shareable; they are a great choice for potlucks, holiday parties, or school events because they transport well.
Ingredients You’ll Need
- 2 ½ cups all-purpose flour: This forms the base of the cookie bars. It provides structure and chewiness, making the bars satisfying to eat.
- 1 cup granulated sugar: This sweetener brings the necessary sugars for sweetness and caramelization when baked.
- ½ cup brown sugar: The molasses in brown sugar adds depth of flavor and moisture to the bars.
- 1 cup unsalted butter, softened: This ingredient ensures a rich buttery taste and tender texture.
- 2 large eggs: Eggs provide moisture and act as a binding agent for all ingredients, ensuring they hold together.
- 2 tablespoons red food dye: This ingredient gives the characteristic red color to the bars.
- 1 teaspoon vanilla extract: This enhances the overall flavor profile; vanilla always pairs beautifully with sweet desserts.
- 1 teaspoon baking powder: This leavener will help the bars rise slightly while baking, ensuring a nice texture.
- 1 teaspoon baking soda: This also aids in rising and contributes to the lightness of the bars.
- ½ teaspoon salt: Salt is essential as it balances the sweetness and enhances the flavors of the other ingredients.
- 8 ounces cream cheese, softened: For an indulgent frosting that complements the bars perfectly with its tangy creaminess.
- 4 cups powdered sugar: This sweetener is used for the frosting, giving it the delightful sweetness we expect in desserts.
- 2 tablespoons milk: This is needed to adjust the consistency of the cream cheese frosting to make it perfectly spreadable.

How to Make
- Start by preheating your oven to 350°F (175°C). Grease a 9×13-inch baking pan or line it with parchment paper for easy removal. This ensures your cookie bars do not stick, making them easier to cut and serve.
- In a large mixing bowl, cream together the softened butter, granulated sugar, and brown sugar until light and fluffy. This should take about 3-5 minutes. The creaming process incorporates air into the mixture, yielding a lighter texture for the bars.
- Add in the eggs, one at a time, mixing well after each addition. Then, mix in the vanilla extract and red food dye until fully combined. Be cautious with the food dye; you can add more if you desire a deeper color.
- In a separate bowl, whisk together the all-purpose flour, baking powder, baking soda, and salt. Gradually add the dry ingredients to the wet mixture, stirring until just combined. Overmixing can result in tough cookie bars, so mix until everything is barely incorporated.
- Once the batter is ready, pour it into the prepared baking pan and spread it evenly. Bake for 25-30 minutes until a toothpick inserted in the center comes out clean or with a few moist crumbs. Keep an eye on them to ensure they do not overbake, as they should remain soft and chewy.
- While the bars are baking, prepare the frosting. In a mixing bowl, combine the softened cream cheese and powdered sugar. Gradually add in the milk until you achieve a smooth and creamy frosting consistency. Adjust milk or sugar as needed for your desired consistency.
- Once the cookie bars are done baking, allow them to cool completely in the pan on a wire rack before adding the frosting. This will avoid melting the frosting into the bars. Once cooled, spread the cream cheese frosting evenly over the top.
- Cut the bars into squares and serve! Enjoy the delicious flavors and textures along with family and friends.
Variations & Substitutions
Chocolate Chip Red Velvet Cookie Bars: For a delightful twist, consider folding in 1 to 1 ½ cups of semi-sweet chocolate chips into the batter before spreading it into the pan. Chocolate and red velvet are a match made in heaven, providing a rich flavor contrast that many will love. The melty chocolate interior will add a decadent touch, delighting chocolate lovers.
Nutty Red Velvet Cookie Bars: If you enjoy nuts, try adding ½ to 1 cup of chopped pecans or walnuts into the batter. Nuts add a satisfying crunch and additional flavor. Make sure to toast them beforehand to enhance their nutty flavor, as this brings out their natural oils, adding depth to the cookie bars.
Gluten-Free Red Velvet Cookie Bars: For those with gluten sensitivities, swap the all-purpose flour with a gluten-free flour blend. Make sure to use a blend that is specifically designed for baking to achieve a similar texture and rise. Additionally, check that all other ingredients are certified gluten-free to avoid cross-contamination.
Common Mistakes to Avoid
When baking Red Velvet Cookie Bars, a common mistake is **overmixing** the dough. This can lead to tough bars instead of the desired chewy texture. Always mix the batter until just combined. Another issue is **not measuring ingredients properly**. Baking relies heavily on precise measurements, so ensure you’re using the correct measuring tools and techniques. It is also essential to **cool the bars completely** before frosting; otherwise, the frosting will melt and slide off rather than sitting beautifully on top.
Storage, Freezing & Reheating Tips
To store your red velvet cookie bars, place them in an airtight container at room temperature for up to 5 days. If you want to keep them longer, you can freeze them for up to 3 months. Make sure to wrap them tightly in plastic film and place them in a freezer-safe container. When ready to enjoy, simply thaw in the refrigerator overnight.
For reheating, place individual bars in the microwave for 10-15 seconds until warmed through. You can also enjoy them cold, which offers a different texture experience.
Frequently Asked Questions
Can I use a different type of frosting?
Absolutely! While cream cheese frosting complements red velvet flavors beautifully, you can also use classic buttercream or even whipped cream. If you prefer a lighter option, a simple sprinkle of powdered sugar can be an excellent way to finish them off, especially if you’re looking for a less sweet topping. Customize based on your taste preferences!
What can I do with leftover frosting?
Leftover cream cheese frosting can be stored in the refrigerator for up to one week. You can use it on other baked goods such as cupcakes or muffins, or even as a dip for fruits like strawberries or apple slices. It also makes a delicious filling for cakes or cookies, allowing you to create new treats from your leftovers.
How do I adjust the recipe for larger servings?
If you want to make a larger batch, you can easily double the recipe. Ensure you use a larger baking pan, or you can bake in two separate pans. Keep an eye on the baking time, as larger quantities may take a few extra minutes to cook through. You’ll know they’re done when a toothpick inserted in the center comes out clean.
Can I make these a day ahead of time?
Yes, Red Velvet Cookie Bars can be made a day in advance! In fact, like many desserts, their flavors tend to deepen after sitting for a day. Simply store them in an airtight container to keep them fresh, and frost them right before serving for the best taste and presentation.
Conclusion:
Red Velvet Cookie Bars are a spectacular dessert that combines the beloved flavors of red velvet cake into a chewy, bar-shaped treat. Whether you enjoy them plain or customize them with chocolate chips or nuts, they are sure to be a hit. Easy to make and capable of satisfying any sweet craving, follow this recipe and you’ll have a crowd-pleaser for any occasion. Happy baking!