Prep time: 20 minutes
Cook time: 25 minutes
Total time: 45 minutes
Servings: 16 bars
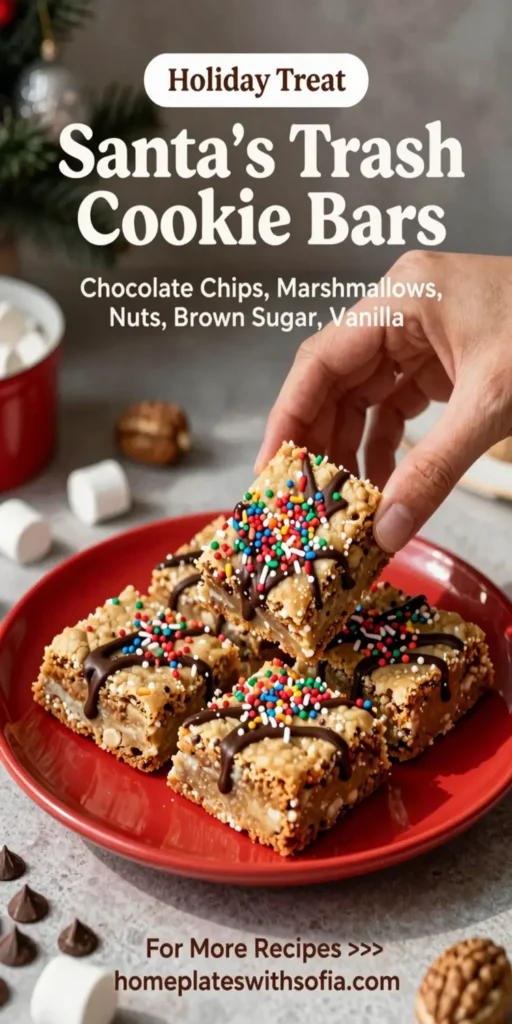
Santa’s Trash Cookie Bars are the perfect way to embrace the holiday spirit, combining a delightful array of flavors and textures. These cookie bars feature an assortment of delicious goodies, making them a festive treat that can please everyone at the holiday gathering or potluck. The chewy texture from the cookie base, combined with crunchy nuts and soft chocolate pieces, creates a truly satisfying dessert. Plus, the ease of preparing bars over traditional cookies makes them an excellent option for busy baking days.
What Is Santa’s Trash Cookie Bars?
Santa’s Trash Cookie Bars are a fun and festive dessert that combines various ingredients often referred to as “trash” for their random assortment. Typically made with a mix of chocolate, nuts, pretzels, and candy, these bars come together in a simple baking dish and are cut into squares after baking. The name reflects the playful, haphazard nature of the unique flavor combinations and textures within each bite.
Many families have their special variations on this recipe, using different candies, nuts, or dried fruits to suit personal preferences. The adaptability of the recipe makes it a festive staple during the holiday season, where everyone can contribute their favorite flavors.
Why You’ll Love This
You will love Santa’s Trash Cookie Bars because they are not only delicious but also incredibly easy to make—a great choice for busy parents or anyone who wants to indulge in some holiday baking without spending hours in the kitchen. The fun blend of ingredients allows everyone to enjoy their favorites, whether that’s chocolate chips, nuts, or candy. These bars also make great gifts for friends and family, wrapped in cellophane with a festive bow.
The versatility doesn’t end there; you can experiment with various combinations, making each batch a new adventure. The combination of textures—from chewy to crunchy—will have everyone coming back for seconds. Plus, these bars can be made ahead of time, allowing for more relaxation and less stress as the holidays approach.
Ingredients You’ll Need
- 1 cup unsalted butter, melted: Provides a rich, buttery base for the bars.
- 2 cups brown sugar: Adds sweetness and a moist texture.
- 2 large eggs: Binds the ingredients together and enhances richness.
- 1 teaspoon vanilla extract: Offers depth and enhances the overall flavor.
- 2 cups all-purpose flour: Forms the bar’s structure, giving it body.
- 1 teaspoon baking soda: Aids in leavening, ensuring a light cookie bar.
- 1/2 teaspoon salt: Balances the sweetness and enhances flavors.
- 1 cup chocolate chips: Adds melty chocolate goodness throughout the bars.
- 1 cup crushed pretzels: Introduces a salty crunch that complements the sweetness.
- 1/2 cup chopped nuts (walnuts or pecans): Adds a rich texture and nutty flavor.
- 1 cup assorted candies (like M&Ms or Skittles): Brings a pop of color and fun to the bars.
How to Make
- Preheat your oven to 350°F (175°C). Prepare a 9×13-inch baking dish by greasing it with butter or lining it with parchment paper. This will help the bars bake evenly and make removal easier.
- In a large mixing bowl, combine the melted butter and brown sugar until the mixture is smooth and well-combined. This is where the bars get their delicious flavor from, so be sure to mix thoroughly.
- Add the eggs, one at a time, mixing well after each addition. Then, stir in the vanilla extract. The mixture should look glossy and creamy after this step, indicating the eggs are thoroughly incorporated.
- In a separate bowl, mix together the flour, baking soda, and salt. Gradually add this dry mixture to the wet ingredients, stirring until just combined. Avoid overmixing, as that can lead to tough bars.
- Fold in the chocolate chips, crushed pretzels, chopped nuts, and assorted candies. This step is where you can be creative; the more you mix, the more unique your bars will be.
- Pour the batter into the prepared baking dish, spreading it evenly. Use a spatula to smooth the top, ensuring an even bake.
- Bake in the preheated oven for 20-25 minutes, or until the top is golden brown and a toothpick inserted into the center comes out clean. The edges will firm up slightly while the center remains chewy.
- Once baked, remove from the oven and let it cool in the pan for at least 10 minutes before transferring to a wire rack to cool completely. This will help set the bars for easier cutting.
- Once cool, cut into squares or rectangles and serve. These bars are perfect for sharing or indulging on your own!
Variations & Substitutions
Peanut Butter Twist: Incorporate 1 cup of peanut butter chips instead of chocolate chips for a luscious peanut butter flavor. You can also swirl in a couple of tablespoons of creamy peanut butter into the mix before baking for extra depth.
Fruit & Nut Delight: Substitute half of the candy with dried fruits like raisins or dried cranberries and add in chopped almonds or pecans. This variation gives an excellent chewy texture and adds a nutritious twist.
Gluten-Free Option: Replace all-purpose flour with a gluten-free flour blend to accommodate gluten-sensitive guests without compromising taste or texture. Ensure any add-ins are also gluten-free.
Vegan Version: Swap the butter for coconut oil, use flax eggs (1 tablespoon of ground flaxseed mixed with 2.5 tablespoons of water per egg) instead of the eggs, and replace chocolate chips with dairy-free varieties to create a vegan-friendly treat.
Common Mistakes to Avoid
Overmixing the Batter: Be cautious not to overmix after adding the flour. Overmixing can lead to dense bars rather than a soft, chewy texture, which we all love.
Not Allowing for Cooling: Patience is vital! Allow the bars to cool properly in the pan before cutting. Cutting too soon may result in crumbly pieces instead of neat squares.
Using Expired Ingredients: Always check the expiration dates on your baking powder and any other ingredients. Using expired products can disrupt the texture and rise of your cookie bars, turning your festive treat into a baking flop.
Storage, Freezing & Reheating Tips
For optimal freshness, store Santa’s Trash Cookie Bars in an airtight container at room temperature for up to one week. If you have leftovers, and we know you will, you can also freeze them for up to 3 months. Simply wrap each bar individually in plastic wrap and place them in a freezer-safe container or a zip-top bag.
When you’re ready to enjoy them after freezing, let them thaw in the refrigerator overnight. You can reheat them gently in the microwave for about 10-15 seconds for that fresh-out-of-the-oven experience or enjoy them cold straight from the fridge.
Frequently Asked Questions
Can I use different types of chocolate chips?* Absolutely! Whether you prefer dark chocolate, milk chocolate, or white chocolate, feel free to mix and match the types of chocolate chips you use. You can even use a combination for a more complex flavor profile.
What if I don’t like nuts?* If you or someone you’re serving has a nut allergy, simply omit the nuts altogether. You can substitute with additional chocolate chips or sprinkles to maintain the fun and festive feel.
How do I know when the bars are done baking?* The cookie bars are done when the edges are golden brown and a toothpick inserted in the center comes out clean or with a few moist crumbs. They will continue to cook slightly from residual heat after being removed from the oven.
Can I make this recipe ahead of time?* Yes! You can prepare the batter a day in advance and store it in the refrigerator, covered, until you’re ready to bake. Alternatively, baked bars can be stored, as previously mentioned, and will stay fresh for days.
What can I do with leftovers?* Leftover bars can be crumbled and used as a topping for ice cream or yogurt for a delightful twist on dessert. You can also pack them for lunches as a sweet treat for your daily routine.
Conclusion: Santa’s Trash Cookie Bars are undeniably a festive treat that ticks all the boxes — delicious, easy to make, and the perfect addition to any holiday gathering or cozy night in. Allow your creativity to shine with variations and enjoy this delightful dessert that appeals to everyone. Embrace the joy of baking and make this festive recipe a tradition in your home!