# Smashing Patty Melts with Signature Sauce – Juicy, Cheesy & Flavor-Packed!
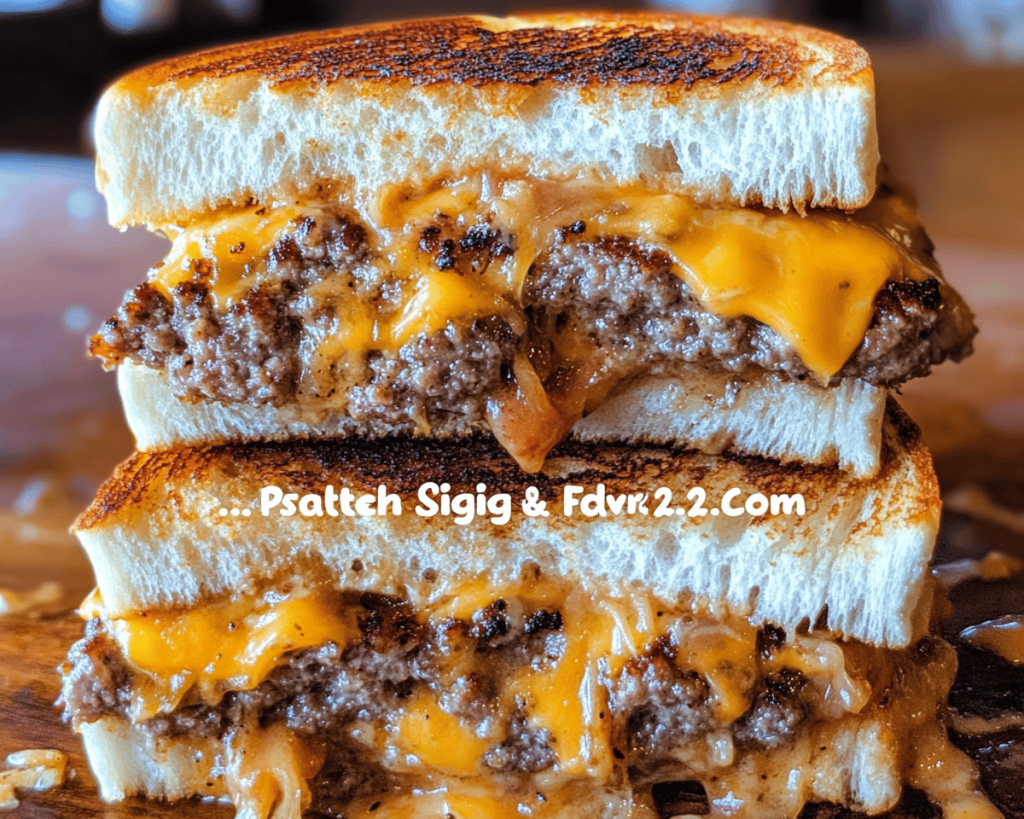
There’s nothing quite like sinking your teeth into a perfectly grilled **patty melt**. The crispy, buttery bread cradling a juicy patty, gooey cheese, and a tangy, delectable sauce is what dreams are made of! Picture yourself on a lazy Sunday afternoon, the scent of sizzling beef filling your kitchen, mixing with the buttery aroma of grilled bread. It evokes memories of diners where you could hear the grill sizzling while catching up with friends over plates piled high with mouthwatering food.
What’s exceptional about this recipe is the signature sauce that complements the patty melt flawlessly. It’s rich, creamy, and has just the right kick to elevate each bite. Whether you’re making this for a casual weeknight dinner or for a gathering with friends, these smashing patty melts are guaranteed to impress. They’re not just your ordinary sandwiches; they’re a celebration of flavors and textures that will keep everyone coming back for more.
What is a Patty Melt?
A **patty melt** is an iconic comfort food that combines a cheeseburger and a grilled cheese sandwich into an irresistible meal. The traditional patty melt features seasoned beef patties cooked to juicy perfection, topped with melted cheese (often Swiss or American), and placed between two slices of crispy, buttery bread that’s been griddled until golden brown. The contrast of textures — the crunchy exterior and the tender, juicy interior — makes it an absolute delight.
Flavor-wise, burger enthusiasts love patty melts for their savory umami from the beef, the luscious gooeyness of melted cheese, and the added depth from caramelized onions or a signature sauce. The combination of these key elements makes it a popular choice in diners and homes alike. But truthfully, what takes this patty melt to the next level is the **signature sauce** – a creamy, zesty addition that balances the richness of the melt with refreshing brightness.
Why You’ll Love This Smashing Patty Melts Recipe
– **Bursting with Flavor**: Every bite is packed with a juicy beef patty, melted cheese, and a creamy signature sauce that dances on your taste buds.
– **Quick and Easy**: Less than 30 minutes from prep to plate, making it perfect for busy weeknights or impromptu gatherings.
– **Comfort Food at Its Finest**: Warm, cheesy, and satisfying, this meal is sure to bring smiles and warm feelings to your dinner table.
– **Family-Friendly**: Kids and adults alike adore their deliciousness, making these patty melts an excellent choice for family meals or parties.
– **Versatile**: You can swap the beef for turkey, chicken, or veggie patties, allowing you to cater to everyone’s preference.
– **Make Ahead**: Prep the patties and sauce ahead of time, making it a snap to grill up these melts when hunger strikes.
– **Impressive Presentation**: The way they ooze cheese and sauce creates a mouthwatering visual that makes everyone want to dig in!
Ingredients You’ll Need
To get started on these smashing patty melts, gather the following ingredients:
– **1 lb ground beef (80/20 preferred)** – This blend guarantees juiciness and flavor for your patties. Opt for leaner beef if you prefer.
– **4 slices of Swiss cheese (or your favorite cheese)** – The melty goodness is essential; Swiss adds a classic touch, but cheddar or American works well, too.
– **4 slices of rye or sourdough bread** – A hearty bread that toasts well creates the ideal foundation for your melt; sourdough gives it a lovely tang.
– **1 medium onion, thinly sliced** – Caramelized onions add sweetness and richness.
– **2 tablespoons butter** – For grilling bread till golden and crunchy.
– **Salt and pepper** – Essential seasoning for the patties.
– **Chopped fresh parsley (optional)** – For garnish and a pop of color.
**For the Signature Sauce**
– **½ cup mayonnaise** – The creamy base for our sauce.
– **1 tablespoon Dijon mustard** – Adds a delightful tanginess.
– **1 tablespoon ketchup** – Sweetness balances the savory flavors.
– **1 teaspoon Worcestershire sauce** – A sneaky umami booster that takes it to the next level.
– **Salt and pepper to taste** – A simple seasoning to enhance flavors.
How to Make Smashing Patty Melts
Ready to create some culinary magic? Follow these simple steps:
1. **Prepare the Signature Sauce**:
– In a small bowl, mix together ½ cup of mayonnaise, 1 tablespoon of Dijon mustard, 1 tablespoon of ketchup, and 1 teaspoon of Worcestershire sauce. Stir until well blended, then season with salt and pepper to taste. Set aside and let the flavors mingle.
2. **Shape the Patties**:
– In a large bowl, season 1 pound of ground beef with a generous pinch of salt and pepper. Gently mix — overworking the meat can lead to tough patties! Shape into evenly sized patties (about ¾ inch thick). Ensure there’s a slight indentation in the center of each patty, preventing them from puffing while cooking.
3. **Caramelize the Onions**:
– Heat a skillet over medium heat. Add a drizzle of oil and toss in the thinly sliced onions. Stir occasionally for 10–15 minutes until they’re soft, golden, and slightly caramelized. Remove them from the skillet and set aside.
4. **Cook the Patties**:
– In the same skillet, add the beef patties over medium-high heat. Cook for around 3-4 minutes on one side, then flip and top each with a slice of Swiss cheese. Cook for another 3-4 minutes, or until they reach your desired doneness (145°F for medium). For added decadence, you can cover the skillet with a lid for the last minute, letting the cheese melt beautifully.
5. **Grill the Bread**:
– While the patties are finishing up, spread butter on one side of each slice of bread. Once the patties are done, set them aside. Wipe the skillet clean and place your buttered bread in the skillet, grilling it on medium heat until golden and crispy on one side (about 2-3 minutes). Flip and repeat on the other side.
6. **Assemble the Patty Melts**:
– On the non-buttered side of two slices of toasted bread, spread some of your prepared signature sauce. Add a beef patty topped with melted cheese and a generous scoop of caramelized onions. Top each with another slice of bread, buttered side up.
7. **Final Grill**:
– Return the sandwiches to the skillet and grill for another 3–4 minutes on each side until they’re crispy and golden brown. The cheese should be oozy, and the bread should be ultracrunchy.
8. **Serve and Enjoy**:
– Remove from the skillet, slice in half, and serve hot. Drizzle a bit more signature sauce on the side for dipping if desired.
Expert Tips, Tricks & Variations
– **Use fresh ground beef**: Ground beef that is freshly ground will be tastier and juicier than pre-packaged. Ask your butcher for some if possible.
– **Ultimate caramelization**: For the best caramelized onions, cook them slowly over low heat; patience is key! A pinch of sugar can enhance their sweetness too.
– **Swap the cheese**: Feel free to experiment with different types of cheese, like pepper jack for heat or smoked gouda for a unique flavor twist.
– **Add extras**: Toss in some sautéed bell peppers or mushrooms for added flavor and nutrition in your melt!
– **Batch cooking**: Make extra patties and cook them ahead of time; they reheat beautifully in a skillet for quick future meals.
What to Serve With Smashing Patty Melts
Pair your smashing patty melts with a few delightful sides to round out the meal:
– **Crispy French Fries**: Classic and irresistible, the perfect complement to your cheesy melt.
– **Sweet Potato Wedges**: For a slightly healthier option with a yummy sweetness.
– **Dill Pickles**: The tartness cuts through the richness of the melt beautifully.
– **Coleslaw**: A crunchy, tangy side salad adds freshness and crunch.
– **Potato Chips**: For the ultimate diner vibe, serve with a crunchy bag of chips for that satisfying contrast.
Storage, Freezing & Meal Prep
**Storage**: If you have any leftovers (though they are rare), store your patty melts in an airtight container in the refrigerator for up to 3 days.
**Freezing**: To freeze, you can wrap individual, cooked patty melts tightly in plastic wrap and place them in a freezer-safe bag. They’ll keep for up to 2 months. When ready to eat, defrost in the refrigerator overnight, then reheat in a skillet until heated through.
**Meal Prep**: Consider prepping the patties and signature sauce ahead of time. You can form the patties and store them in the refrigerator for up to 24 hours or freeze them for longer storage. This makes weeknight meals a breeze!
Frequently Asked Questions
**1. Can I use turkey or chicken instead of beef?**
Absolutely! Lean turkey or chicken patties can be delicious alternatives. Just be sure to watch the cooking time since they can dry out more easily than beef.
**2. What other cheese can I use for my patty melts?**
While Swiss is classic, feel free to mix it up! Cheddar, pepper jack, or even a creamy blue cheese can bring a delightful twist to your melts!
**3. Can I make the signature sauce ahead of time?**
Yes! You can prepare the signature sauce a day in advance and store it in an airtight container in the refrigerator. This allows the flavors to meld beautifully.
**4. Is there a vegetarian option for this recipe?**
Certainly! You can substitute the beef patty with a veggie burger or make a portobello mushroom cap for a hearty alternative that still delivers on flavor!
**5. How can I reheat leftover patty melts?**
For the best results, reheat in a skillet over medium heat for about 5-7 minutes, flipping halfway. This preserves the crispiness while ensuring the inside is warm.
Now it’s your turn — grab your ingredients and create this magic in your kitchen tonight! Whether it’s a quick weeknight meal or a special occasion, these smashing patty melts with signature sauce will surely become a staple in your home. Tag me when you try it; I can’t wait to see how yours turns out!