Prep time: 15 minutes
Cook time: 25 minutes
Total time: 40 minutes
Servings: 16 bars
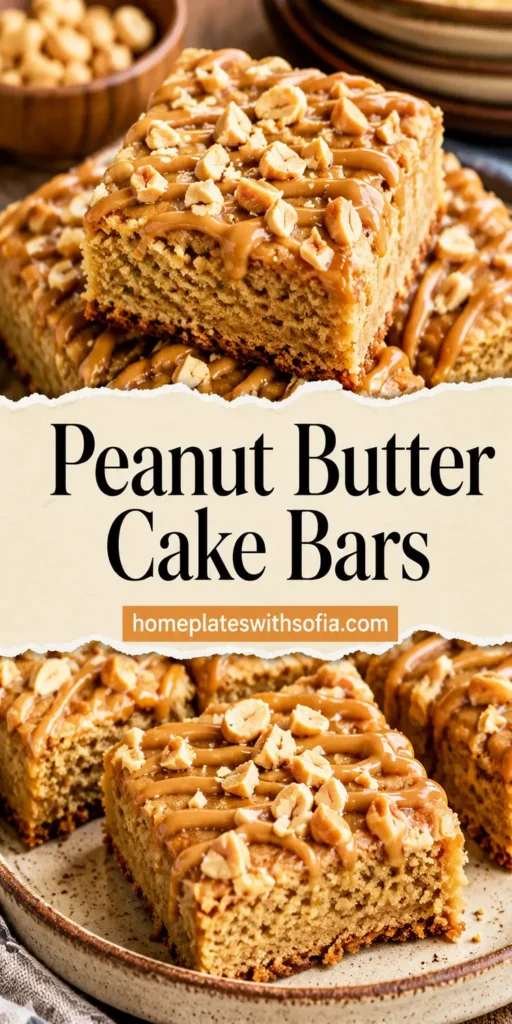
Soft Peanut Butter Cake Bars are not just a delightful addition to your lunchbox; they are a classic treat that turns snack time into pure joy. These cake bars are soft, chewy, and packed with the rich flavor of peanut butter, making them a favorite among children and adults alike. Perfect for busy parents looking for something both nutritious and satisfying, these bars are easy to make and ideal for meal prep too. Let’s dive into why these cake bars will be your new go-to recipe!
What Is Soft Peanut Butter Cake Bars for Lunchbox Treats?
Soft Peanut Butter Cake Bars are delightful, sliceable treats made primarily from peanut butter, flour, sugar, and eggs. Unlike traditional cookies, these bars embody a soft, moist texture that melts in your mouth. They are sweetened to perfection while allowing the natural peanut flavor to shine through. This versatility allows them to be enjoyed as a midday snack or even a dessert after dinner. The unique combination of ingredients offers a rich flavor while being simple enough for even the novice baker to conquer.
Why You’ll Love This
There are countless reasons to fall in love with Soft Peanut Butter Cake Bars. For one, they are incredibly easy to make, taking minimal time and effort, which is impressive for busy parents or kitchen beginners. The bars are also versatile, allowing for different mix-ins like chocolate chips or nuts, giving you the freedom to tailor them to your family’s taste preferences. Additionally, they are freezer-friendly; you can make a large batch and store them for those days when you need a quick treat on hand. Finally, this recipe uses common ingredients that are often already available in your pantry, making it budget-friendly for those mindful of grocery bills.
Ingredients You’ll Need
- 1 cup peanut butter: This is the star ingredient, providing the rich flavor and moisture that the bars need.
- 1 cup granulated sugar: Adds sweetness, balancing the savory taste of peanut butter.
- 2 large eggs: Acts as a binder to hold the bars together and provide structure.
- 1 cup all-purpose flour: The base of the bars, giving them the desired soft texture.
- 1 teaspoon baking powder: Helps the bars rise and become fluffy during baking.
- 1 teaspoon vanilla extract: Enhances the flavor of peanut butter and adds aroma.

How to Make
- Preheat your oven: Start by preheating your oven to 350°F (175°C) and greasing a 9×9 inch baking dish. This step is crucial to ensure that your bars bake evenly and do not stick to the pan. Alternatively, you can line the dish with parchment paper for easy removal later.
- Mix wet ingredients: In a large mixing bowl, combine the peanut butter, granulated sugar, and eggs. Use an electric mixer or whisk until the mixture is smooth and creamy. This step introduces air into the batter, contributing to the overall texture.
- Add dry ingredients: Gradually add the all-purpose flour and baking powder, using a spatula to fold the ingredients together gently. Avoid over-mixing, as this can lead to dense bars. The batter should be thick and sticky.
- Incorporate the vanilla: Pour in the vanilla extract and give the mixture one final fold to incorporate. This will enhance the flavor. You might notice a lovely aromatic scent as you blend in the vanilla.
- Transfer to baking dish: Pour the batter into the prepared baking dish and spread it evenly using a spatula. Make sure to smooth the top to achieve an attractive finish once baked.
- Bake: Place the dish in the preheated oven and bake for 25 minutes or until the edges are golden brown. Keep an eye on them towards the end of the baking time; you want the center to be just set and slightly soft. Remember, they will continue to cook as they cool.
Variations & Substitutions
Chocolate Chip Peanut Butter Bars: One of the most popular variations of these cake bars is adding chocolate chips. Simply fold in ½ cup of semi-sweet chocolate chips to the batter just before pouring it into the baking pan. The delightful contrast of rich peanut butter and chocolate makes for a heavenly treat!
Oatmeal Peanut Butter Bars: If you’re looking to add some heartiness to your bars, consider adding 1 cup of rolled oats to the mixture. This will give the bars a slightly chewy texture and increase their healthiness, making them more filling. You can also substitute half of the flour with whole wheat flour for added fiber.
Nut-Free Version: For those who are allergic to peanuts, you can easily swap the peanut butter for sun butter or almond butter. The flavor profile will change slightly, but you’ll still get that creamy texture.
Fruity Bars: For a fresh twist, try adding ½ cup of diced apples or overripe bananas to the batter. This not only imparts a delightful fruity flavor but also adds natural sweetness and moisture to the bars.
Common Mistakes to Avoid
One common mistake is **over-mixing the batter**. When the flour is added, mixing too vigorously can develop gluten, leading to tough bars instead of soft ones. Instead, gently fold in the flour until just combined.
Another pitfall is **baking for too long**. Each oven is different, so monitor your bars carefully. If they seem set but still jiggly in the middle, it’s time to take them out, as they will continue to firm up while cooling.
Lastly, not letting the bars **cool completely** before cutting can result in crumbling. Make sure to allow them to sit in the pan for at least 15-20 minutes before slicing into squares.
Storage, Freezing & Reheating Tips
To store your Soft Peanut Butter Cake Bars, place them in an airtight container at room temperature for up to a week. If you wish to keep them longer, consider freezing them. Cut the bars into squares and layer them with parchment paper in a freezer-safe bag. They will freeze well for up to 3 months.
When you’re ready to enjoy a bar, simply take it out and let it thaw at room temperature, or for a quick treat, microwave it for about 10-15 seconds for that fresh-from-the-oven taste! Always remember to check for any signs of freezer burn if they have been stored for an extended period.
Frequently Asked Questions
Can I use natural peanut butter instead of regular peanut butter?
Yes, you can use natural peanut butter, but it may result in a different texture. Natural peanut butter is typically runnier than regular, processed peanut butter, so you might need to adjust the quantity slightly. You might have to reduce the sugar as natural peanut butter can be less sweet.
Can I make these bars ahead of time?
Absolutely! These bars are perfect for meal prep. Simply bake them a few days in advance, and they will stay fresh in an airtight container for about a week. You can also freeze them to extend their shelf life and serve them whenever needed.
What can I substitute for eggs in this recipe?
If you prefer a vegan option or have an egg allergy, try using a flaxseed meal. To replace one egg, mix 1 tablespoon of flaxseed meal with 2.5 tablespoons of water, let it sit for a couple of minutes until it becomes gel-like, and mix it into your batter.
How can I make these bars healthier?
You can make several adjustments to enhance the healthiness of the bars. Consider reducing the sugar, using whole wheat flour, and adding ingredients like nuts or seeds for extra fiber and protein. You can further enhance the nutritional value by incorporating some chia seeds or adding a scoop of protein powder.
How do I know when the bars are done baking?
You’ll know the bars are done when the edges are lightly golden, and the center appears set but still soft. Inserting a toothpick in the center should come out with a few moist crumbs. Avoid overbaking, as they continue to firm up as they cool.
Conclusion: Soft Peanut Butter Cake Bars are more than just a treat; they encapsulate the warmth and love of homemade snacks. Whether for lunchboxes, after-school treats, or a cozy night in, their delightful flavor and texture make them irresistible. Grab your ingredients and start baking—your family will thank you!