Prep time: 30 minutes
Cook time: 25 minutes
Total time: 55 minutes
Servings: 12
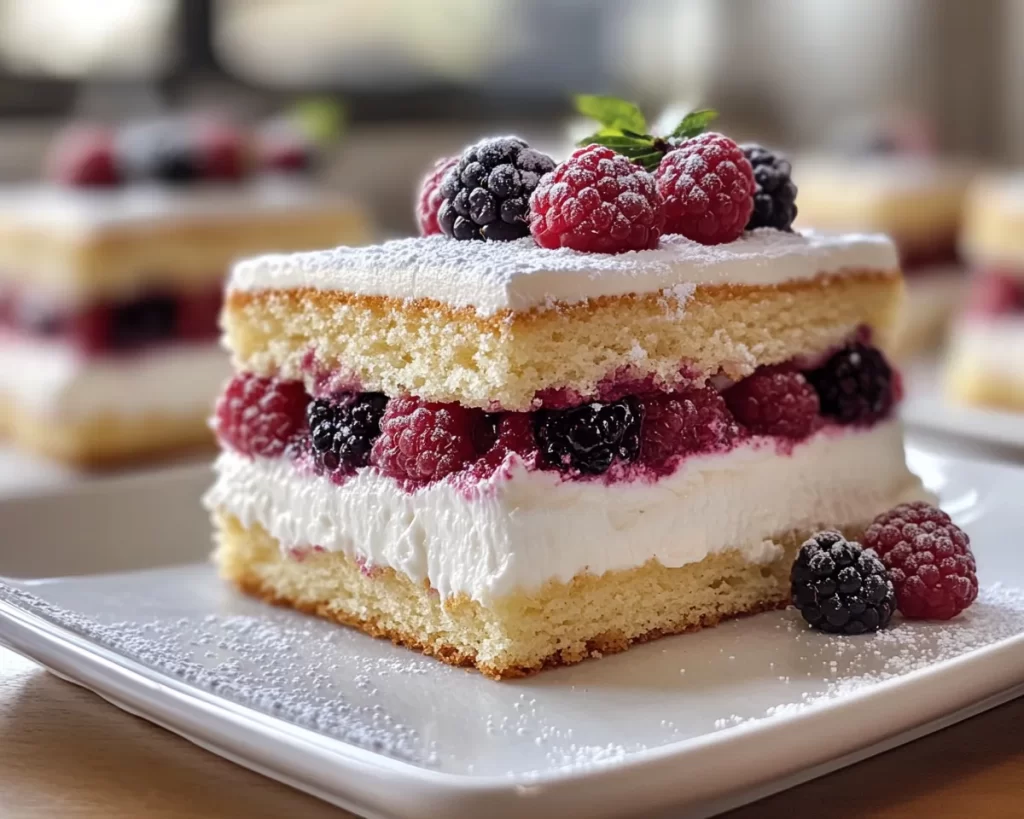
Spring is here, and with it comes the joy of baking light, colorful treats that celebrate the season! If you find yourself craving something delightfully sweet and visually stunning, look no further than these Mini Vanilla Berry Layer Cakes. Picture this: delicate layers of moist vanilla cake, complemented by fresh, vibrant berries, and creamy frosting—all presented in individual portions that make sharing (or not sharing) oh-so-easy! This recipe is not just about the taste; it’s about creating joyful moments with loved ones and adding a splash of color to your dessert table.
What makes these cakes special is their delightful combination of flavors and textures. The fluffy vanilla cake serves as the perfect base, while the fresh berries bring a burst of natural sweetness and acidity that balances the rich frosting. You’ll learn how to master the art of layering, ensuring every bite is a delightful experience. Plus, I’ve included tips and variations to make this recipe your own!
What Is Spring Baking: Mini Vanilla Berry Layer Cakes (Easy + Pretty)?
Mini Vanilla Berry Layer Cakes are charming desserts crafted with simplicity and elegance in mind. Originating from traditional layer cakes, these mini versions allow for individual servings that are perfect for gatherings, brunches, or even a simple afternoon tea. The cake’s soft, airy texture gives way to a light and fluffy mouthfeel, making every bite a gentle delight.
The flavor profile is undeniably appealing, with the vanilla cake providing a buttery backdrop that complements the fresh berries beautifully. You might find strawberries, blueberries, or raspberries in this recipe, each contributing their unique sweetness and tartness. The use of these berries not only enhances the visual appeal of the cake but also adds a health-conscious aspect, making these treats feel less indulgent and more refreshing. With every layered slice, you’re met with a delightful contrast in taste and texture, leaving you wanting more.
Moreover, this recipe is exceptionally versatile. Whether you’re celebrating a birthday, hosting a brunch, or simply baking for fun, these cakes can be tailored to suit various occasions. And the best part? They are surprisingly easy to make, even for beginner bakers. You’ll discover how simple techniques can yield stunning results that impress your family and friends.
Why You’ll Love This
There are many reasons you’ll fall in love with this Mini Vanilla Berry Layer Cakes recipe. First and foremost, the taste is phenomenal. The lightness of the cake, combined with the natural sweetness of the berries and the rich, creamy frosting creates a heavenly experience that simply shouts “spring!” Every bite is a celebration of flavors that will evoke happy memories and warm smiles.
Ease is another significant factor. Unlike many complex desserts that require specialized skills, this recipe is straightforward and manageable for cooks of all levels. It allows you to focus on the fun of baking rather than worrying about intricate techniques. Additionally, you can prepare the components in advance, making assembly a breeze when it’s time to serve.
Cost and health also come into play; with simple ingredients like flour, sugar, butter, and fresh berries, this recipe won’t break the bank. And since you’re using fresh fruit, you’re incorporating vitamins and antioxidants that add a touch of healthfulness to your cake. It’s an excellent way to indulge without feeling guilty!
Many novice bakers fear mistakes, but this recipe addresses common misconceptions. For instance, some might believe that layered cakes are only for seasoned chefs. This is where you will learn that even a slight discrepancy in layering can lead to eye-catching results, making every dessert a unique masterpiece.
Ingredients You’ll Need
- All-Purpose Flour: The base of your cake. It provides the necessary structure and texture. You can substitute it with a gluten-free blend if needed.
- Granulated Sugar: Essential for sweetness and moisture. You can use coconut sugar for a more natural option.
- Baking Powder: This leavening agent is crucial for texture. Ensure it’s fresh for the best rise.
- Salt: Enhances flavor and balances the sweetness. Never omit it!
- Unsalted Butter: Adds richness and moisture. Be sure to soften it at room temperature for easy mixing. If dairy-free, you can use coconut oil or a vegan butter substitute.
- Eggs: Provide structure and stability, while also adding moisture. For a vegan version, you could use flax eggs or applesauce.
- Vanilla Extract: The star flavor of the cake! Use high-quality pure vanilla extract for the best taste.
- Milk: Adds moisture and tenderness. You can opt for almond milk, soy milk, or any other non-dairy alternative to make it vegan.
- Fresh Berries: Choose a combination of your favorites such as strawberries, blueberries, and raspberries for decoration and flavor.
- Powdered Sugar: For the frosting, it provides a smooth texture and sweetness. You can use organic powdered sugar if preferred.
- Heavy Whipping Cream: Creates the perfect frosting that’s creamy and luscious. Non-dairy creamers can replace this in vegan versions.
Each ingredient plays a significant role in the overall flavor and texture of the Mini Vanilla Berry Layer Cakes, making it essential to understand their function in the recipe.
How to Make
1. **Preheat Your Oven:** Begin by preheating your oven to 350°F (175°C). This step is crucial because a properly preheated oven ensures that your cakes rise evenly and bake correctly. Prepare two 6-inch round cake pans by greasing them with butter or non-stick spray, and lightly dust them with flour. This extra step helps prevent sticking, making it easy to release your cakes once they’re baked.
2. **Mix Dry Ingredients:** In a medium bowl, whisk together the all-purpose flour, baking powder, and salt. This process not only combines the dry ingredients but also incorporates air, leading to a lighter cake texture. If you’re using a gluten-free flour blend, ensure it includes a leavening agent for similar results.
3. **Cream Butter and Sugar:** In a large mixing bowl, beat the softened unsalted butter and granulated sugar together until light and fluffy. This will take about 3-5 minutes with a hand or stand mixer. The mixture should appear pale in color and have a smooth, creamy texture. This step is vital because it ensures the proper incorporation of air into the batter for a perfect rise.
4. **Add Eggs and Vanilla:** Next, add the eggs, one at a time, mixing well after each addition until fully incorporated. Add the vanilla extract and continue to mix, allowing all the ingredients to combine fully. This is when your kitchen will start to smell amazing!
5. **Incorporate Dry Ingredients and Milk:** Gradually add the flour mixture to the butter and sugar mixture, alternating with the milk. Start and end with the flour—this helps achieve a smooth batter without overmixing. You want a thick but pourable batter that holds its shape. Make sure to scrape down the sides of the bowl to include all ingredients well.
6. **Divide and Bake:** Pour the batter evenly into the prepared cake pans. Use a spatula to smooth the tops. Bake in the preheated oven for 22-25 minutes, or until a toothpick inserted in the center comes out clean. The cakes should also spring back when lightly touched. Once baked, allow them to cool in the pans for about 10 minutes, then transfer to a wire rack to cool completely.
7. **Make the Frosting:** While the cakes cool, prepare the frosting by beating heavy whipping cream and powdered sugar in a mixing bowl until stiff peaks form. You can adjust the sugar based on your sweetness preference. Once your cakes are completely cooled, it’s time to assemble!
8. **Layer the Cakes:** Once cooled, carefully slice each cake in half horizontally. You’ll have four layers, which provides a stunning presentation. Place one layer on a serving plate and spread a layer of frosting on top. Add a layer of your chosen berries, pressing them gently into the frosting.
9. **Repeat the Process:** Continue the layering process with the remaining cake layers, frosting, and berries. You can do this for as many layers as you prefer, but be sure to finish with a layer of frosting topped with berries for a beautiful presentation.
10. **Chill and Serve:** Chill the assembled cake in the refrigerator for about 30 minutes to set the frosting. Once set, slice into individual servings, and enjoy your delightful Mini Vanilla Berry Layer Cakes!
Variations & Substitutions
Sugar-Free Alternative: If you are looking to cut back on sugar, try using a sugar substitute like erythritol or stevia. Opt for sugar-free whipped cream for the frosting. The texture remains delightful, and you’ll get to enjoy these cakes guilt-free! Just keep in mind that the flavor may slightly differ, so taste as you go to achieve the right balance.
Gluten-Free Version: For a gluten-free option, swap the all-purpose flour with a gluten-free flour blend. This tasteful alternative allows those with dietary restrictions to indulge in these delicious cakes. Be cautious of overmixing, as gluten-free batter can become gummy quickly.
Vegan Option: Making this recipe vegan is easier than you might think! Replace the eggs with flax eggs (1 tablespoon of flaxseed meal mixed with 2.5 tablespoons of water equals one egg) or unsweetened applesauce. Use non-dairy butter, almond milk, and a coconut-based whipping cream for the frosting. The result is just as decadent!
Flavor Enhancements: Want to amp up the flavor? Add lemon zest or almond extract to the cake batter for a refreshing twist. You can also experiment with different flavor extracts for your frosting, like coconut or hazelnut, for a unique touch.
Seasonal Berries: While this recipe calls for strawberries, blueberries, and raspberries, don’t limit yourself! Seasonal fruits like peaches, nectarines, or even citrus slices can work beautifully, changing up your flavor profile while making the cake visually appealing.
Common Mistakes to Avoid
One common issue novice bakers face is **overmixing** the batter. Doing so can lead to dense cakes rather than light and fluffy layers. When you combine the wet and dry ingredients, mix just until you no longer see flour; a few lumps are okay! Overmixing strengthens the gluten, resulting in a chewy texture.
Another common mistake is **not properly preparing the cake pans**. If you skip greasing and flouring the pans, your cakes may stick, making them hard to remove. Always take the time to prepare your pans correctly for a seamless baking experience.
**Oven temperature inaccuracies** can also be troublesome. An oven that’s too hot can cause cakes to burn on the outside while being undercooked inside. Invest in an oven thermometer if you’re unsure, and adjust your baking times based on your oven’s specific quirks.
Lastly, be cautious when **layering** your cakes. Ensure each layer is even and use a spatula or icing smoother to create visually appealing sides. If your layers are uneven, you might experience leaning or toppling—taking a little time to make sure everything is right will yield a stunning final product.
Storage, Freezing & Reheating Tips
To store leftover Mini Vanilla Berry Layer Cakes, place them in an airtight container in the refrigerator for up to 3 days. This will keep the cakes fresh while preventing the frosting from becoming overly soft. If you’re using berries as a topping, consider adding them just before serving to avoid them becoming mushy.
If you want to prepare the cakes ahead of time, you can freeze them. Wrap each layer in plastic wrap and place it in a freezer bag. They can be frozen for up to 3 months. To thaw, simply move them to the refrigerator the night before you plan to serve them. Reassemble with fresh frosting and berries, and you’re good to go!
Reheating isn’t necessary for this dessert; however, if you prefer a warm cake experience, gently warm individual slices in the microwave for a few seconds. This will activate the flavors and soften the frosting slightly.
Always adhere to food safety best practices to keep your desserts delicious and safe. When dealing with perishable items like whipped cream and fresh fruit, it’s best to consume or refrigerate them promptly after serving.
Frequently Asked Questions
Can I make the cake in advance?
Absolutely! The cake layers can be baked and stored in the fridge for up to three days or frozen for later use. Frosting and assembling the cakes should be done closer to the time you plan to serve to maintain the best texture and flavor of the whipped cream.
How can I make this recipe more dairy-free?
You can easily make this recipe dairy-free by substituting the butter with dairy-free margarine or coconut oil, using almond milk or oat milk instead of regular milk, and opting for a non-dairy cream for frosting. All these adjustments will still yield delicious results.
What other toppings can I use besides berries?
Feel free to get creative! Any seasonal fruit, such as peaches, kiwi, or even citrus slices can make delightful toppings on your cakes. You could also try shaved chocolate or edible flowers for a stunning visual twist.
How can I achieve an even layer for my cakes?
To create an even surface, use a serrated knife to level the tops of your cakes after they’ve cooled completely. This ensures that your layers sit flat when stacked, avoiding any potential leaning or toppling.
What if I don’t have 6-inch pans?
If 6-inch pans are unavailable, you can use 8-inch pans, but keep in mind that the cakes will be slightly thinner. Adjust the baking time as needed, checking for doneness with a toothpick inserted into the center.
Conclusion:
These Mini Vanilla Berry Layer Cakes are a delightful way to welcome spring at your table! Their light texture, vibrant colors, and mouthwatering flavors will surely impress everyone who takes a bite. Don’t hesitate to try out your spin on the recipe, customize it with your favorite flavors, and perhaps even share it with loved ones. Baking is all about joy, and this recipe allows you to spread that joy easily. Get ready to whip up something special that not only tastes fantastic but also nourishes the spirit of togetherness. Happy baking!