Prep time: 30 minutes
Cook time: 45 minutes
Total time: 1 hour 15 minutes
Servings: 12
Spring Birthday Cake Aesthetic: 7 Tips for a Stunning Dessert
Spring is a magical time, often associated with new beginnings, vibrant flowers, and celebrations. A birthday cake that embodies these seasonal qualities can be the perfect centerpiece for any spring birthday party. Whether it’s for a loved one or a treat for yourself, this cake will impress both in flavor and aesthetic. With a few thoughtful touches, you can create a stunning dessert that not only tastes delicious but also looks amazing. Let’s dive into the art of making a fabulous spring birthday cake and explore some fabulous tips!
What Is Spring Birthday Cake Aesthetic: 7 Tips for a Stunning Dessert?
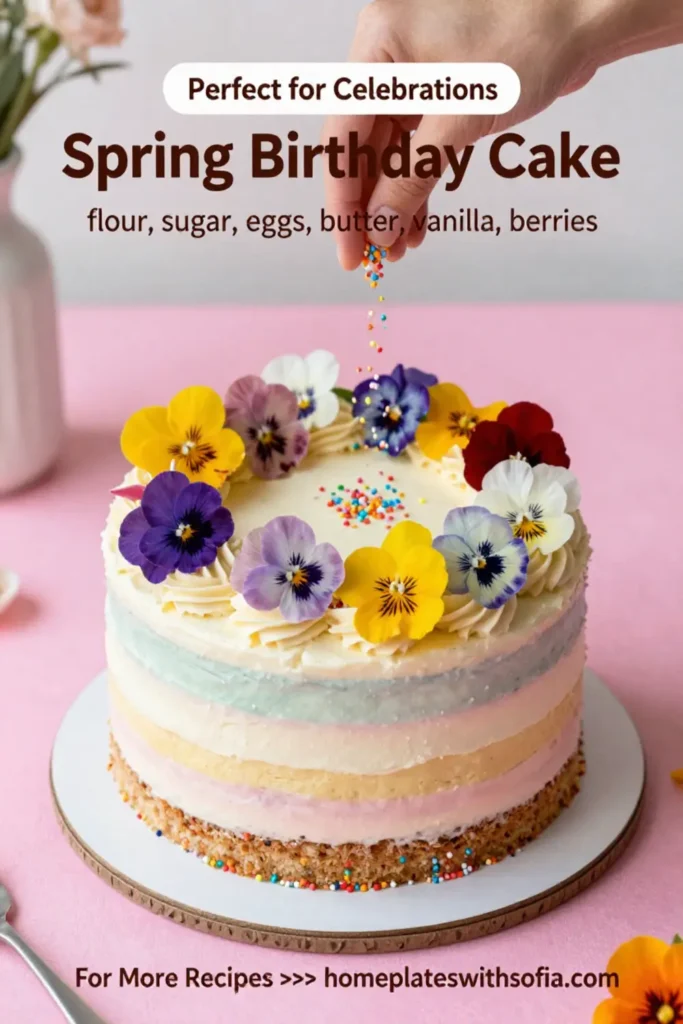
The Spring Birthday Cake Aesthetic is all about bringing the beauty and freshness of the season into a celebratory dessert. This cake typically features light flavors, bright colors, and an overall elegant presentation that evokes the essence of spring. Think floral motifs, fruity flavors, and delicate textures that speak to the rejuvenating qualities of the season. By employing clever techniques and choices in ingredients, you can elevate any birthday celebration and make it truly memorable.
Why You’ll Love This
This cake is not only visually stunning but also incredibly versatile. The balance between sweet and tangy flavors, coupled with a light and airy texture, ensures that it appeals to varied palates. Moreover, the use of seasonal ingredients means you can incorporate local flavors and make use of fresh produce. It’s an ideal choice for busy parents looking to create a special dessert without hours spent in the kitchen. The techniques we’ll cover will help even kitchen beginners successfully create a beautiful cake.
Ingredients You’ll Need
- 2 cups of all-purpose flour: This will form the base of your cake and provide structure.
- 1 ½ cups of granulated sugar: This sweetens the cake, creating a delightful balance with the other flavors.
- ½ cup of unsalted butter: Adds richness and moisture, contributing to a tender crumb.
- 1 cup of buttermilk: Infuses a subtle tang and helps create a fluffy texture.
- 3 large eggs: Essential for binding and adding moisture.
- 2 teaspoons of vanilla extract: Enhances the overall flavor profile.
- 2 teaspoons of baking powder: Helps the cake rise effectively.
- 1 teaspoon of baking soda: Aids in leavening and gives the cake a nice lift.
- ½ teaspoon of salt: Balances the sweetness and enhances overall flavors.
- Fresh berries (for topping): Adds a vibrant, fresh flavor and gorgeous color.
- Edible flowers (like pansies or violets): These not only look stunning but also add a delicate flavor.
- Whipped cream (for frosting): Light and airy, it perfectly complements the cake’s flavors.
How to Make
- Preheat your oven to 350°F (175°C). Greasing and lining two 9-inch round cake pans with parchment paper ensures that your cakes release effortlessly after baking.
- In a medium bowl, whisk together the all-purpose flour, baking powder, baking soda, and salt. This step helps to evenly distribute the leavening agents and prevent lumps.
- In a larger mixing bowl, beat the unsalted butter and granulated sugar together until the mixture is light and fluffy, which typically takes about 3-4 minutes. This process is critical for creating a cake with an airy texture.
- Add the eggs, one at a time, in the butter-sugar mixture. Be sure to mix well after each addition, and then add the vanilla extract, ensuring that every drop is incorporated.
- Gradually mix in the flour mixture, alternating with the buttermilk. Start and end with the flour mixture, mixing until just combined. Be careful not to over-mix; this can lead to a dense cake.
- Pour the batter evenly into the prepared cake pans. Tap the pans lightly on the counter to remove any air bubbles. Bake for 25-30 minutes, or until a toothpick inserted into the center comes out clean.
- Allow the cakes to cool in the pans for about 10 minutes before transferring them to a wire rack to cool completely. Proper cooling is essential for frosting the cake without melting the whipped cream.
Variations & Substitutions
Fruit-Infused Cake: Swap the buttermilk for a fruit juice like orange or lemon juice to add a zesty twist. Incorporating fruit purees directly into the batter can also enhance flavor while keeping the cake moist.
Gluten-Free Version: If a gluten-free option is preferred, replace all-purpose flour with a 1:1 gluten-free flour blend. Ensure that all other ingredients are also gluten-free, especially if they have any hidden gluten.
Vegan Alternative: For a vegan cake, substitute eggs with flaxseed meal or applesauce, and use a dairy-free butter alternative along with almond or oat milk instead of buttermilk.
Different Frosting: Instead of whipped cream, consider a light cream cheese frosting or a lemon buttercream for a tangy alternative that still complements the flavors beautifully.
Common Mistakes to Avoid
One common mistake many home bakers make is **overmixing the batter**, which leads to a tough cake. When incorporating your dry ingredients, mix just until they are combined. Another pitfall is using cold ingredients directly from the fridge. Instead, allow your butter, eggs, and buttermilk to come to room temperature for better emulsification. It’s also vital to **not skip the cooling step**; frosting a still-warm cake can lead to melting and messiness.
Storage, Freezing & Reheating Tips
To store your cake, cover it with plastic wrap or an airtight container at room temperature for up to three days. If you need to keep it longer, consider freezing the layers separately. Wrap each cooled cake layer tightly in plastic wrap and foil and store them in the freezer for up to three months. When you’re ready to enjoy it, let the cake layers thaw in the refrigerator overnight before decorating or serving. If reheating a slice, use a microwave for about 10-15 seconds just to warm it slightly without compromising the texture.
Frequently Asked Questions
Can I make this cake ahead of time?
Absolutely! Baking the cake layers a day in advance is a great idea. Just ensure they are wrapped properly to maintain moisture. This can also relieve the stress of last-minute baking on the day of your celebration.
What can I use instead of butter?
If you’d like to reduce the dairy, coconut oil or vegan butter works wonderfully as an alternative. It may introduce a slight coconut flavor, which can be delightful with the spring theme.
How can I prevent my cake layers from doming?
To ensure even baking, check your oven temperature periodically. An oven thermometer can help verify that your oven is accurately heated. Additionally, using cake strips can keep the edges from cooking too quickly, allowing for a more level top.
What flavors pair well with a spring cake?
Citrus flavors like lemon and orange, floral notes such as lavender or elderflower, and fresh fruits like strawberries and raspberries are all excellent complements. Adding a hint of almond extract is also a lovely touch.
Can I decorate this cake the day before an event?
While it’s possible to decorate the cake ahead of time, waiting until the day of serving can keep the frosting and decorations looking fresh and vibrant, especially if using delicate edible flowers.
Conclusion:
Creating a Spring Birthday Cake that dazzles is easier than you might think. By understanding key techniques and making thoughtful ingredient choices, you can whip up a stunning dessert that highlights the beauty of spring. Whether for a birthday celebration or a casual gathering, this cake will surely shine. Enjoy the process and don’t forget to have fun while making lasting memories around the table!


