Prep time: 30 minutes
Cook time: 25 minutes
Total time: 55 minutes
Servings: 8-10
Indulging in a beautifully decorated cake is one of life’s simple pleasures. Picture this: a vibrant, pastel sprinkle cake that not only captures the essence of spring but also delights your taste buds with its soft texture and delightful flavors. This Spring Cake Designs: Pastel Sprinkle Cake Design is the perfect centerpiece for any gathering, be it a birthday party, a spring gathering, or just a treat for yourself and your family.
You will discover not just how to bake this exceptional cake but also how to make your own interpretation to suit your personal tastes, dietary preferences, or occasion. You’ll learn about the rich flavors when combined with a luscious frosting and a sprinkle of joy on top. So, grab your apron; it’s time to get baking!
What Is Spring Cake Designs: Pastel Sprinkle Cake Design?
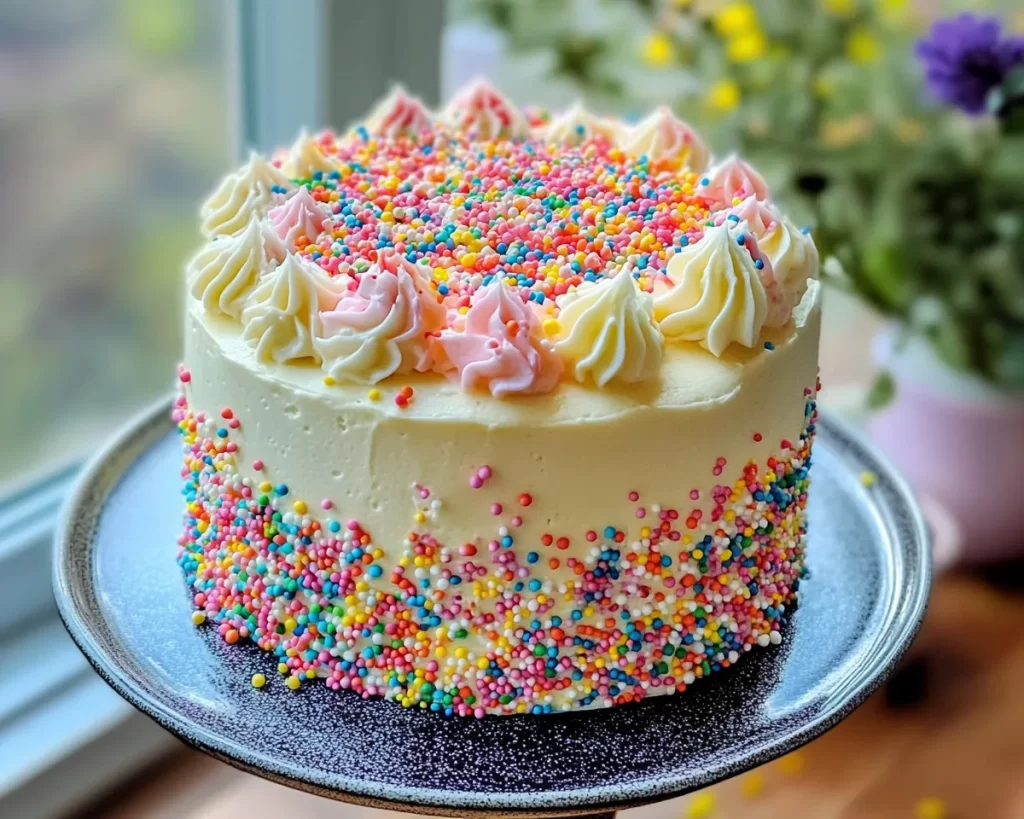
Spring Cake Designs: Pastel Sprinkle Cake Design is a visual and gastronomical celebration of the season. The cake typically features three layers of soft, fluffy vanilla sponge, each adorned with a dramatic swirl of pastel-colored frosting and a generous sprinkle of colorful nonpareils.
Originating from the love for seasonal celebrations, this cake captures the aura of spring—fresh, lively, and vibrant. The texture is light and airy, making it a perfect treat as the weather warms up. The flavor is a delightful blend of sweet vanilla with creamy buttercream that melts in your mouth, balanced by the slight crunch of the sprinkles. This cake is not just a feast for the eyes but a heartfelt indulgence that brings joy to any occasion.
Making a cake like this involves applying various baking techniques. From creaming butter and sugar to ensuring the right folding technique for incorporating dry ingredients, the process is both enjoyable and rewarding. With patience and practice, anyone can achieve a beautiful result.
Why You’ll Love This
There are countless reasons to love the Spring Cake Designs: Pastel Sprinkle Cake Design. First and foremost, its light and fluffy texture paired with the sweetness of the frosting is captivating. It’s the perfect way to say goodbye to winter and welcome the warmth of spring with open arms.
Additionally, this cake is remarkably versatile. You can alter the frosting colors to match any theme or occasion, whether it’s a birthday, anniversary, or even an engagement celebration. Despite its extravagant appearance, the cake is cost-effective; the ingredients are commonly found in any kitchen and the techniques are beginner-friendly.
One common misconception is that baking a layer cake is a complicated endeavor meant only for professional bakers. In reality, with the right guidance and some simple tips, anyone can master it. As you follow along with the recipe, remember that practice makes perfect, and even small imperfections can be charming.
Ingredients You’ll Need
- 2 ½ cups all-purpose flour: This will provide structure to your cake. If you’re looking for gluten-free options, substitute with a gluten-free blend.
- 2 ½ teaspoons baking powder: Essential for making your cake rise. Always check the expiration date to ensure effectiveness.
- ½ teaspoon salt: Enhances the flavors in the cake.
- 1 cup unsalted butter, softened: Provides creaminess and moisture. If you need a dairy-free option, consider using coconut oil.
- 2 cups granulated sugar: Sweetens the cake. You can replace it with coconut sugar for a healthier alternative.
- 4 large eggs: The proteins in eggs help bind the ingredients together. For a vegan alternative, consider using aquafaba or flax eggs.
- 2 teaspoons vanilla extract: Adds depth of flavor and aroma. Pure vanilla extract is preferred for the best taste.
- 1 cup milk: Provides moisture. Almond, soy, or oat milk can be used for dairy-free options.
- 2 cups pastel-colored sprinkles: These are for decoration and add that festive touch.
- 3 cups buttercream frosting: Flavored as you prefer—vanilla, chocolate, or even fruit-infused!
Each ingredient plays a crucial role in achieving the perfect cake. When you take the time to understand what each component does, you empower yourself to make better substitutions and adjustments.
How to Make
- Preheat your oven to 350°F (175°C). This is a critical step because baking demands precise temperature control. Use an oven thermometer to ensure accurate readings. Prepare three 8-inch round cake pans by greasing them well with butter or oil and lining them with parchment paper. This ensures the cakes won’t stick.
- In a mixing bowl, whisk together the all-purpose flour, baking powder, and salt. This step is vital in ensuring that the leavening agents are evenly distributed throughout the flour, leading to a uniform rise in your cake. Set this mixture aside while you prepare the wet ingredients.
- In another bowl, cream together the softened butter and granulated sugar. Use an electric mixer on medium speed until the mixture becomes light and fluffy, which typically takes about 3-5 minutes. This step incorporates air into the mixture, making your cake rise beautifully. Make sure to scrape down the sides of the bowl to incorporate all ingredients.
- Add the eggs, one at a time, mixing well after each addition. Then, stir in the vanilla extract. The mixture should take on a creamy consistency, with each egg enriching the batter. Always mix thoroughly after each addition to ensure maximum blending.
- Gradually add the flour mixture to the butter mixture, alternating with the milk. Start and end with the flour mixture. This prevents the batter from curdling and ultimately results in a smoother batter. Mix gently until just combined; over-mixing can lead to a dense cake.
- Divide the batter evenly among the three prepared pans. Use a spatula to smooth the tops. If you want a sparkling finish, you can lightly tap the pans to release any air bubbles. Then, place the pans in the preheated oven and bake for 25 to 30 minutes, or until a toothpick inserted into the center comes out clean.
- Allow the cakes to cool in the pans for about 10 minutes. Then transfer them to wire racks to cool completely. Cooling the cakes properly prevents them from becoming gummy. As they cool, they will also continue to firm up, ensuring that you have a stable base for frosting.
- Once cooled, layer the cakes with buttercream frosting. Start with one layer, add a generous amount of frosting, and repeat until all layers are stacked. Finally, cover the entire cake with a smooth layer of frosting. Use a spatula or a bench scraper to create a polished finish, and don’t forget to let it be thick and enticing!
- Add the pastel sprinkles on the top and sides of the cake. Make sure to apply sprinkles generously to create that festive look. It’s fun to let the sprinkles fall slightly down the sides for a playful effect. Finally, place the completed cake in the refrigerator for about 30 minutes to set the frosting.
This process includes some small but essential techniques that lead to the creation of an impressive cake, and you can feel proud of your accomplishment!
Variations & Substitutions
Chocolate Variation: If you’re a chocolate lover, you can easily adapt this recipe to create a chocolate sprinkle cake. For this variation, substitute half of the all-purpose flour with unsweetened cocoa powder. This will result in a rich, chocolate-flavored cake that remains light and fluffy. Pair it with a chocolate buttercream for an even more indulgent dessert.
Gluten-Free Version: To make a gluten-free cake, use a certified gluten-free all-purpose flour blend. Ensure that all additional ingredients are also gluten-free, particularly baking powder. This version retains the same light texture and flavor as the original and is perfect for those with dietary restrictions.
Fruit-Infused Flavor: Adding a fruit flavor can brighten the cake even further. Consider incorporating lemon or orange zest to the batter or using fruit puree in place of some of the milk. To complement this, use a fruit-flavored buttercream frosting, which will enhance the overall taste experience.
Vegan Variation: Vegan adaptations can be made by substituting eggs with flax eggs (1 tablespoon flaxseed meal mixed with 2.5 tablespoons water equals one egg) and using dairy-free milk and butter alternatives. Use vegan sprinkles to ensure all ingredients fit this dietary need while allowing everyone to enjoy the cake.
Mini Cake Alteration: For those short on time or needing individual servings, you can create mini cakes or cupcakes instead. Use a muffin pan instead of cake pans and adjust the baking time to about 15-20 minutes. This bite-sized version is great for parties or when having guests as it’s easier to serve and enjoy!
Each of these variations customizes the cake to fit different occasions, tastes, and dietary requirements, ensuring that there’s a perfect version for everyone.
Common Mistakes to Avoid
A few pitfalls can lead to less-than-perfect results with this recipe. First, one of the most significant mistakes is under-mixing or over-mixing the batter. To avoid this, mix until you no longer see dry flour but do not mix beyond that point as it can lead to a dense cake.
Another critical factor is the importance of the temperature of ingredients. Using cold eggs or butter can affect the batter’s consistency and the cake’s rise. Always ensure that the butter is room temperature and eggs are also at room temperature for the best results.
Finally, when layering the frosting, don’t skip the step of leveling your cakes. Uneven layers can lead to a lopsided cake, so use a knife or cake leveler to ensure they are flat before stacking. This attention to detail can make a significant difference in the overall presentation of your cake.
Storage, Freezing & Reheating Tips
Storing the Spring Cake Designs: Pastel Sprinkle Cake Design is straightforward. If you have any leftovers, keep the cake in an airtight container at room temperature for up to a few days. If you know you won’t finish the cake in a few days, it’s best to freeze slices individually. Wrap each slice tightly in plastic wrap and then foil to prevent freezer burn.
When freezing an un-frosted cake, wrap it in the same way and place it in a container. Ensure it’s well-sealed to retain its moisture. When ready to eat, allow the frozen slices to thaw in the refrigerator overnight before enjoying.
For reheating purposes, if you prefer it warm, place a slice in the microwave for about 10-15 seconds. Ensure to cover the slice to avoid drying it out. Always check the cake to ensure it’s heated just right!
Frequently Asked Questions
How do I know when my cake is done baking?
It’s critical not to open the oven door too soon, as this may cause your cake to sink. A good rule of thumb is to start checking at the minimum baking time by inserting a toothpick into the center. If it comes out clean or with a few crumbs attached, your cake is ready.
Can I use different flavors of frosting?
Absolutely! While this recipe highlights a classic buttercream frosting, feel free to experiment with cream cheese frosting, whipped cream, or flavored ganache. Each option adds a unique twist that can enhance the overall flavor profile of the cake.
Can I make this cake ahead of time?
Yes, the cake can be baked a day or two in advance. Just make sure to wrap it well and store it in an airtight container. Frost the cake closer to serving time to ensure the frosting remains fresh and vibrant.
What type of sprinkles work best for this cake?
Nonpareils work wonderfully for this cake, but you can use jimmies, confetti sprinkles, or even edible glitter to give it a little shine. Just make sure that whatever you choose complements the cake’s overall theme and flavor.
Is it possible to make this cake dairy-free?
Yes! To make it dairy-free, substitute the milk with almond milk or oat milk and the butter with a dairy-free alternative like coconut oil or a vegan butter blend. Ensure that your frosting is also dairy-free to maintain dietary consistency.
Conclusion:
This Spring Cake Designs: Pastel Sprinkle Cake Design is more than just a recipe; it’s an experience filled with joy, flavor, and creativity. The delightful contrasts of textures and flavors make every bite a sweet escape into the season. I encourage you to uniquely customize this cake to your tastes and occasions, whether you go for chocolate, fruit-infused, or even fully vegan options.
Don’t hesitate to share your creations with friends and family; they will surely appreciate your efforts in brightening their day with this gorgeous cake! Happy baking!


