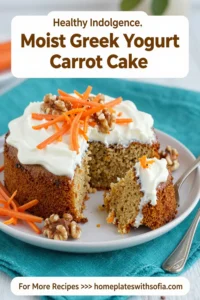
Prep time: 30 minutes
Cook time: 45 minutes
Total time: 1 hour 15 minutes
Servings: 8 servings
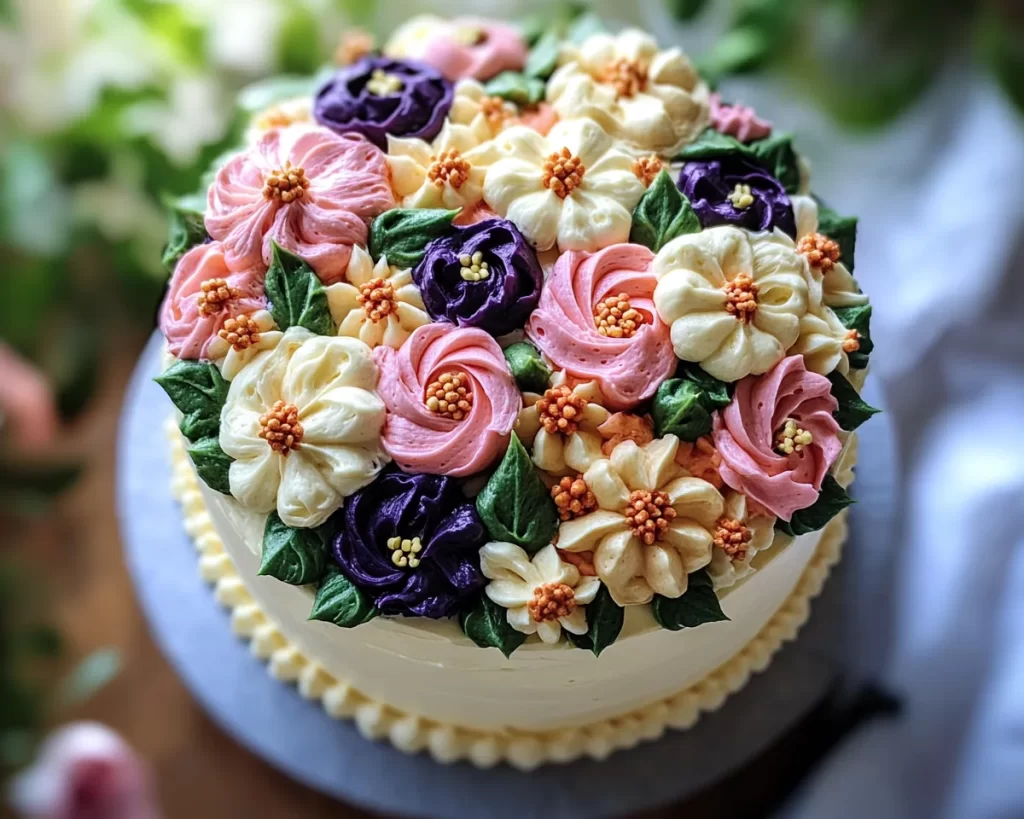
The beauty of a cake adorned with lovely buttercream flowers is truly a sight to behold. This Spring Cake Designs: Simple Buttercream Flowers Cake brings both aesthetics and flavor together in a union that pleases both the eyes and the palate. There’s something uniquely satisfying about crafting your own decorations, transforming a simple dessert into a gorgeously customized centerpiece for any occasion. In this guide, you’re going to learn not just how to create this stunning cake, but also the intricacies involved in mastering buttercream flowers. Whether you are a busy parent looking to impress at your child’s birthday or a beginner eager to explore cake decorating, this recipe is meant for you.
As you read along, we’ll explore the charm of this cake, from its delightful flavors to the easy steps involved in making it. By the time you finish, you’ll be equipped with knowledge about tips, variations, and even answers to your burning questions.
What Is Spring Cake Designs: Simple Buttercream Flowers Cake?
The Spring Cake Designs: Simple Buttercream Flowers Cake is a delightful twist on the traditional cake, primarily featuring buttercream as both a frosting and an art medium. Traditionally, cakes have been a symbol of celebration, from birthdays to weddings. This specific cake design embodies the essence of spring, characterized by bright colors and floral patterns that evoke the beauty of nature during this vibrant season. The cake itself is fluffy, moist, and implores a sweet flavor profile that rounds off with a hint of vanilla, enriched by the smoothness of buttercream frosting.
One of the most appealing traits of this cake is its versatility. The buttercream flowers can be customized in a myriad of ways, allowing you to incorporate different colors that complement the theme of your gathering. Imagine a soft pink peony or perhaps bright yellow daisies; the choices are only limited by your imagination. Furthermore, creating buttercream decorations presents a wonderful opportunity for creative expression, making cake decorating not just a task but a joyous art form.
Additionally, the cake’s texture plays a significant role in enhancing your eating experience. With each bite, the light, airy structure of the sponge pairs beautifully with the rich, velvety buttercream frosting, culminating in a symphony of flavors and textures. This harmonious blend is what makes the Spring Cake Designs: Simple Buttercream Flowers Cake a standout in any dessert lineup.
Why You’ll Love This
There are countless reasons why the Spring Cake Designs: Simple Buttercream Flowers Cake will become a favorite in your baking repertoire. First and foremost, the taste is unparalleled; the buttery richness of the frosting combined with the light flavor of the cake creates an indulgent experience that is hard to resist. But what might enchant you even more is the ease with which you can master this recipe. Unlike many elaborate cake designs that require years of practice, this buttercream flower technique is approachable, allowing even novice bakers to achieve stunning results.
When it comes to cost, making this cake at home is much more economical than purchasing a professionally decorated cake from a bakery. You’ll be saving money while also crafting a dessert that is both beautifully personal and delicious. Additionally, customizing the flavor and design allows for a cake that can easily cater to various dietary preferences—whether you wish to make it gluten-free or vegan, this cake can adapt to meet different needs.
One common misconception is that home bakers need to invest in expensive tools to create desserts that wow. While having certain tools can make the process easier, many of the essentials can be found in your kitchen already. Even basic piping bags can help you create breath-taking decorations. By understanding the cake’s components and the process, you’ll be well-equipped to debunk this myth while enjoying many successful baking adventures.
Ingredients You’ll Need
To create this alluring cake, gather the following ingredients:
- For the cake:
- 2 cups all-purpose flour
- 1 ½ cups granulated sugar
- 1 cup unsalted butter, softened
- 4 large eggs
- 1 cup whole milk
- 2 tsp baking powder
- 1 tsp vanilla extract
- ½ tsp salt
- For the buttercream frosting:
- 1 cup unsalted butter, softened
- 4 cups powdered sugar
- 3-4 tbsp heavy cream
- 2 tsp vanilla extract
- Food coloring (optional)
Each ingredient plays its unique role in achieving a flawless outcome. The all-purpose flour provides the necessary structure, while butter not only enriches the cake but also aids in moisture retention. The granulated sugar plays a crucial role in balancing flavors, contributing to both taste and texture. Using whole milk ensures that your cake remains moist, while the baking powder acts as a leavening agent, giving rise to a light and fluffy crumb.
When it comes to making the buttercream, the unsalted butter is key for a rich flavor. The powdered sugar adds sweetness and thickness, resulting in a smooth frosting that’s easy to work with. You can adjust the consistency with heavy cream as needed, making it either thicker for piped designs or slightly thinner if you prefer spreading. Adding a hint of vanilla extract infuses the frosting with warmth; color can be introduced to your frosting with careful drops of food coloring, creating a mesmerizing floral effect.
How to Make
Now that you have a clear understanding of the ingredients, let’s go through the step-by-step process to make the cake and create beautiful buttercream flowers.
- Preheat the oven: Start by preheating your oven to 350°F (175°C). This will ensure that your cake bakes evenly. While the oven is heating, prepare your cake pans by greasing them with butter or a non-stick spray, then line the bottoms with parchment paper for easy removal later.
- Mix the dry ingredients: In a medium bowl, combine 2 cups of all-purpose flour, 2 tsp of baking powder, and ½ tsp of salt. Whisk together thoroughly until evenly mixed. This step is crucial, as it helps to distribute the leavening agent evenly throughout the flour, ensuring a consistently risen cake.
- Creame butter and sugar: In a large bowl, cream together 1 cup of softened unsalted butter and 1 ½ cups of granulated sugar. Use an electric mixer on medium speed for about 3-5 minutes, until the mixture is light and fluffy. The color should lighten significantly, and the texture should become airy. This process is essential for achieving a tender crumb.
- Add eggs and vanilla: Beat in the 4 large eggs one at a time, making sure each is fully incorporated before adding the next. Also, add the 1 tsp of vanilla extract. You should notice a cohesive mixture that’s creamy and slightly thick at this stage. Ensure that you scrape down the sides of the bowl to include all ingredients.
- Combine wet and dry mixtures: Gradually add your flour mixture to the butter mixture, alternating with 1 cup of whole milk. Start with a third of the flour, then half of the milk, mixing on low speed. Repeat this process until everything is fully combined. This will help maintain the fluffiness of the batter.
- Pour and bake: Divide the batter evenly between your prepared cake pans. Use a spatula to smooth the tops. Bake in the preheated oven for 25-30 minutes. To check for doneness, insert a toothpick in the center; it should come out clean with a few moist crumbs.
- Cool the cakes: Once baked, remove the cakes from the oven and allow them to cool in the pans for about 10 minutes. Then gently turn them out onto a wire rack to cool completely. This cooling step is important to prevent the frosting from melting when applied.
- Make the buttercream: In a large bowl, beat 1 cup of softened unsalted butter. Gradually mix in 4 cups of powdered sugar, alternating with 3-4 tbsp of heavy cream until the desired consistency and sweetness is achieved. Add in 2 tsp of vanilla extract at the end for flavor.
- Color your frosting: If you want to make your buttercream flowers colorful, separate the frosting into different bowls and tint with food coloring. A little goes a long way, so be cautious and mix until you reach your desired shade.
- Frost the cake: Place one layer of the cooled cake on a serving plate. Spread a layer of buttercream on top using an offset spatula, and then carefully lay the second cake layer on top. Coat the entire cake with a thin layer of buttercream, known as a crumb coat, and refrigerate for 30 minutes to firm it up before applying more frosting.
- Decorate with flowers: Use a piping bag fitted with flower tips to create your buttercream flowers. Begin with the larger flowers like roses, then fill in with smaller flowers like daisies. Don’t hesitate to have fun with colors and designs; the beauty of this cake is not just in taste but in its unique presentation!
As you follow these steps, don’t hesitate to take your time and enjoy the process. Remember, baking is as much about the journey as it is about the destination. You will soon find out that the smell of the cake baking, combined with the sight of your floral decorations, creates a joyful and fulfilling experience.
Variations & Substitutions
Gluten-Free Variation: If you’re catering to those with gluten sensitivities, this cake can easily be transformed into a gluten-free version. Use a high-quality gluten-free flour blend, making sure to include a binding agent like xanthan gum if your flour does not contain one. The texture may vary slightly, but the flavor should remain intact, ensuring that your cake will still deliver all the delights that make it special.
Vegan Variation: To make this cake vegan-friendly, substitute eggs with flaxseed meal or applesauce and use plant-based butter as well as almond or coconut milk. The result will be a deliciously moist cake that everyone can enjoy, regardless of dietary choices. Again, the flavor profile stays the same, allowing the lovely buttercream flowers to shine.
Flavor Variations: While traditional vanilla is delightful, why not experiment with different flavors? Consider adding lemon or almond extract into your batter for a unique twist. You can also incorporate pureed fruits like strawberries or mango into your cake mix to introduce a fresh flavor. The buttercream can also be flavored with citrus zest or coffee for a different taste experience.
Seasonal Themes: What about changing the theme based on seasons? For autumn, think shades of orange and brown with maple flavoring. During winter, why not frost the cake in icy blues or whites, mimicking a snowy landscape? Adapting your cake to the seasons not only keeps things interesting but also delightfully festive on various occasions.
Common Mistakes to Avoid
Even seasoned bakers can run into a few hiccups while making a cake, so here are some common pitfalls to watch for. One such mistake is using cold ingredients. Always ensure that your butter and eggs are at room temperature before incorporation; this helps them mix better and results in a smoother batter.
Another frequent issue is overmixing the cake batter. After adding the flour, mix only until you see no dry spots to prevent a dense texture. Mixing too much can lead to a tough cake rather than the light, airy crumb we desire.
Not letting your cakes cool completely before frosting can lead to melted buttercream. It might be tempting to frost a warm cake for speed, but patience here will reward you with a beautiful finish.
Also, improper tool selection can hinder your piping method as well. Using the wrong piping tip or not holding the piping bag at the correct angle can lead to awkward, undesirable shapes. Practicing your flower piping technique on parchment paper is an excellent way to refine your skills before applying them to the cake.
Storage, Freezing & Reheating Tips
Proper storage and handling are key in preserving the longevity of your Spring Cake Designs: Simple Buttercream Flowers Cake. If you have leftovers, store them in an airtight container at room temperature for up to three days. Just ensure they are kept in a cool place, as exposure to heat can cause the frosting to melt.
If you need to prepare the cake in advance, consider freezing it. After your cakes have cooled completely, tightly wrap each layer in plastic wrap, followed by aluminum foil to minimize freezer burn. You can freeze them for up to two months. When you’re ready to use them, simply thaw in the refrigerator overnight before frosting.
As for the buttercream frosting, it can also be made ahead. Store it in an airtight container in the refrigerator for up to a week. Bring it to room temperature before re-whipping it to restore its fluffy consistency.
If you choose to freeze buttercream, keep it in an airtight container, and it can last for up to three months. To thaw, simply leave it at room temperature and give it a good stir before using.
Frequently Asked Questions
Can I use a different type of flour for this cake?
Yes! While all-purpose flour yields great results, you can substitute with a gluten-free flour blend or cake flour for a different texture. It’s important to ensure that your flour is suitable for baking and that it can provide the necessary structure for the cake.
How can I make my buttercream less sweet?
If you find traditional buttercream too sweet, consider adding a pinch of salt to balance the flavors. You can also decrease the amount of powdered sugar and blend in some unsweetened cocoa powder or cream cheese to create a frosting with a richer, less sugary taste.
What if my buttercream is too thin?
If you find your buttercream is too thin for piping, simply add more powdered sugar incrementally until you achieve your desired consistency. Conversely, if it’s too thick, add a touch of milk or cream until it reaches the desired smoothness.
How do I achieve vibrant colors in my buttercream flowers?
To achieve a vibrant hue, start with gel food coloring instead of liquid. Gel colors are more concentrated and require less product to get rich colors. Mix the gel into the buttercream gradually until you achieve the desired shade.
Can I make this cake ahead of time for an event?
Absolutely! You can bake the cake layers 1-2 days in advance and store them properly. Frosting the cake a day ahead is also acceptable; just make sure to keep it chilled to maintain freshness right up until serving.
Conclusion:
In summary, the Spring Cake Designs: Simple Buttercream Flowers Cake is not just a treat for the taste buds but also a feast for the eyes. With its beautiful decorations and delectable taste, this cake is sure to impress your guests and become a beloved centerpiece at your celebrations. Don’t hesitate to make it your own by experimenting with flavors and decorations. I encourage you to try this recipe, impressing not only yourself but also those around you. Happy baking!