Prep time: 20 minutes
Cook time: 45 minutes
Total time: 1 hour 5 minutes
Servings: 12
There’s something magical about the arrival of spring, with blooming flowers, vibrant colors, and the fresh scent of new beginnings. As the world sheds its wintry layers, what better way to celebrate than with a delightful dessert that showcases the essence of the season? The **Spring Garden Cake Design** is not just another cake; it’s a stunning centerpiece that encapsulates the beauty of springtime through its vibrant colors and fresh flavors. This cake is perfect for gatherings, celebrations, or simply to brighten up your home with a burst of sweetness. In this recipe, you’ll learn how to create a moist cake with a luscious frosting and beautiful decorations, making it a joy to share with family and friends.
This recipe stands out due to its versatility and the creative expression it allows. Using fresh ingredients and easy-to-follow techniques, you can personalize the cake to match your taste preferences or the occasion. Whether you’re a beginner in the kitchen or an experienced baker wanting a new challenge, this cake will provide you with the rich texture and delightful flavors that everyone will love. So gather your ingredients and let’s dive into the world of spring cake designs!
What Is Spring Cake Designs: Spring Garden Cake Design?
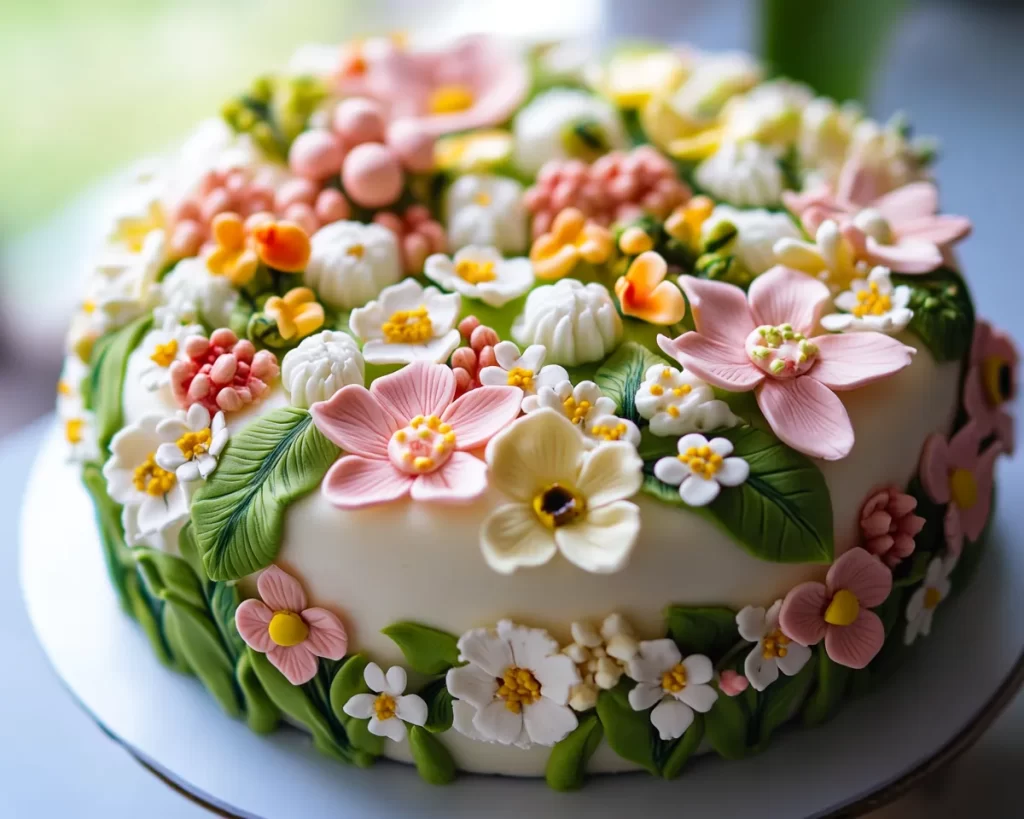
The Spring Garden Cake Design is a visually stunning and delicious dessert that embodies the charm of springtime. Traditionally, this cake consists of several layers of fluffy, moist cake, often made with fresh fruits, and is decorated with a variety of colorful elements resembling a blooming garden. Its flavor profile typically includes light and refreshing notes, thanks to ingredients like lemon, vanilla, and seasonal fruits such as strawberries or raspberries. The cream cheese frosting or buttercream gives it a rich finish that perfectly balances the cake’s lightness.
Originating from the desire to celebrate seasonal bounties, this cake combines techniques from classic baking and modern design. It appeals to those who appreciate both aesthetic beauty and delightful taste. The cake is light enough for a warm day, yet substantial enough to satisfy your sweet tooth. Whether you’re serving it for a birthday, Easter, or just a sunny afternoon, the Spring Garden Cake Design promises to be a showstopper on any table.
The textures of the cake—soft and airy—contrast beautifully with the thick cream frosting, creating a delightful mouthfeel. As you cut into it, you’ll find layers that not only entice the eyes but also deliver a burst of flavor with every slice.
Why You’ll Love This
There are numerous reasons why the Spring Garden Cake Design will capture your heart (and your palate). Firstly, the taste is simply unmatched—a perfect blend of sweetness and tanginess from the fresh fruits, coupled with the smooth creaminess of the frosting. This cake is not overly heavy; instead, it provides a refreshing treat that is enjoyable, even after a hearty meal.
In terms of ease, you’ll appreciate how straightforward this recipe is. Even if you’re new to baking, the step-by-step instructions will guide you through each phase, resulting in a cake you can be proud to serve. Additionally, the ingredients are not only readily accessible but also cost-effective, making it a budget-friendly option for gatherings and celebrations.
Another benefit of this cake is its versatility. You can easily substitute ingredients based on availability or dietary restrictions. Whether you’re avoiding gluten, want to make it dairy-free, or looking to swap in your favorite fruits, this recipe adapts beautifully. Don’t worry if you don’t have certain items—there are always alternatives to ensure your cake still shines.
Many might think that creating such a beautiful cake requires professional skills or profound expertise, but this cake proves that with a bit of patience and practice, anyone can achieve stunning results. It’s not just about appearance; it’s about the joy of creating something wonderful from scratch.
Ingredients You’ll Need
To create the beautiful Spring Garden Cake Design, you’ll need the following ingredients:
- 2 cups all-purpose flour: The base of the cake, giving it structure.
- 1 ½ cups granulated sugar: For sweetness, helping the cake stay moist.
- 1 cup unsalted butter, softened: Adds richness and moisture.
- 4 large eggs: Acts as the binding agent for the cake.
- 1 cup buttermilk: Enhances the flavor and helps maintain moisture.
- 2 teaspoons baking powder: Provides the necessary leavening.
- 1 teaspoon baking soda: Also helps the cake rise and can add a slight tang.
- 1 teaspoon vanilla extract: Infuses the cake with a warm, sweet flavor.
- 1 teaspoon lemon zest: Brightens the cake, giving it a fresh spring taste.
- 3 cups fresh mixed berries (strawberries, raspberries, blueberries): For decorating and flavor.
- 8 oz cream cheese, softened: A primary component of the frosting.
- 4 cups powdered sugar: Sweetens and thickens the frosting.
- 1 teaspoon lemon juice: Adds a zing to the frosting and balances sweetness.
- Fresh mint leaves: For garnish, adding a pop of color.
Each ingredient plays a crucial role in achieving the cake’s signature taste and texture. The all-purpose flour provides the necessary structure, while the buttermilk contributes to the cake’s tenderness. Fresh berries not only serve as decoration but also enhance the overall flavor profile. You can substitute the buttermilk with a non-dairy option or use yogurt if desired. Similarly, the cream cheese can be swapped for a vegan alternative if you’re catering to a plant-based audience.
How to Make
Creating the Spring Garden Cake Design is easier than you might think. Follow these step-by-step instructions to craft a cake that will impress your guests.
- Preheat your oven to 350°F (175°C). Make sure your oven is fully preheated before placing the cake inside, as proper temperature is crucial for even baking. Grease and flour two 9-inch round cake pans, which will help prevent the cakes from sticking and allow for easy removal once baked.
- In a mixing bowl, cream the softened butter and granulated sugar together. Using an electric mixer, beat them until the mixture is light and fluffy, about 3-5 minutes. This step incorporates air into the mixture, which is vital for the cake’s rise.
- Add the eggs one at a time. Ensure that each egg is fully incorporated before adding the next. This helps maintain the emulsion and results in a smooth batter. Don’t forget your vanilla extract and lemon zest during this step; they provide essential flavors.
- In another bowl, mix the dry ingredients together. Combine the all-purpose flour, baking powder, baking soda, and a pinch of salt. Mixing the dry ingredients separately ensures that the leavening agents are evenly distributed throughout the cake batter.
- Alternately add the dry ingredient mixture and buttermilk to the wet ingredients. Start and end with the dry ingredients. Mixing just until combined helps avoid over-mixing, which can lead to a tough cake. You want a smooth, pourable batter with minimal lumps.
- Divide the batter evenly between the prepared cake pans. Use a spatula to spread the batter into the corners of each pan. This ensures even baking. Gently tap the pans on the counter to eliminate air bubbles.
- Bake in the preheated oven for 25-30 minutes. Check for doneness by inserting a toothpick into the center of the cakes; it should come out clean. Once done, remove the cakes from the oven and let them cool in the pans for about 10 minutes.
- Transfer the cakes to a wire rack to cool completely. Allowing them to cool completely is crucial for the frosting to adhere properly, as warm cakes can make your frosting melt off.
- While the cakes cool, prepare the frosting. In a mixing bowl, beat the softened cream cheese with the powdered sugar until smooth. Add a splash of lemon juice for flavor and to balance the sweetness of the frosting.
- Once the cakes are completely cool, place one layer on a serving plate. Spread a generous layer of cream cheese frosting on top, then add a layer of mixed berries. Place the second cake layer on top and gently press down to set.
- Frost the top and sides of the cake. Use an offset spatula to create a smooth finish. Don’t worry about perfection; rustic finishes can add charm! Top with remaining fresh berries and mint leaves for an added pop of color and freshness.
- Slice and serve! Enjoy this beautiful cake with friends and family. The vibrant colors and flavors will surely be the highlight of any gathering!
Variations & Substitutions
Citrus Spring Garden Cake
If you’re a lover of citrus flavors, try adding orange or lime zest to your batter for a vibrant twist. This will enhance the spring-like quality of the cake and add a refreshing note. You can even replace the mixed berries with citrus segments for a tropical flavor profile.
Dairy-Free Version
Making this cake dairy-free is a breeze! Simply substitute the butter with a plant-based alternative and use almond or coconut milk instead of buttermilk. For the frosting, look for dairy-free cream cheese options available at most grocery stores. This way, everyone can enjoy this lovely cake even if they have dietary restrictions.
Gluten-Free Spring Garden Cake
If you need a gluten-free option, substitute the all-purpose flour with a gluten-free baking blend. It’s essential to use one that contains xanthan gum or add it separately; this ensures that your cake achieves a good structure. Follow the other instructions as usual, and enjoy a gluten-free version of this delightful dessert.
Layered with Whipped Cream
Instead of cream cheese frosting, consider a light whipped cream topping for a different flavor profile. This will give the cake a lighter finish, perfect for hot spring days. Just whip heavy cream with a bit of sugar and vanilla extract until soft peaks form, then layer it generously between cake layers and on top for a fluffy surprise.
Common Mistakes to Avoid
Making a beautiful cake may seem straightforward, but there are common pitfalls to watch out for. One major error is **overmixing** the batter. When you mix too vigorously, you can develop gluten, which makes the cake dense rather than light. It’s best to mix the ingredients until just combined.
Another mistake stems from baking at incorrect temperatures. Always preheat your oven; this ensures your cakes will rise properly. Additionally, if you open the oven door too frequently, it could lower the temperature dramatically, causing uneven baking.
It’s also common to frost a still-warm cake, leading to melted frosting. Always let your cake cool completely before frosting. Lastly, be cautious when measuring ingredients; using too much flour or sugar can throw off the balance of the recipe altogether.
Storage, Freezing & Reheating Tips
Knowing how to store your cake properly is key to maintaining its flavor and texture. The Spring Garden Cake can be stored at room temperature for up to 3 days if covered well. If you want to extend its shelf life, you can refrigerate it, where it will last up to a week. Make sure the cake is well-wrapped to prevent it from absorbing any odors from the refrigerator.
For longer storage, consider freezing the cake. Wrap each layer tightly in plastic wrap and then in aluminum foil. This dual-layer wrapping will help prevent freezer burn. The cake can remain frozen for up to 3 months. To serve, thawn you plan to serve it overnight in the refrigerator and frost it when it’s completely cool.
For reheating, if you prefer a slightly warm slice, pop it in the microwave for 10-15 seconds. Just be careful not to heat it too long, as it may become dry.
Frequently Asked Questions
Can I make this cake ahead of time?
Absolutely! You can make the cake layers a day in advance. Just ensure they are thoroughly cooled before wrapping them tightly in plastic wrap. Once you’re ready to serve, frost the cake on the day of, to maintain the freshness of the frosting.
What type of berries work best for this cake?
While the recipe calls for a mix of strawberries, raspberries, and blueberries, feel free to use any berries you love! Blackberries and even sliced kiwi can make lovely additions. Just keep in mind that each berry has its own level of sweetness and tartness, which can impact the overall flavor.
Can I use frozen berries instead of fresh?
Yes! Frozen berries can be used, but it’s best to thaw and strain them first. This prevents excess moisture from making the cake soggy. They can still provide delicious flavor and vibrant color!
Is it necessary to use buttermilk?
While buttermilk adds flavor and moisture, you can substitute it with a mixture of milk and vinegar or lemon juice (1 cup milk + 1 tablespoon vinegar/lemon juice) to mimic its acidity. This will help create a tender crumb in your cake.
How do I prevent my cake from sticking to the pan?
Make sure to grease and flour your pans generously. Alternatively, you can line the bottoms with parchment paper. This will create a barrier between the cake and the pan, ensuring it releases easily after baking.
Conclusion:
The Spring Garden Cake Design is a delightful way to celebrate the beauty of the season while indulging in a sweet treat. With its vibrant layers and refreshing taste, it’s sure to be a hit at any gathering. I encourage you to try this recipe, customize it to your liking, and share it with friends and family. There’s nothing quite like the joy of baking and presenting a cake that is not only delicious but also a feast for the eyes. Get those baking tools ready, and let the spring celebrations begin!