Prep time: 30 minutes
Cook time: 45 minutes
Total time: 1 hour 15 minutes
Servings: 8 servings
If you’re craving a dessert that perfectly captures the essence of spring, look no further than this delightful Strawberry Lemon Layer Cake. Imagine layers of fluffy cake infused with fresh strawberries, zesty lemon, and a buttery frosting that melts in your mouth. This is not just any cake; it’s a celebratory treat that brings smiles to every gathering. Whether you are hosting a spring party or simply enjoying a slice with afternoon tea, this cake will surely elevate the moment.
What makes this Strawberry Lemon Layer Cake extraordinary is its balance of flavors and its versatility. You get *sweetness* from the strawberries and *tanginess* from the lemons, creating a symphony of taste that’s light yet satisfying. In this article, you’ll not only learn how to make this scrumptious cake but also discover tips, variations, and common pitfalls to avoid. Let’s get baking!
What Is Spring Cake: Strawberry Lemon Layer Cake?
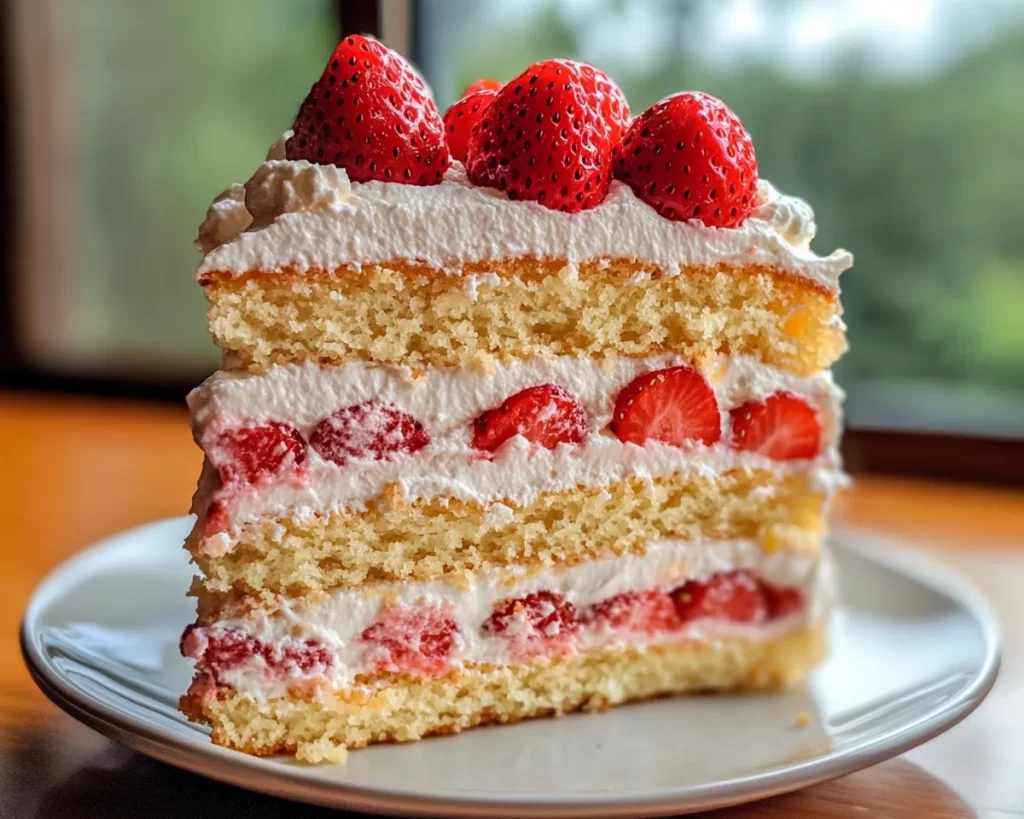
Spring Cake, particularly the Strawberry Lemon Layer Cake, is a beautiful confection that symbolizes the arrival of warmer weather and the blossoming of fresh produce. Originating from various bakeries that celebrate seasonal fruits, this cake features layers of *light sponge* or butter cake infused with fresh strawberries and zesty lemon. The texture strikes a perfect balance; each forkful is both airy and moist, inviting you to savor its flavors.
The main flavors come from the *juicy strawberries* and *tart lemons*. The cake is often frosted with a creamy buttercream or a whipped cream frosting, making it a truly decadent treat. The vibrant colors not only make it pleasing to the eye but also echo feelings of warmth and joy, evoking memories of sunny days spent outdoors. This cake is especially popular during spring and summer months, making it a staple for birthdays, picnics, and garden parties.
With its simple yet elegant appearance, the Strawberry Lemon Layer Cake is a testament to how fresh ingredients can inspire incredible flavors. The layering not only adds aesthetic appeal but also allows for *a variety of textures* and experiences, from the soft cake to the creamy frosting and the sweet fruit filling.
Why You’ll Love This
You’ll love this Strawberry Lemon Layer Cake for several reasons. First and foremost, it bursts with fantastic flavors that capture the essence of spring. The combination of *sweet strawberries and tart lemons* is utterly refreshing, making each bite a delightful experience. Additionally, this cake is surprisingly easy to prepare. Even if you’re a beginner in the kitchen, the step-by-step instructions will guide you through the process seamlessly.
If you’re concerned about cost, consider that this cake uses seasonal ingredients, which are often more affordable when in abundance. Moreover, it’s versatile and can easily adapt to different dietary preferences. Whether you’re looking to make it gluten-free or vegan, there are various substitutions that can deliver similar results without compromising on taste.
One common misconception is that cakes must be complex to be delicious. This recipe is proof that simplicity can lead to amazing flavors. By carefully selecting quality ingredients and taking your time with each layer, you can create a masterpiece. It’s also a fantastic cake for *meal prepping*, as it can be enjoyed over several days, making it an excellent choice for busy parents or anyone looking to have a delicious treat on hand for guests or family.
Ingredients You’ll Need
To make this luscious Strawberry Lemon Layer Cake, you’ll need the following ingredients:
- 2 cups all-purpose flour: This forms the base of your cake. You can substitute with gluten-free flour for a gluten-free option.
- 1 ½ cups granulated sugar: This sweetens the cake and helps create a tender texture.
- ½ cup unsalted butter, softened: Provides richness and moisture. Use dairy-free spread for a vegan option.
- 3 large eggs: These act as binding agents, adding structure and stability to your cake.
- 1 cup milk: Choose whole milk for richness, or almond milk for a dairy-free version.
- 2 teaspoons baking powder: Essential for leavening the cake, making it light and fluffy.
- 1 teaspoon vanilla extract: Enhances the flavor profile of your cake.
- Zest of 1 lemon: Adds a concentrated lemon flavor that elevates the overall cake.
- 1 cup fresh strawberries, diced: The star ingredient, providing sweetness and moisture.
- For the frosting:
- 1 cup unsalted butter, softened: This is your base for buttercream, giving it a smooth texture.
- 4 cups powdered sugar: Sweetens the frosting and allows it to hold its shape.
- 2-3 tablespoons lemon juice: Adds a refreshing tang to balance the sweetness of the frosting.
- Fresh strawberries for garnish: Optional, but a beautiful addition that makes the cake visually appealing.
Understanding the role of each ingredient is crucial for success. For instance, the *quality of your eggs* can significantly affect the texture of your cake. Always opt for fresh eggs to achieve the best results. Similarly, using fresh strawberries instead of frozen ones is recommended for maximum flavor and juiciness. If you’re looking for flavor substitutes, consider using *orange* or *lime* in place of lemon for a different but equally delightful experience.
How to Make
Making the Strawberry Lemon Layer Cake involves several straightforward steps, each one essential to achieving the best flavor and texture. Here’s how to do it:
- Preheat your oven: Start by preheating your oven to 350°F (175°C). This step is essential as it ensures that the cake bakes evenly. Proper heating is crucial to achieve a light and fluffy texture.
- Prepare your baking pans: Grease and flour two 9-inch round cake pans. You can also line the bottoms with parchment paper for easier removal. Properly greasing the pans prevents the cake from sticking, making it easier to maintain the cake’s structure when you take it out.
- Mix the dry ingredients: In a bowl, combine 2 cups of all-purpose flour, 2 teaspoons of baking powder, and ½ teaspoon of salt. Whisk them together to ensure they are evenly distributed. This step helps prevent any lumps and ensures that your leavening agent works properly.
- Cream the butter and sugar: In a large bowl, beat ½ cup of softened unsalted butter and 1 ½ cups of granulated sugar until the mixture is light and fluffy. This usually takes about 3-4 minutes. The creaming process is vital because it incorporates air into the butter, giving your cake a lighter texture.
- Add the eggs and vanilla: To the butter and sugar mixture, add 3 large eggs one at a time, mixing well after each addition. Then add 1 teaspoon of vanilla extract. Continue beating until the mixture is fully combined and smooth.
- Combine wet and dry ingredients: Gradually add the dry mixture to the butter mixture, alternating with 1 cup of milk. Start and end with the dry ingredients, mixing gently until just combined. Do not overmix, as this could lead to a dense cake.
- Fold in the lemon zest and strawberries: Gently fold in the zest from 1 lemon and 1 cup of diced fresh strawberries. This is where the magic happens; the *fragrance of fresh lemon* combined with the *sweetness of strawberries* will make your batter irresistible.
- Divide and bake: Pour the batter evenly into the prepared cake pans. Bake in the preheated oven for about 25-30 minutes, or until a toothpick inserted into the center comes out clean. The aroma of baking will fill your kitchen, signaling that something delicious is on its way!
- Cool the cakes: After baking, let the cakes sit in the pans for about 10 minutes, then turn them out onto a wire rack to cool completely. Cooling is crucial before frosting, as warm cakes can cause the frosting to melt and lose its structure.
- Prepare the frosting: In a large mixing bowl, beat 1 cup of softened unsalted butter until creamy. Gradually add 4 cups of powdered sugar and mixed until combined. Add 2-3 tablespoons of lemon juice and continue mixing until you achieve a smooth consistency.
- Assemble the cake: Place one layer of the cake on a serving plate. Spread a layer of frosting on top, then carefully place the second cake layer on top. Continue to frost the top and sides of the cake until fully covered. Feel free to use a spatula for smoother edges or make it more rustic!
- Decorate: For an added touch, garnish with fresh strawberries on top. This not only makes the cake visually appealing but also enhances the flavor profile with additional strawberry notes. Keep it chilled until ready to serve.
Following these steps ensures you’ll achieve a delicious cake that sparks joy with every bite. Don’t rush through; take your time and pay attention to each step for the best results.
Variations & Substitutions
Gluten-Free Variation: If you or your guests are gluten intolerant, you can easily adapt this cake by using a gluten-free flour blend. Make sure to select a brand that includes xanthan gum or other binding agents, as this helps mimic the texture that gluten provides. The cake may be slightly denser, but the *incredible flavor* will still shine through.
Vegan Variation: To turn this into a vegan dessert, swap the eggs for flaxseed meal (1 tablespoon of flaxseed meal mixed with 2.5 tablespoons of water replaces one egg). Use almond milk instead of regular milk and vegan butter for the frosting. You will still enjoy the balance of strawberry sweetness and lemon tang, but in a dairy-free version.
Citrus Twist: While lemon is the star of this recipe, why not experiment with other citrus fruits? Substitute lemon with orange or lime zest for a delightful twist. Each fruit brings its unique flavor profile, making the cake just as refreshing and delicious, perhaps with a more tropical feel that transports you to a sunny paradise.
Layering with Whipped Cream: Instead of buttercream frosting, consider using whipped cream to layer between the cakes and on top. This modification keeps the dessert light and airy, perfect for hot summer days when heavy frosting might not be as appealing. Just be cautious with the whipped cream; it should be stabilized, especially if you’re preparing the cake in advance.
Adding Spice: Incorporate warming spices like cardamom or cinnamon into the cake batter for an unexpected flavor twist. A pinch of cardamom goes especially well with the citrus and strawberry, adding a depth of flavor that intrigues the palate.
Each variation not only brings a new dimension to the cake but also allows it to fit various dietary needs, ensuring everyone can enjoy a slice.
Common Mistakes to Avoid
One common mistake people make when baking is not measuring ingredients correctly. This can severely affect the texture and taste of your cake. Make sure to use the spoon-and-level method for measuring flour, scooping flour directly from the bag can lead to excess flour, resulting in a dense cake.
Another pitfall to avoid is overmixing the batter. Once you combine the wet and dry ingredients, mix just until incorporated; overmixing will develop the gluten and yield a tough cake. Lastly, don’t skip the baking powder! It’s essential for a good rise, so check the expiration date beforehand; stale baking powder will prevent your cake from rising properly.
Lastly, allow your cake to cool completely before frosting. Trying to frost a warm cake can lead to a gooey mess. If you’re in a hurry, consider placing the cakes in the refrigerator to expedite the cooling process.
Storage, Freezing & Reheating Tips
To store your Strawberry Lemon Layer Cake, keep it in an airtight container in the refrigerator. It will last for about 3 to 4 days, making it perfect for leftovers after a party. If you prefer the cake at room temperature, let it sit out for about 30 minutes before serving; this will improve its texture and flavor.
If you want to enjoy this cake later, freezing is a great option! To freeze, wrap each layer tightly in plastic wrap, followed by aluminum foil to prevent freezer burn. This way, you can freeze them for up to 2 months. When you are ready to enjoy, simply thaw at room temperature for a few hours, and frost when completely thawed.
Reheating is usually unnecessary for a cake like this, as it’s best served fresh. However, if you wish to warm up individual slices, consider using the microwave for about 10-15 seconds. Just be careful not to overheat, as this can dry out the cake.
Be mindful of food safety practices; always check your leftovers for any signs of spoilage. If anything looks or smells off, it’s better to discard it rather than risk foodborne illness.
Frequently Asked Questions
Can I use frozen strawberries instead of fresh? Yes, you can use frozen strawberries, though note that they may add extra moisture to your cake. Thaw the strawberries, drain any excess liquid, and chop them before adding to the batter. This can slightly affect the texture, but the flavor will still be delightful.
What can I use if I don’t have butter? You can substitute an equal amount of *coconut oil or olive oil* for a dairy-free option. Both will provide moisture, although the flavor may differ. Keep in mind that using oil will make the cake denser, so it’s best reserved for times when you’re not concerned about texture.
How can I adjust the sweetness of the cake? If you prefer a less sweet cake, consider reducing the sugar by ¼ cup. You can also balance the sweetness in the frosting by adding more lemon juice or using a cream cheese frosting, which tends to be tangier.
Is this cake suitable for beginners? Absolutely! This Strawberry Lemon Layer Cake is beginner-friendly with straightforward steps. Just follow the instructions carefully, and you’re likely to impress everyone with your baking prowess.
Can I make it ahead of time? Yes! You can bake the layers a day in advance and store them wrapped in plastic wrap. Just make sure to frost it on the day you plan to serve for the best texture and taste experience.
Conclusion:
This Strawberry Lemon Layer Cake is not just a dessert; it’s a celebration of spring in every bite. With its perfectly balanced flavors, moist layers, and creamy frosting, this cake will undoubtedly become a beloved favorite in your household. Feel free to customize it by exploring various flavor options or dietary adjustments. Don’t hesitate to share this recipe with your friends and family, inviting them to join in on the fun. Happy baking, and may each slice bring joy to your table!


