Prep time: 15 minutes
Cook time: 20 minutes
Total time: 35 minutes
Servings: 24 bars
When the vibrant colors of spring start to bloom, a wave of excitement rolls in as Easter approaches. One of the best ways to celebrate the season is by baking delightful treats, and what better way to do that than with **Spring Cookies: Mini Egg Cookie Bars**? These delicious bars are the perfect combination of chewy cookie texture and the sweet crunch of chocolate mini eggs, making them a delightful treat for all ages. You can quickly whip them up for gatherings, or simply to enjoy during those relaxing spring afternoons with a cup of tea.
In this recipe, you will learn how to make these delicious bars from scratch, understanding not just the basic ingredients, but also getting to know the tips and tricks that will elevate your baking game. We’ll also explore some fun variations, storage tips, and answer common questions about this delightful treat, ensuring that your experience in the kitchen is stress-free and enjoyable.
What Is Spring Cookies: Mini Egg Cookie Bars (Easter)?
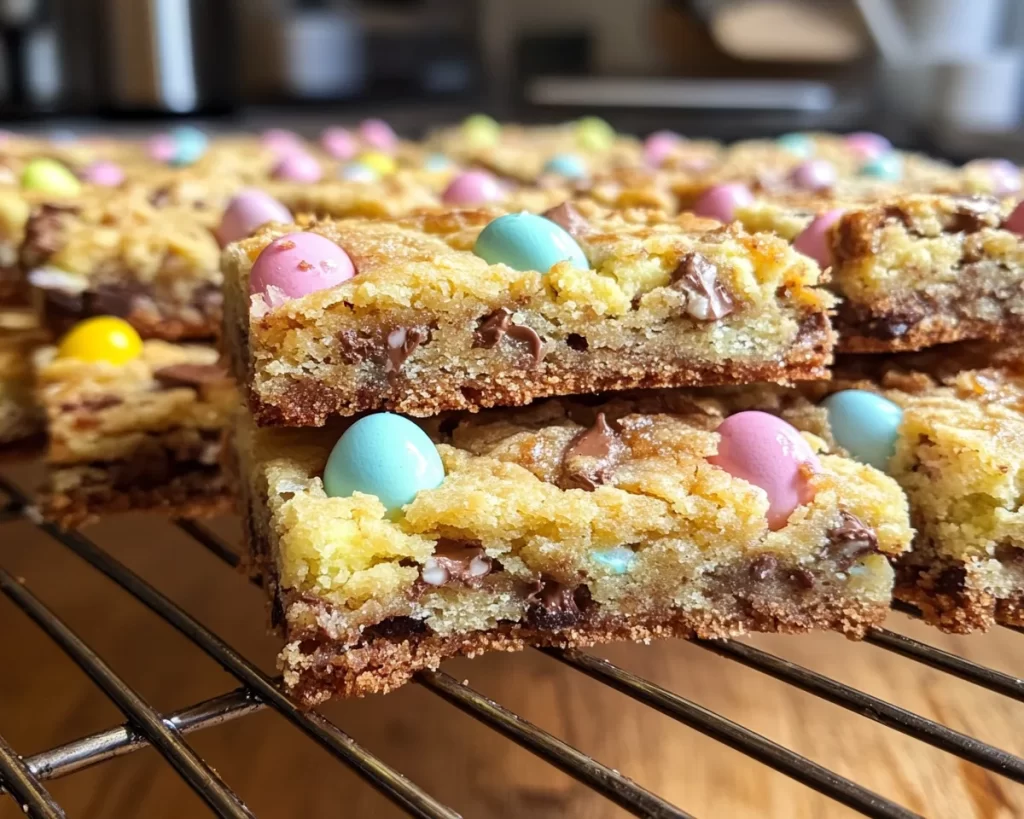
Spring Cookies: Mini Egg Cookie Bars are a unique twist on classic cookie recipes. Originating from traditional Easter treats that celebrate the holiday with vibrant colors and sweet flavors, these cookie bars are particularly popular for their festive appeal and easy-to-share format. When you take a bite, you will immediately notice the soft and chewy texture, enhanced by the crunchy bits of chocolate mini eggs. The combination of buttery cookie dough with the sweet and creamy chocolate creates a flavor explosion that is nothing short of delightful.
These bars can be viewed as a ritual during Easter, making them a cherished treat that brings together family and friends. The aroma that fills your kitchen while they are baking will transport you to a childhood memory of Easter egg hunts, family gatherings, and delightful surprises. With their vibrant colors and delicious taste, you can make a batch that will not only satisfy your sweet tooth but also add a cheerful touch to your holiday celebrations.
Why You’ll Love This
You will absolutely love these Mini Egg Cookie Bars for numerous reasons. First and foremost, they are incredibly easy to make, even for those who might be new to baking. The recipe requires minimal ingredients and doesn’t demand fancy techniques, making it accessible for kids and beginner bakers alike. You can quickly throw these together for an impromptu get-together or as a delightful afternoon snack for the family.
Moreover, they are quite budget-friendly. Most ingredients are pantry staples, and the added flavor from the mini eggs provides a unique touch without breaking the bank. The versatility of this recipe is another aspect you’ll appreciate; you can experiment with different types of chocolate, nuts, or even seasonal sprinkles to suit your taste or dietary needs.
It’s essential to mention that some may worry about ending up with overly dry or crumbly bars, but with just a few simple tips, you can ensure that your cookie bars remain soft and chewy. A common misconception is that more flour means better structure when, in fact, the correct flour measurement and mixing method are crucial to achieving that perfect texture.
Ingredients You’ll Need
To create these delightful Mini Egg Cookie Bars, you will need the following ingredients:
- 2 1/4 cups all-purpose flour – This is the foundation of your cookie bars. It gives them the right structure and helps bind all the ingredients together.
- 1 teaspoon baking soda – This leavening agent helps your cookie bars rise, creating the chewy texture you are looking for.
- 1 teaspoon salt – Balances out the sweetness of the cookie bars and enhances the overall flavor.
- 1 cup unsalted butter, softened – Adds richness and flavor to the bars. Ensure the butter is at room temperature to mix well.
- 3/4 cup granulated sugar – Provides sweetness; you can adjust the measurement to suit your personal preference.
- 1 cup packed brown sugar – Gives a deeper flavor and moisture to the cookie bars.
- 2 large eggs – Essential for binding the ingredients together and adding moisture. Make sure they are at room temperature.
- 1 teaspoon vanilla extract – Enhances flavor; you can use pure vanilla for a more intense aroma.
- 1 1/2 cups chocolate mini eggs – The star ingredient! These mini eggs add a delightful crunch and sweetness, making the bars festive.
Each ingredient plays a vital role in the structure and flavor of the bars. When substituting ingredients, like using coconut oil for butter or creating a gluten-free version with almond or coconut flour, be sure to adjust ratios and baking times accordingly for optimal results.
How to Make
Follow these simple steps to create delicious Spring Cookies: Mini Egg Cookie Bars:
- Preheat your oven to 350°F (175°C). This crucial step ensures an even baking temperature, preventing the cookie bars from becoming too dry or overcooked.
- In a medium-sized bowl, whisk together the flour, baking soda, and salt until they are well combined. This step helps aerate the flour and evenly distribute the leavening agent.
- In a large mixing bowl, cream together the softened butter, granulated sugar, and brown sugar using an electric mixer on medium speed until it becomes light and fluffy. This process typically takes around 3–5 minutes. The fluffiness will help create a tender texture in your cookie bars.
- Add the eggs, one at a time, mixing well after each addition to ensure a homogenous dough. Then stir in the vanilla extract, which will infuse your bars with a rich aroma and flavor.
- Gradually add the flour mixture to the wet ingredients, mixing on low speed to avoid flour flying everywhere. Mix until just combined; overmixing can lead to tough cookie bars.
- Gently fold in the chocolate mini eggs with a spatula until they are evenly distributed throughout the dough, creating that festive appearance and delightful crunch.
- Line a 9×13-inch baking pan with parchment paper, allowing for some overhang, which will make it easier to remove the cookie bars later. Spread the dough evenly into the prepared pan, smoothing the top with a spatula.
- Bake in the preheated oven for 20–25 minutes, or until the edges are golden brown and a toothpick inserted into the center comes out clean. The length of time may vary based on your oven, so it’s essential to check around the 20-minute mark.
- Once baked, remove from the oven and allow the bars to cool in the pan for about 10 minutes. Then, use the parchment paper to lift them out of the pan and cool completely on a wire rack. This cooling step ensures you don’t end up with doughy bars.
- Once completely cooled, cut them into squares or rectangles. Serve and enjoy the festive flavors!
As you bake, the buttery aroma will fill your kitchen, drawing everyone in with the promise of sweet treats. This process fosters memories and connections, making the act of baking a joyful experience.
Variations & Substitutions
Chocolate Chip Twist
For an added layer of flavor, incorporate 1 cup of semi-sweet or dark chocolate chips into your cookie bar dough along with the mini eggs. This variation enhances the chocolatey goodness and adds another dimension to the cookie bars. It’s an excellent option for those with a serious sweet tooth or for those who want an even richer taste.
Nutty Delight
If you or your family love nuts, this is the variation for you! Add 1 cup of chopped walnuts or pecans into the dough. Nuts can add a delightful crunch and depth of flavor to your cookie bars, making them even more satisfying. Just be mindful of allergies when serving these bars to others.
Gluten-Free Option
To make these cookie bars gluten-free, substitute all-purpose flour with a quality gluten-free blend. Ensure that your baking soda and other ingredients are also gluten-free. With this minor adjustment, everyone can enjoy the delicious flavors of Spring Cookies, regardless of dietary restrictions.
Vegan Version
To cater to a vegan audience, replace the eggs with flaxseed eggs (1 tablespoon of ground flaxseed mixed with 2.5 tablespoons of water per egg, let sit for a few minutes) and use coconut oil in place of butter. Additionally, be sure to select dairy-free chocolate mini eggs. This adaptation allows more people to take part in the joyful experience of baking!
Common Mistakes to Avoid
One common mistake while baking cookie bars is not measuring your flour accurately. Too much flour can lead to dry and crumbly bars. Make sure you use the spoon-and-level method instead of packing the flour into the cup. A flat surface with a straight edge will help you achieve the right measurement.
Another mistake is overmixing the dough. This can develop the gluten too much, leading to tough cookie bars instead of the desired soft and chewy texture. Mix until just combined to ensure the best results. If you notice your dough is too crumbly, a splash of milk can help bring it together without compromising texture.
Also, be cautious about baking time. Every oven is different, and it could take more or less time than suggested. Keeping an eye on the edges will help you determine when the bars are perfectly baked.
Finally, be sure to allow your cookie bars to cool completely before slicing. Cutting too soon can lead to messy bars that fall apart rather than neatly cut squares.
Storage, Freezing & Reheating Tips
Storing your Spring Cookies: Mini Egg Cookie Bars correctly will ensure they maintain their deliciousness for a longer period. Once your cookie bars have cooled completely, you can store them in an airtight container at room temperature for up to a week. To maintain freshness, consider placing parchment paper between layers of bars; this will help prevent them from sticking together.
If you want to keep them longer, freezing is a great option! Wrap individual cookie bars tightly in plastic wrap and place them in a freezer-safe container. They can last for up to three months in the freezer. When you’re ready to enjoy them, simply take the desired amount out and let them thaw at room temperature, or you can pop them in the microwave for 10-15 seconds for a warm treat.
When reheating, be cautious not to overdo it; you just want to warm them slightly to revive their chewy texture without drying them out. With these tips, you won’t have to worry about wasting any leftovers, and these bars can be enjoyed any time.
Frequently Asked Questions
Can I use different types of chocolate?
Absolutely! You can use milk chocolate, dark chocolate, or even white chocolate mini eggs to suit your palate. Each type will offer a distinct flavor profile, so feel free to experiment until you find your favorite combination. Adjusting the chocolate type can also modify the overall sweetness or richness of the cookie bars.
How do I know when the cookie bars are done baking?
It’s important to keep an eye on the edges of the cookie bars. When they start turning golden brown and a toothpick inserted into the center comes out clean, they are ready to be removed from the oven. Don’t worry if the center looks soft; they will continue to set as they cool.
Can I customize the recipe further?
Definitely! This recipe is very adaptable. You can add ingredients such as dried fruit, different nuts, or even flavor extracts to enhance the taste. The key is to maintain the right balance of wet and dry ingredients for the desired texture. Just remember to keep the total quantity in mind to avoid making the dough too dry or too wet.
Is it possible to make these cookie bars ahead of time?
Yes, these bars are perfect for preparing in advance. You can bake them a day or two ahead and store them in an airtight container. They will maintain their flavor, and, in fact, some say they taste even better after resting for a day. Just remember to let them cool completely before storing to avoid any sogginess.
What makes these cookie bars perfect for holidays or gatherings?
Their vibrant and colorful appearance makes them visually appealing, perfect for holiday settings like Easter. The sweet combination of chocolate and cookie bars are sure to be a hit with both kids and adults alike. They are easy to cut and serve, making them a practical choice for gatherings where you want to delight guests without the fuss.
Conclusion:
In summary, Spring Cookies: Mini Egg Cookie Bars are a delightful treat that brings together flavors, fun, and festive cheer. Their ease of preparation, combined with numerous variations, ensures that you can customize them to cater to various preferences. Not only do they serve as a wonderful indulgence for your family, but they also provide a means to make memorable moments together. So why not give this recipe a try? Gather your ingredients, roll up your sleeves, and get ready to create something special in the kitchen. Don’t forget to share your delicious results, and encourage everyone to join in on the fun!