Prep time: 20 minutes
Cook time: 10 minutes
Total time: 30 minutes
Servings: 24 cookies
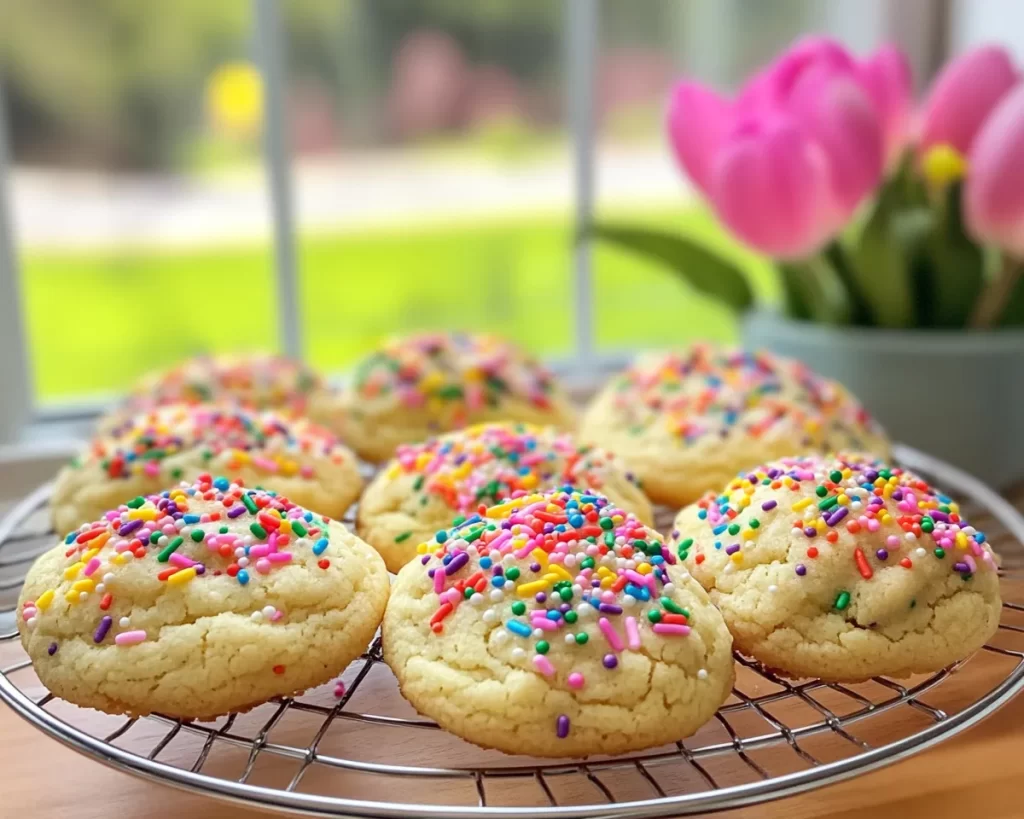
When spring arrives, it brings along a sense of renewal and warmth, inviting us to embrace lighter, more colorful flavors in our cooking and baking. One of the most delightful ways to celebrate this season is with a batch of Spring Cookies: Soft Spring Sprinkle Cookies. These cookies are not just a treat for the taste buds; they are a feast for the eyes, with a soft, chewy texture and vibrant sprinkles that perfectly capture the essence of springtime. The appeal of these cookies lies not only in their taste but also in their ease of preparation, making them a favorite among busy parents or beginner bakers.
In this article, you’re going to discover the secrets behind these delightful cookies. From understanding what makes them so special to learning about variations that can cater to different tastes and dietary needs, you’ll find everything you need to know. With easy-to-follow instructions and a wealth of tips, you’ll be well on your way to creating a batch that will impress your family, friends, or guests.
What Is Spring Cookies: Soft Spring Sprinkle Cookies?
Spring Cookies, or Soft Spring Sprinkle Cookies, originate from the tradition of celebrating seasonal flavors and colors. These cookies are typically characterized by their soft and pillowy texture, which contrasts delightfully with the crunchy sweetness of colorful sprinkles. The flavor profile is a harmonious blend of sweetness, often enhanced by a subtle hint of vanilla and a splash of citrus zest, making each bite a joyful experience.
The joy of these cookies is not just in their delightful appearance; they evoke fond memories of sunny days and cheerful gatherings. Whether you are enjoying them on a picnic, serving them at a birthday party, or simply indulging in one with your afternoon tea, these cookies hold the power to uplift your mood. The addition of vibrant sprinkles not only beautifies them but also offers a nostalgic nod to childhood treats, making them appealing to both kids and adults. As you learn to make these cookies, you can also explore different flavor accents, such as lemon or almond, which adds another layer of enjoyment.
In essence, spring cookies celebrate the warmer months with a light, sweet treat that brings a smile to everyone who tries them. Ready to bake? Let’s dive deeper into why you’ll love this recipe.
Why You’ll Love This
One of the most compelling reasons to bake Spring Cookies is the incredible taste. They bring a delightful balance of sweetness without being overwhelmingly sugary, appealing to both kids and adults alike. With a soft and inviting texture, each cookie offers a melt-in-your-mouth experience that you won’t easily forget. The crispy sprinkle exterior provides a fun texture that contrasts beautifully with the soft interior, creating an enjoyable eating experience.
Another great aspect is the ease of preparation. These cookies don’t require elaborate steps or complicated techniques, making them an excellent choice for beginners in the kitchen or those who may be short on time. You can whip up a batch in just about 30 minutes, allowing you to enjoy fresh-baked cookies without a whole day lost in the kitchen. This time efficiency makes them perfect for busy parents or anyone needing a quick dessert for unexpected guests.
Cost is also a factor. The ingredients needed for Spring Cookies are affordable and typically found in most households. This means you can whip up a delightful treat without breaking the bank. Not to mention, how rewarding it is to see the joy on your loved ones’ faces as they indulge in cookies made from scratch!
Moreover, Spring Cookies are incredibly versatile. You can easily adapt the recipe to suit various dietary preferences, be it gluten-free or vegan, without significantly compromising on taste or texture. This adaptability allows you to cater to guests who might have different dietary needs, ensuring everyone can enjoy these delicious treats at the table.
Common misconceptions may arise regarding cookie baking, such as needing to chill the dough or using specific types of flour. However, this recipe defies those norms, showcasing how simple it is to achieve cookie perfection with minimal fuss. With the right tips and techniques, you’ll become a cookie-baking expert in no time.
Ingredients You’ll Need
- 2 ¾ cups all-purpose flour – This is the base of your cookie, providing structure and texture. If needed, you can substitute with a gluten-free flour blend.
- 1 teaspoon baking soda – This ingredient helps the cookies rise, creating that soft, fluffy texture you desire.
- ½ teaspoon salt – Adds balance to the sweetness of the cookies and enhances overall flavor.
- 1 cup unsalted butter, softened – Provides richness and flavor. Make sure it’s at room temperature for easy mixing.
- 1 cup granulated sugar – Sweetens the cookies and helps achieve a lovely golden color while baking.
- ½ cup packed brown sugar – Adds moisture and a deeper, caramel-like flavor. You can use light or dark brown sugar based on your preference.
- 2 large eggs – Binds the ingredients together and adds moisture. Use room-temperature eggs for the best results.
- 2 teaspoons vanilla extract – Infuses a sweet aroma and enhances the overall flavor of the cookies.
- 1 cup colorful sprinkles – The fun part! They make the cookies visually appealing and add a delightful crunch.
Each ingredient plays a pivotal role in achieving the desired cookie texture and flavor. The balance of sugars provides the ideal sweetness, while butter ensures they remain soft. You can easily adapt certain ingredients based on what you have on hand or any dietary restrictions your family or friends may have.
How to Make
To create your Spring Cookies, follow these step-by-step instructions for a successful baking experience.
- Preheat your oven to 350°F (175°C) and line two baking sheets with parchment paper. Preheating your oven is crucial for ensuring that the cookies bake evenly. The parchment paper will help prevent them from sticking.
- In a medium bowl, whisk together the flour, baking soda, and salt. This mixing helps to evenly distribute the baking soda and salt throughout the flour, ensuring that your cookies rise evenly. Set this mixture aside while you prepare the wet ingredients.
- In a large bowl, cream the softened butter, granulated sugar, and brown sugar together using an electric mixer until light and fluffy. This process should take about 2-3 minutes. Creaming incorporates air into the butter, which will help create a lighter texture in your cookies.
- Add the eggs, one at a time, and mix until fully incorporated. Then, mix in the vanilla extract until well blended. It’s vital to add the eggs slowly to prevent the mixture from breaking and to achieve a smooth, uniform batter.
- Gradually add the dry mixture to the wet mixture, stirring gently until just combined. Be careful not to overmix here, as overmixing can lead to dense cookies. Once you see no visible flour, stop mixing.
- Finally, fold in the colorful sprinkles with a spatula or wooden spoon. This step is where the fun begins; as you add the sprinkles, your dough will transform into a vibrant mixture, promising a delightful cookie.
- Using a cookie scoop or spoon, drop rounded tablespoons of dough onto the prepared baking sheets, leaving about 2 inches between each cookie. This spacing is crucial as the cookies will spread during baking. If desired, top each cookie with a few extra sprinkles for decoration.
- Bake in the preheated oven for 8-10 minutes, or until the edges are lightly golden. Keep an eye on them and avoid overbaking, as you want the centers to remain soft. Keep in mind that cookies will continue to cook slightly even after you remove them from the oven.
- Remove from the oven and allow the cookies to cool on the baking sheets for about 5 minutes before transferring them to a wire rack to cool completely. This cooling time allows them to set up slightly, making them easier to move.
Cooking is about sensory experiences. While you’re mixing the batter, allow yourself to inhale the sweet aroma of vanilla that fills the kitchen. Take note of the vibrant colors as you fold in the sprinkles, heightening your anticipation for those first bites.
Variations & Substitutions
Lemon Zest Variation: For a fresh flavor twist, add the zest of one medium lemon to your cookie dough. This simple addition brings a bright, citrusy note that perfectly complements the sweetness of the cookies. This variation is especially appealing for those who enjoy lighter flavors in spring desserts. Just be cautious not to add too much liquid, or you may alter the dough’s consistency.
Chocolate Chip Spring Cookies Variation: If you’re a fan of chocolate, consider adding 1 cup of semi-sweet chocolate chips alongside the sprinkles. The chocolate will melt slightly as the cookies bake, creating pockets of rich flavor that contrast delightfully with the sweetness of the cookie. This version is perfect for both chocolate lovers and adventurous bakers. Just remember to maintain the same measurements for other ingredients to keep the balance.
Gluten-Free Variation: To cater to those with gluten sensitivities, replace the all-purpose flour with a gluten-free 1:1 baking flour. Most of these blends are designed to replicate the texture of regular flour, so your cookies should remain soft and chewy. Always check the label for any additional ingredients that might affect taste.
Vegan Variation: To make these cookies vegan, replace the butter with coconut oil or a vegan butter substitute. Use a flax egg (1 tablespoon of ground flaxseed mixed with 2.5 tablespoons of water, allowed to sit until it thickens) instead of regular eggs. You can also ensure that your sprinkles are vegan-friendly. This variation allows you to satisfy not just your sweet tooth but also accommodate vegan guests.
Funfetti Cookies Variation: For an even more festive look, you can include a mix of sprinkles in varying shapes and sizes. This adds any fun factor that children will love. Besides the regular sprinkles, consider incorporating star and heart-shaped sprinkles to bring in a playful yet aesthetic appeal. This variation is perfect for celebrations and makes your cookies stand out.
With these variations, you can customize your Spring Cookies to match your flavor preferences or dietary needs!
Common Mistakes to Avoid
When making Spring Cookies, a few common pitfalls can lead to less-than-perfect results. One common mistake is over mixing the dough. Overmixing can result in tough cookies, as it develops the gluten in the flour. To avoid this, gently mix just until combined after adding the dry ingredients.
Another important point to remember is using cold butter. Typically, cookie recipes recommend softened butter at room temperature for a reason. Cold butter will not cream well with sugars, resulting in dense cookies instead of light and fluffy ones. To soften your butter quickly, cut it into cubes and let it sit out for about 15-20 minutes before starting your preparation.
Be mindful of your oven temperature as well. If your oven runs hot, you may end up with cookies that are overly browned on the edges while remaining raw in the center. Using an oven thermometer can help you ensure that the temperature is accurate, leading to perfectly baked cookies every time.
Lastly, try not to overcrowd your baking sheets. Giving the cookies enough space allows them to spread and cook evenly. If they’re too close together, you may end up with a singular block of cookie instead of distinct pieces.
With these important reminders in mind, you’ll enhance your cookie-baking prowess and ultimately end up with beautifully soft, spring cookies.
Storage, Freezing & Reheating Tips
Proper storage is one of the key factors in ensuring your Spring Cookies remain as delicious as the day you baked them. To store them, simply place the cookies in an airtight container at room temperature. They should stay fresh for about a week.
If you want to keep them for a longer period, consider freezing them. To freeze, place the cookies in a single layer on a baking sheet and freeze until solid. Once frozen, transfer the cookies to a freezer-safe container or zip-top bag. They can last in the freezer for up to three months. When you are ready to enjoy them, simply pull out the desired number of cookies and let them thaw at room temperature, or warm them up in the microwave for a couple of seconds.
If you want to reheat the cookies after thawing, preheat your oven to 300°F (150°C) and place the cookies on a baking sheet for about 5-7 minutes. This quick reheating will restore their softness and melt any chocolate chips for that gooey effect everyone loves.
Always pay attention to food safety practices. Ensure that your cookies are completely cooled before sealing them in a container to prevent condensation, which can lead to soggy cookies.
Frequently Asked Questions
How do I achieve soft cookies?
To achieve soft cookies, make sure to not overbake them. Taking them out of the oven when they are just lightly golden at the edges will yield a soft center. Additionally, using good-quality butter and not overmixing the dough contributes to a desired fluffy texture.
Can I make these cookies in advance?
Absolutely! These cookies can be made in advance and stored in an airtight container or frozen for later use. They actually taste delightful after resting for a day or two as the flavors settle nicely.
What if I don’t have sprinkles?
If you don’t have sprinkles on hand, consider using chocolate chips, nuts, or even dried fruits like cranberries. Altering the additives can transform the flavor profile without compromising the cookie’s overall delightfulness.
Can I use baking powder instead of baking soda?
While baking powder can sometimes be used as a substitute for baking soda, it’s crucial to keep the ratios in mind. Baking soda requires an acid to activate, while baking powder has both acid and base components. If you use baking powder, you may need to adjust other ingredients.
Can I double the recipe? What changes should I make?
Yes, you can double the recipe! Just ensure that your mixing bowl is large enough to accommodate the larger quantity. It’s also a good idea to check the oven more frequently while baking, as larger batches may require slight adjustments to baking time.
Conclusion:
In conclusion, Spring Cookies: Soft Spring Sprinkle Cookies shine as a delightful, easy-to-make recipe that embodies the spirit of the season. Their soft, chewy texture combined with colorful sprinkles makes them a hit among all age groups. With a few variations and tips, you can customize these cookies to suit every palate and occasion. I encourage you to try out this recipe, experiment with your flavors, and share the joy of homemade cookies with those you love. Happy baking!